Automate the installation of Let’s Encrypt SSL on free plan of Runcloud.
Update 🆕: Runcloud ended the free plan.
This method adds Let’s encrypt SSL to your WordPress site created using Runcloud and hosted on Digitalocean (can be any VPS). Runcloud offers auto installation of Let’s encrypt when you upgrade. The free plan doesn’t allow one-click SSL, The following script saves time and works with free Runcloud account. Let’s see how to install SSL + a cronjob for the auto-renew purpose.
Remember: If this article helped you, consider signup using this link to DigitalOcean to get $10 bonus for your droplet, (that’s about 2 months of free hosting). I spent about 5 days on testing this, created a script, and added every possible help with all the required resources. To start with Runcloud, you must create an account first (click).
Runcloud Review and WordPress Installation Guide
Let’s Compare Runcloud and Serverpilot (WordPress Installation)
Important Notice
Create Droplet Snapshot: Visit your droplet > Snapshot and create a snapshot, will take 5-minutes, in case something goes wrong, you can restore it with one click.
DNS: Visit you DNS management site, and make sure to you have added Digitalocean nameserver. If your domain name DNS is not pointing to your website, simply the Lets Encrypt verification will fail, and you won’t get SSL. So you need to ensure both www and non-www domain points to your website.
Even though we tested all the things before publishing this article, we take no responsibility whatsoever you might face in the process. Do it at your own risk.
What Do you need?
1. Putty (To give ssh command)
2. Droplet’s root password. (You can always reset going to DigitalOcean > Droplet > Access > Reset Root Password). Similar to other VPS.
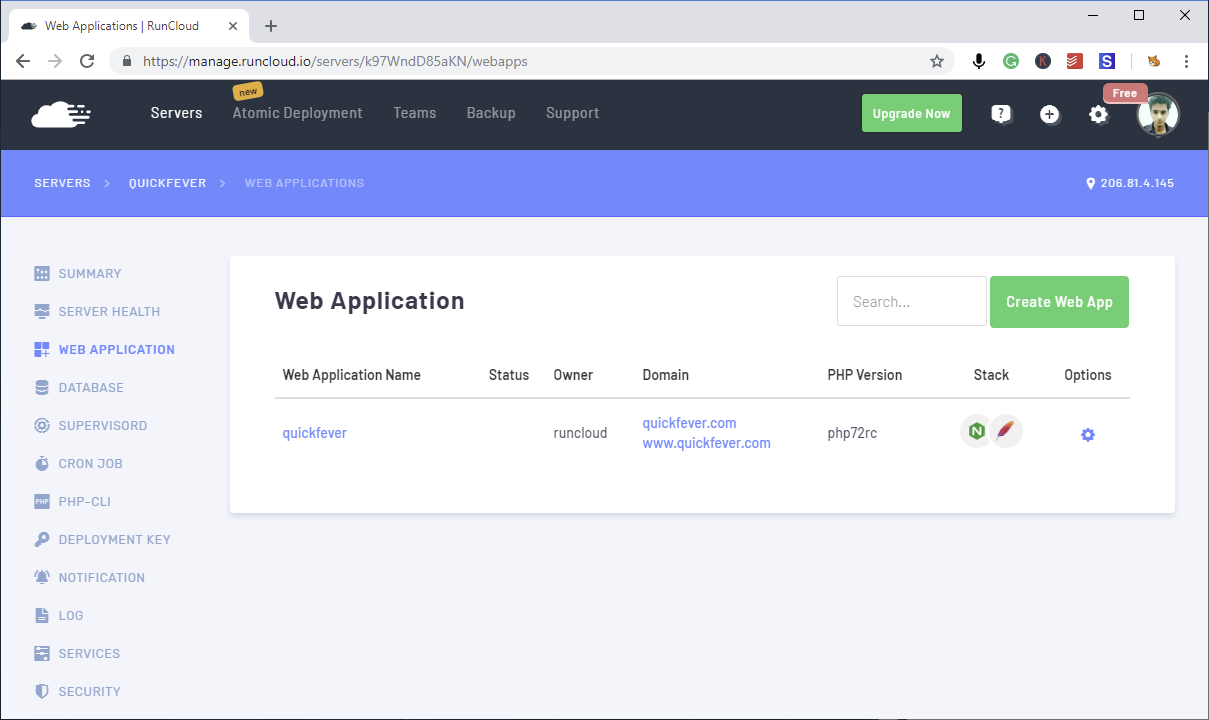
3. “Web application name” is the name of the WordPress installation. Visit Runcloud > Servers > Web Apps and check app name. See the screenshot below highlighting the app name.
Navigate the article
Install Let’s Encrypt SSL on Runcloud
Step 1. Open SSH login to your Droplet
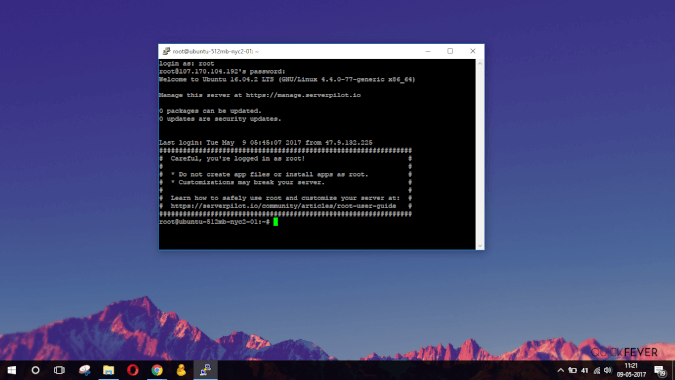
Open Putty, enter your droplet’s IP address and click on “Open” button. If you created SSH secrete key earlier, you don’t need to enter a password, but that’s the step you should have done when creating Droplet (DigitalOcean).

Type “root” when asked login as. And then the root password (it won’t show just type and hit enter). You can copy the password and then right-click on the windows and press the enter key to login.
Step 2. Installing Let’s Encrypt Script
This is a python script, created by RahmatWorks. So this is as simple as giving the following command.
pip install rcssl
After that, you can install SSL for all the domains assigned. You can add domain through Runcloud dashboard.
rcssl -i all
Note: Let’s encrypt allow only 5 SSL certificates per domain per week. If you think you already made this mistake, you’ve to wait for a week before using this method or use a different domain or subdomain of the domain you’re adding SSL for.
Installing Letsencrypt SSL to specific App
Here are the simple steps to install SSL on your WordPress installation. Open SSh to your Droplet IP address using Putty and type the following commands.
rcssl -i appname
.htaccess Changes.
Redirect everything to HTTPS WWW version.
You may want to redirect HTTP, https:// to secure https://www, use the following code and add it to your .htaccess file.
RewriteCond %{HTTPS} !on [OR]
RewriteCond %{HTTP_HOST} !^www\.
RewriteRule (.*) https://www.example.com%{REQUEST_URI} [L,R=301]
This will redirect HTTP:// and https:// to https://www version.
Redirect everything to HTTPS non-www
You might want to redirect HTTP, www, and https://www to secure https://, use the following code and add it to your .htaccess file.
RewriteEngine on
RewriteCond %{HTTP_HOST} ^www\.quickfever\.com [NC]
RewriteRule ^(.*)$ https://quickfever.com/$1 [L,R=301]
RewriteCond %{ENV:HTTPS} !on
RewriteRule ^(.*)$ https://%{HTTP_HOST}%{REQUEST_URI} [L,R=301]
This will redirect everything into https:// version.
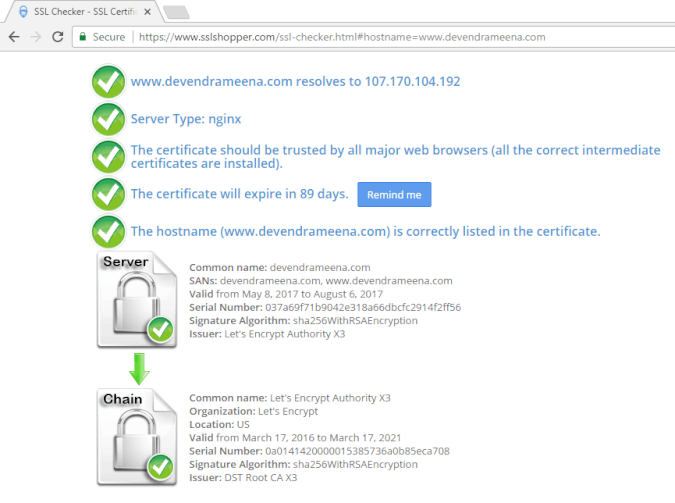
Ensure you’ve got SSL
Further Note: I the same to install SSL certificate on this website. If this article helped you, consider signup using this link to DigitalOcean to get $10 bonus for your droplet, (that’s about 2 months of free hosting).
Few known issues.
The sitemap does not update.
Visit the sitemap page in Yoast SEO settings and disable, save it, then enable it again to force sitemap to change HTTP to HTTPS.

Thank you it’s really helped me
Thanks for the guide. I’m pretty new at this. It says the certificate will expire in 89 days. Do I need to manually renew it or does it renew on it’s own?
Hello the guide mentioned automatically renew your SSL after 60 days. So you don’t have to do it manually.