Windows 10, is the most advanced operating system ever released by Microsoft. In addition to that, it receives regular updates (twice a year) which bring significant improvement to Windows 10. In this article, you’ll learn the easiest way to install Windows 10 from a USB drive.
This article applies to every Windows but we’re focusing on Windows 10 versions 22H2, and 21H2.
Don’t worry USB is not required to install Windows 10, see why and how you do that.
What are the requirements?
- Windows 10 ISO, download ISO using our article, or get it from anywhere.
- 8 GB USB drive
- Rufus tool: We’ll use this tiny and lightweight tool to create a bootable USB of Windows 10. It is widely used to create bootable USBs from all sorts of ISO and IMG files (most OS can be downloaded in such format). Though, other tools like Windows 7 USB creator and Unetbootin will work the same. Alternatively, you can use the Windows Media Creation tool to download Windows 10 ISO from Microsoft. You can also separately download Windows 10 ISO from Microsoft servers. Don’t forget to check if your partition has enough space required to install Windows 10.
How to install Windows 10 using a USB
Before you start: Check whether your computer runs 32-bit or 64-bit operating system. (Type Win+R and enter msinfo32 and look under system type).
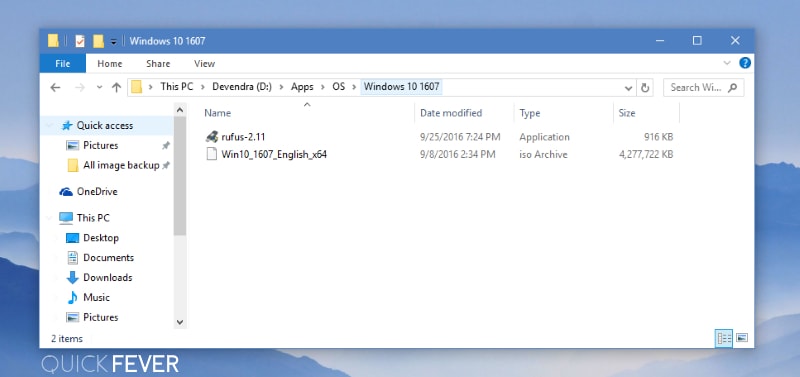
#1. First, you have to download both files (ISO and Rufus tool) to your computer, the ISO of Windows 10 you can download directly from Microsoft’s website or from here, or you can use the Windows Media Creator tool. For convenience, you can copy the files to the same folder.
#2. Now you need to open Rufus (instructions here), drag-and-drop the Windows 10 ISO file inside the tool. Additionally, The tool automatically chooses the best settings, but you are free to roam around the settings. If you are creating the Bootable USB using another computer. Please see below for other options and set according to the computer on you’ll install the Windows 10.
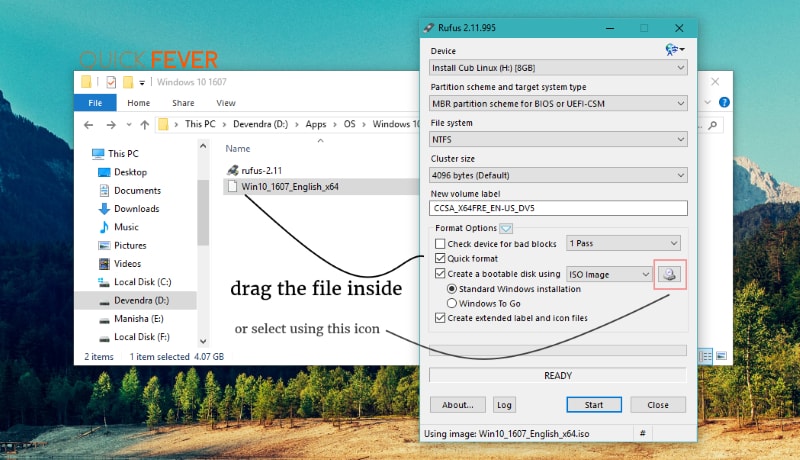
Don’t touch other settings unless you need to. Btw here are basic explanations of the settings. (In descending order)
#3. Click on the start button. It will take around 5 minutes depending on USB and data writing speed. Meanwhile, you can grab a coffee, or save coffee for Windows 10 installing period. Pull out the USB drive and plug it into any Computer on that you want to Install Windows 10.
If you are making the Bootable USB using another computer. Please see below for other options and set according to the computer on which you’ll install Windows 10.
Device: Select the USB device which you want to make bootable.
Partition System: GPT partition, MBR for HDD.
File System: The default is FAT32, But NTFS works fine.
Cluster size: 4096 bytes (If Windows 10)
Format Options.
- Create A Bootable Disk using. ISO/DOS
- The standard Windows installation (recommended)
- Windows to go (A persistence installation on USB)
#4. You might have to enable the USB boot, especially in the older computer from BIOS settings. Accessing BIOS is different for each computer brand. For HP you can access BIOS settings by pressing ESC and then F10 when the computer starts. A newer computer such as UEFI based have settings that let them choose Booting from External USB, for that, of course, this varies. For HP you have to Press ESC followed by F9 to select Boot device.
#5. Once your computer successfully detects your USB drive a Windows 10 icon will show and it will start the initial setup.
⬇️ Read this guide for a better step-by-step guide
Part 1. The initial setup
Choose language and keyboard layout language. The next thing is the terms page; you have to tick that and click on I Agree. Now there will be a big “INSTALL” button, click on that.
Enter the windows 10 serial key, if you don’t have to click on the “I don’t have windows 10 key”.
Part 2. The main setup
When asked to install Windows 10 on your hard drive, Wait and read this.
There will be two options, one is to upgrade and the second is custom if you are doing a clean install you should choose the “Custom” option. Since there is no need to format the partition on which you’re installing Windows 10 via USB. (In case there was an older windows setup would be moved to a new Windows.old folder in the root directory of the partition).
Installation Type:
Custom: Choose this option to do a clean/full windows 10 installation on your hard disk. Upgrade: If you’re on Windows 8 you can perform an upgrade by directly running the setup on a running windows 8 computer. Thus bootable media is not required.
There is nothing much complicated about a Windows 10 setup, just follow your screen. After Windows, copies setup files a prompt will show and your computer will restart.
NOTE: When this happens you need to pull out the USB drive, otherwise your computer again may try to boot from USB Drive and will create a setup-boot loop. The USB drive part is done.
Your computer will take some more minutes to set things up, it will ask you to set a User on your computer, you can choose a username and password, just in case. You can either go with the Express settings or can take a minute to customize those.
After Windows 10 is installed
Though Windows 10 is great, you might have installed Windows 10 (22H2 build) which comes with some advertising, which can be removed using this guide. If your computer has a fingerprint sensor, it’s right time to set up the Windows Hello to unlock using an assigned fingerprint.
