
How to Get Google Assistant for PC (Windows 10, MAC & Linux)
The amazing Google Assistant comes to your Desktop with help of an unofficial client.
Advertisement
The great Google Assistant – available on Android devices in chrome box is now available unofficially to any Windows 10, Mac, and Linux operating system. Thanks to Melvin-Abraham for the unofficial client that makes use of the assistant API is to give you the same Google Assistant experience on a computer device.
We have seen Android assistant in terminal on computer earlier, now you can get almost similar interface on your computer which is amazing and you should definitely try it.
So let’s get started.
(Setup initial phase) Download the client from this GitHub page, it is available for Windows, LINUX, and MAC operating systems. Always get the latest build. If you are using Windows 10 download the file with .exe extension.

(Setup phase part 1 of 2) Follow all; the instructions to get the authentication key (OAuth 2.0 Credentials) it might sound very hard to your trust me it is very easy to follow each and every instruction given there.
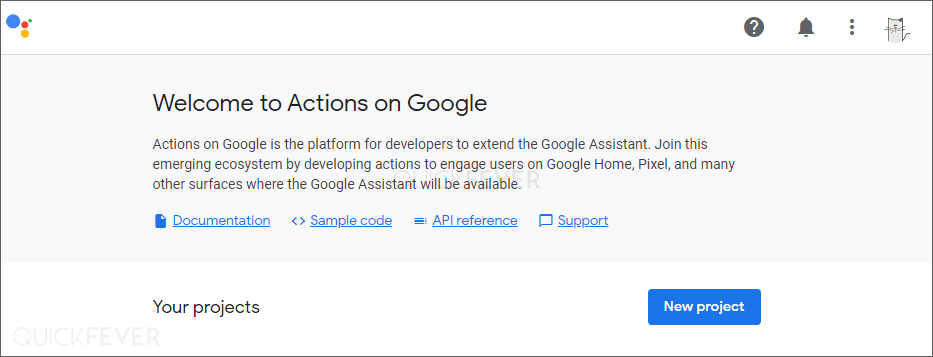
- Open up the Actions Console (console.actions.google.com) for the first phase of the setup.
- From here click on “
new project” button.
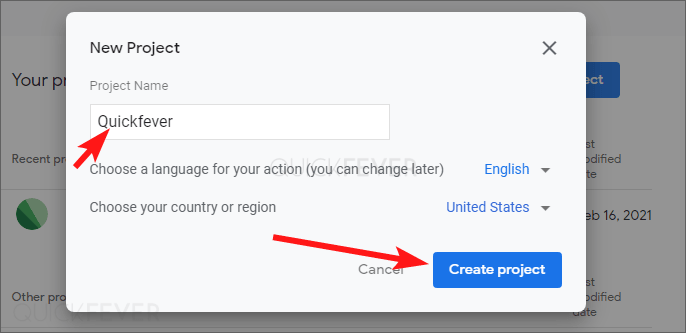
- A popup must have appeared, type any project name and click on create project. Other settings like language and country or region are optional it doesn’t affect anything.
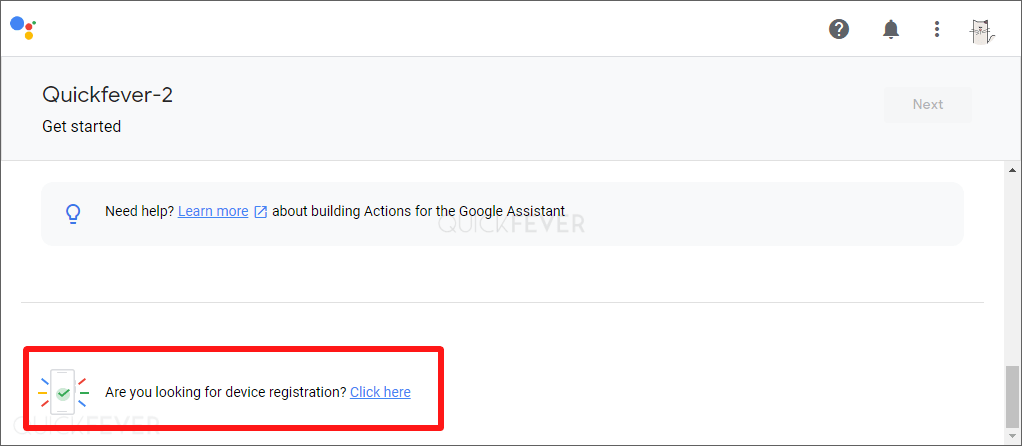
- On the screen scroll down to the bottom of the page there you’ll find a “are you looking for device registration” click here. You will need to click on the button to proceed.
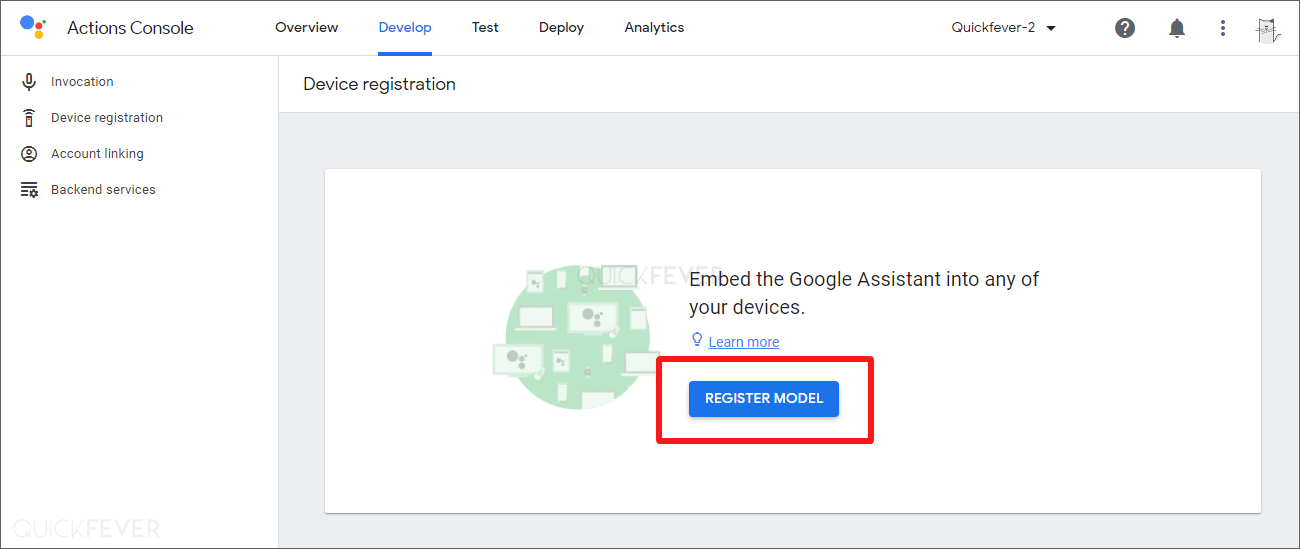
- It will take few seconds, …. probably setting up firebase. Now, you will be landed on the “Device Registration” page. Here, click on the “Register Model” button
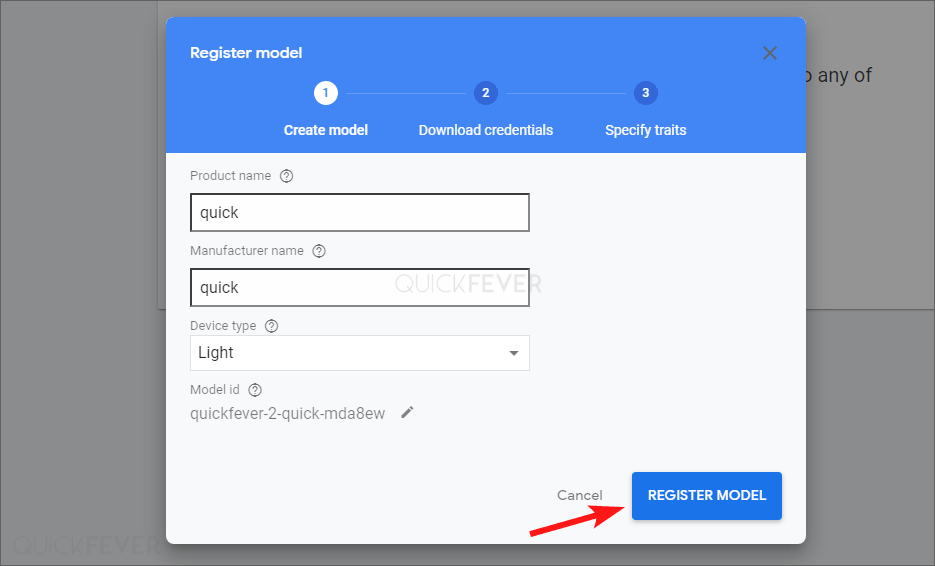
- You will see a “Register Model” popup, fill up any name and company and Device type, (select eg:
light). Then, finally, click on “REGISTER MODEL”
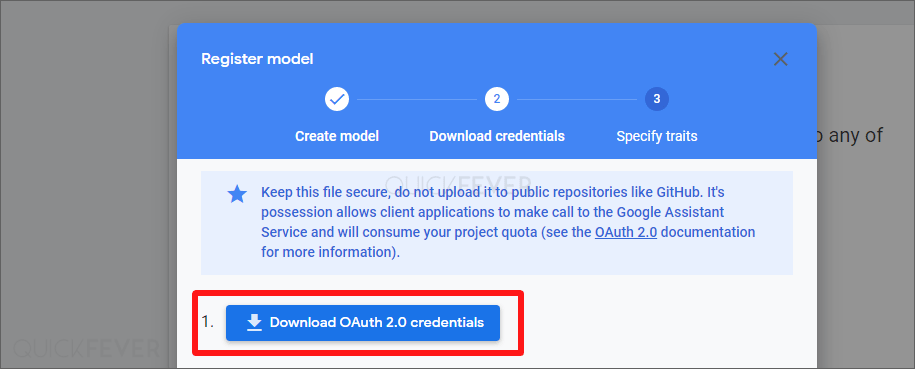
- Now, after you have created a model, you will be asked to download the credentials. Click on “Download OAuth 2.0 credentials”
Click next and click on SKIP. You’re done with the first phase of the setup.
Now, you are done with the registration process. But in order to authenticate, you have to “Configure Consent Screen”
Configure Consent Screen
(Setup phase part 2 of 2)
- Click on the link to get to Cloud Console page.
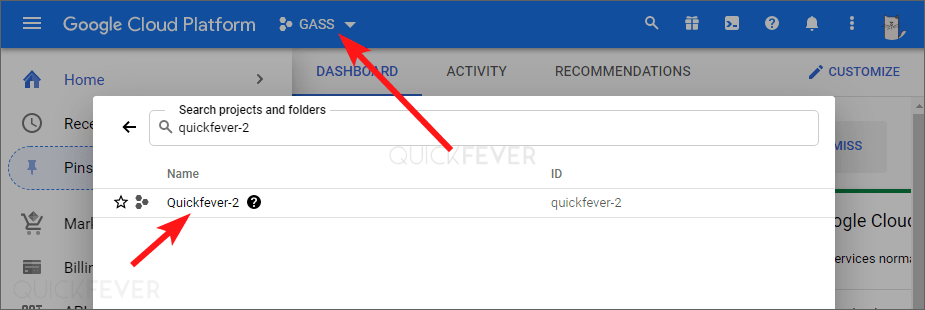
- From the menu bar area, search and select the project you’ve just created.
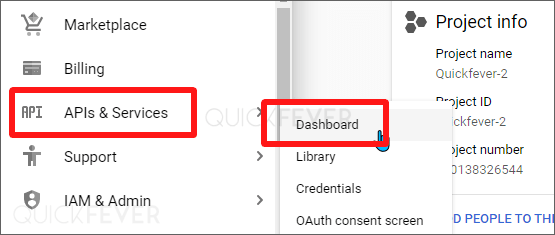
- Now, from the left hamburger menu, select “APIs & Services” it’ll get you to the Dashboard page.
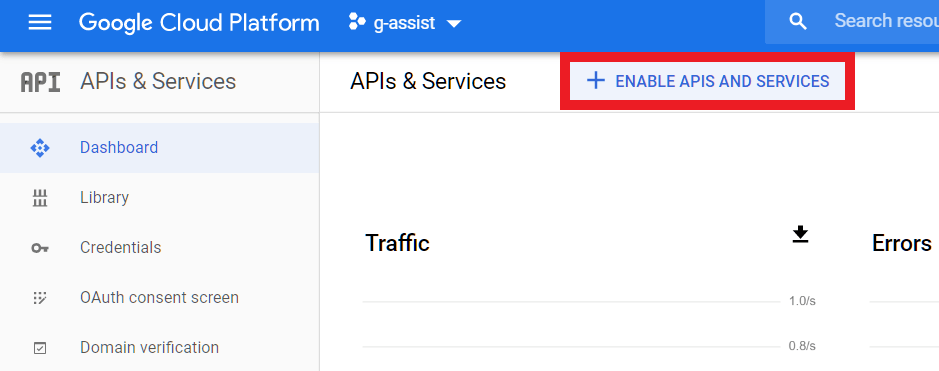
- From here Click on “ENABLE APIS AND SERVICES” that does what it says.
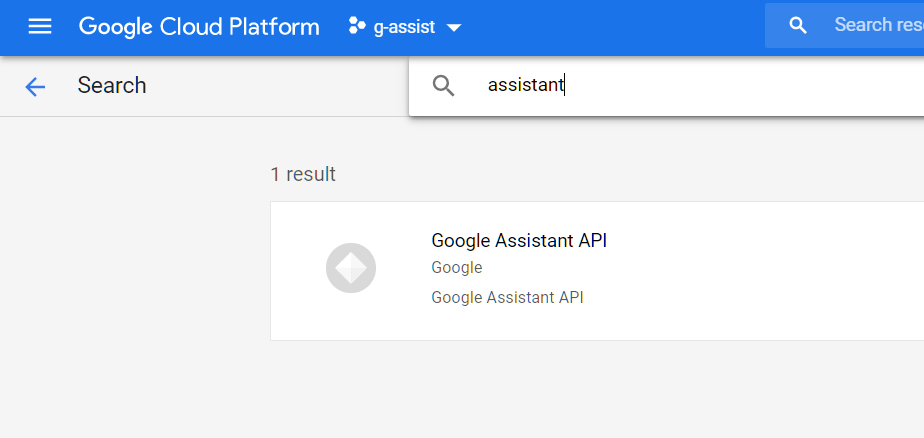
- A new page will open “API Library” where you can search for APIs and enable them.
- Search for “Google Assistant” and click on “Google Assistant API” and ENABLE IT.
- Now, from the hamburger menu, go to the “Credentials” screen.
- Click on the “CONFIGURE CONSENT SCREEN”

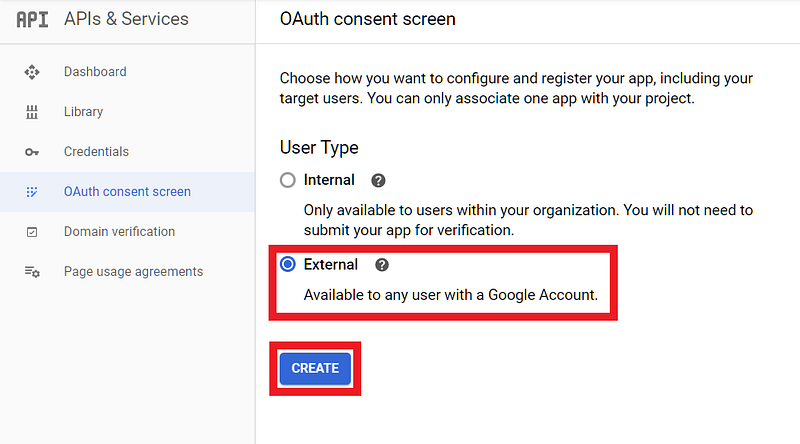
- In the OAuth Consent Screen under User Type, select External. Then, click CREATE
- On the next page, under “App Registration” select your email for “User Support email” and Scroll down to the bottom of the page and enter email in “Developer Contact Information”, right after that click on SAVE AND CONTINUE. If there is anything else like SCOPES on the screen you can skip that.
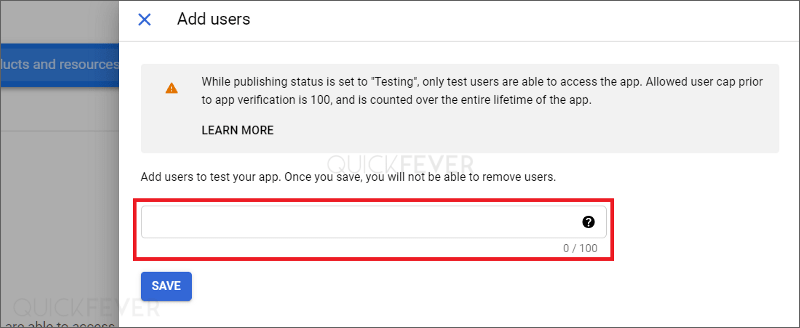
- Under “Test Users” click on the “ADD USERS” button

- Under “Add Users”, fill in the email address of the Gmail account that you will use to authenticate, you can add more accounts following a comma.
Setting authentication in the app
(Setup phase part 3 of 3)
- Run and launch the Google Assistant Unofficial Desktop Client app
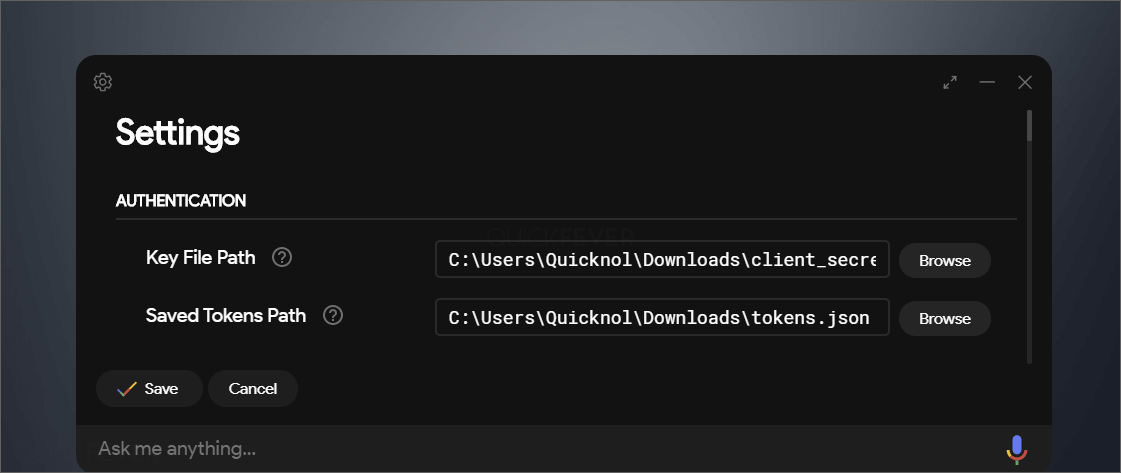
- Click on the “Settings” button in the top-left corner of the application
- Under the “Authentication” section, set the “Key File Path” to the path where you have kept the “OAuth 2.0 Credentials” and leave the “Saved Tokens Path” empty. Now click on “Save” button
Once you have the Key file saved on your computer, open up Un-official google Assistant client, click the gear icon Browse the authentication key, and click on the Save button.
- You will be prompted to automatically create a path for “Saved Tokens Path”. Click on “Automatically set a path”
- You will be asked to reload the Assistant. Click on “Relaunch Assistant” button
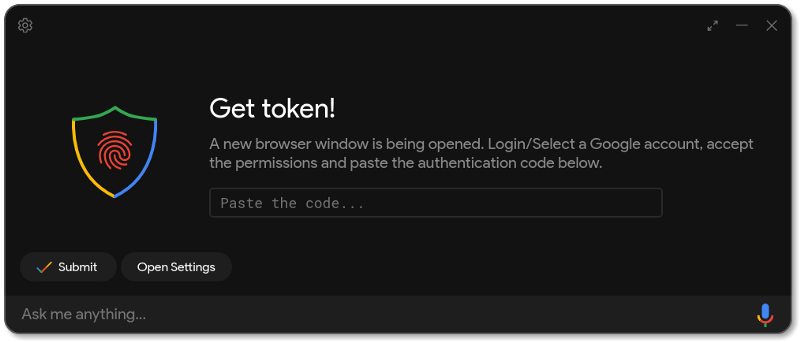
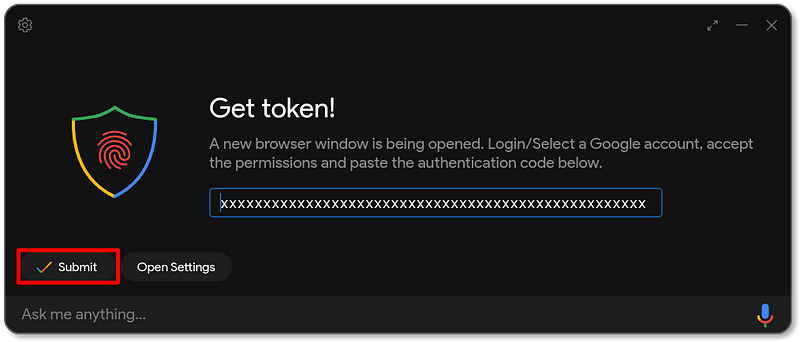
- Now, you will be presented with the “Get Token!” screen. An authentication page will be opened in your default browser
- Can you Chrome Windows must have appeared you need to login with your Gmail account, you will come across a warning Google hasn’t verified this app, but as you have created this application it is safe to proceed click on “Advanced” and then “Go to project-xxxxxx (unsafe)”
- Now grant permission to the project by clicking on “Allow”
- You will now be presented with the authorization code screen. Click on the copy button
- Switch to the application and paste the code in the respective field. Now click on “Submit”
Relaunch the app again. Click on “Relaunch Assistant” if prompted.
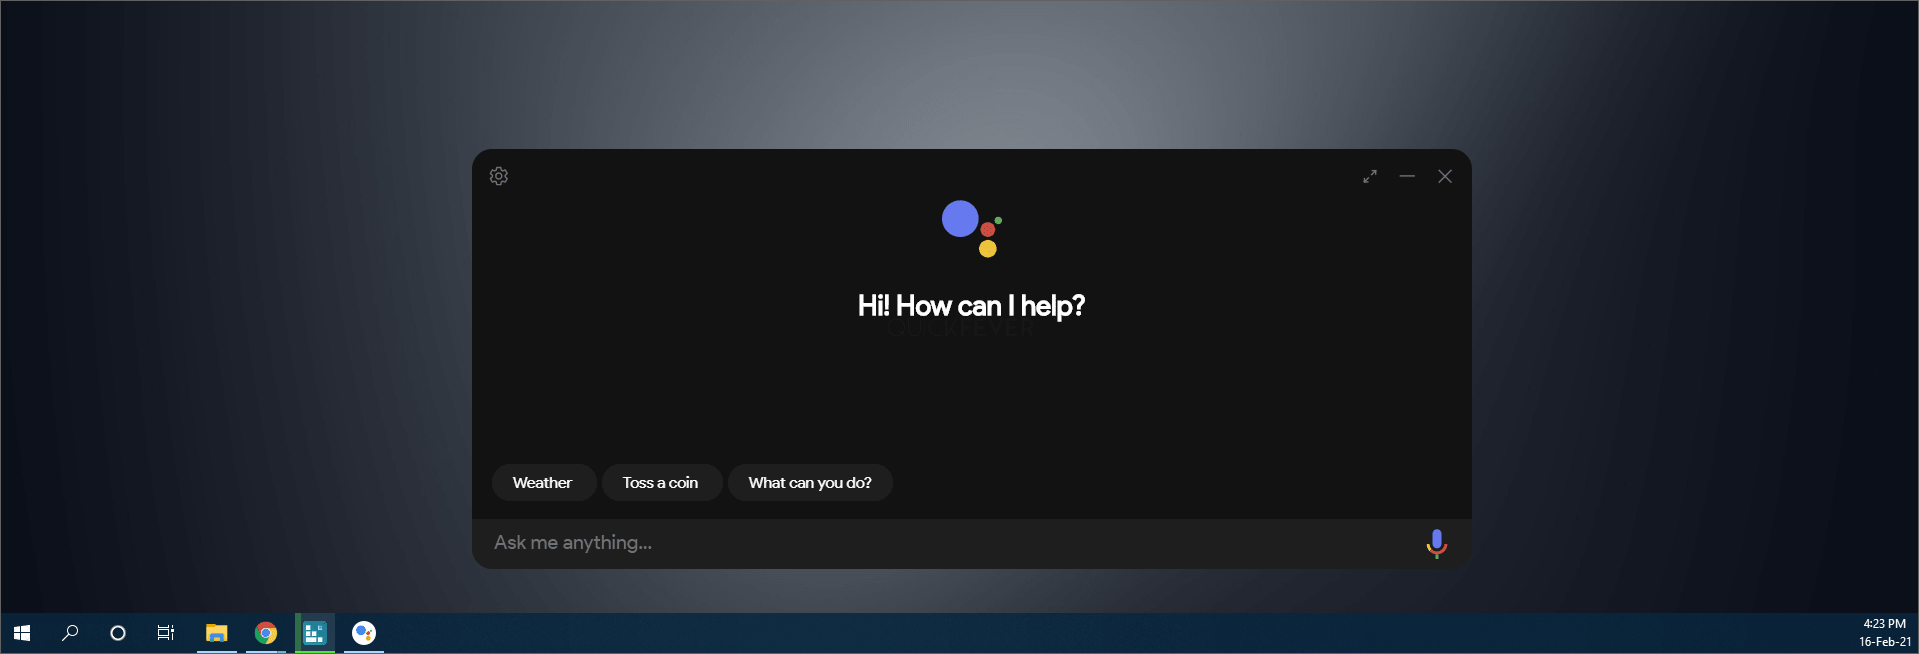
Now, you are all set! You can finally use the Google Assistant Unofficial Desktop Client and customize it the way you want…
How to use Google Assistant for PC
Start Google Assistant, you can then trigger it with CTRL + SHIFT + A and start giving commands.
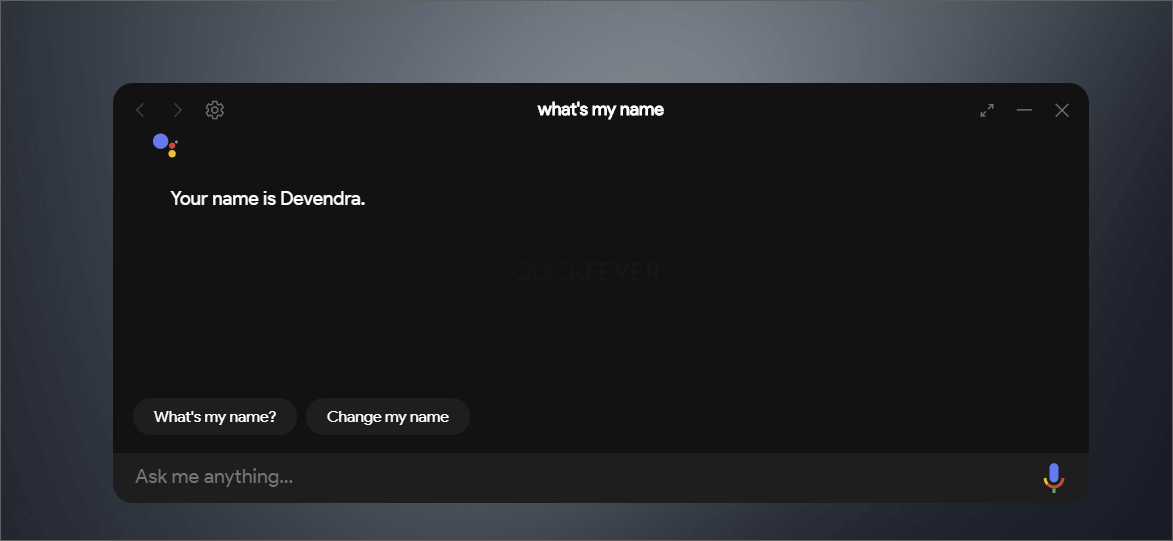
Everything is likely to work once you restart it. You can either type something or use the mic icon to speak to Google assistant. In my opinion, it sounds just like the original Google Assistant on any Android device.
Where it is good.
- You can control your smart devices from your Windows 10 computer.
- Google Assistant can fill the gap, created by Cortana.
Limitations:
- Saying open google.com similar actions will not work.
- Other commands that can really on Android devices might not function as expected.
- It is time no hotkey works which is expected since health and unofficial client.
Ending words
The constant pop-up segment looks as similar as the third-party implementation might be without being rendered explicitly by Google. It’s very similar to the Assistant integration already found in the Chrome OS.
One of the key benefits of this non-official service from Google Assistant is that you can monitor all of your smart home tech directly from your laptop or desktop PC. The only drawback we can see at the moment is that the UI might be a little improperly rendered or lack a “correct” UI. This creates challenges with certain instructions, but it’s a hacky approach to integrate anyway.
General questions work pretty well and I always just want to get a fast update without having to dig or scan manually correctly. This workaround works really well. If you want all the goodness of the assistive, we will also strongly recommend a dedicated Nest Hub or Smart Display in your office or space, and we sincerely hope that Google will have any ideas to create an official version of its own.
Being interested in Google’s Ambient Assistant Mode on supported OnePlus and Xiaomi smartphones is a more stop-gap that can fill a work-from-home AI assistant-style void.
