
How to resolve CPU Fan Errors from BIOS In various motherboards

Advertisement
During the boot-up of a Windows desktop or laptop, users sometimes see an error message called CPU fan error. Computers that have shut down due to overheating most often trigger this warning. When that occurs, the fan (or fans) are not able to adequately cool the hardware. It is frustrating, but it indicates the safety features of the computer are intact and working. Several components of the computer may be permanently damaged if the fans do not work correctly. Overheating and error messages can be caused by many factors, and can be repaired.
How the CPU Fan Error Displays
During a normal Windows session, the CPU fan error does not often occur. It usually occurs during the Windows boot-up or start-up process. Typically, error messages look like these:
- “Error: CPU Fan Has Failed”
- “CPU Fan Error”
- “CPU Fan error press F1 to run setup”
In addition to Asus American Megatrends, other motherboard manufacturers show similar messages. It is very common for your motherboard to display CPU fan errors. Now we will try to resolve these issues by applying some solution.
How to Fix a CPU Fan Error
Since CPU fan errors are caused by both hardware and software issues, there are various solutions to fix them. For instance, the internal fan may need to be checked or changed if it is malfunctioning.
Keep CPUs cool and error messages at bay with these tips.
1. Check the BIOS settings for CPU fans. Troubleshoots and checks to ensure everything is as it should be can be done with it occasionally.
When you receive the initial CPU error message, you may be prompted to press F1 to open the BIOS settings.
From the BIOS, select Hardware Monitor ➜ CPU Fan. Change CPU temperature to Ignore (this won’t turn off your computer when it exceeded the threshold temperature) Turn on Q-fan control this disabled passive heat sinks and fan ducts. Don’t forget to exit BIOS when you’re done. MSI and other motherboards have this setting easily accessible in BIOS. Remember if you turn off the CPU temperature trigger your processor might get very hot and it can get permanently damaged.
2. Wipe the vents clean. Using your vacuum cleaner at full power will suffice to remove dust and debris from the vents. Remove the brush from the vacuum cleaner and use it to remove anything that is stuck inside. If necessary, blow the dust out using an airgun or canned air.
Occasionally pull out your air cooler and clean it with a brush to remove any lint or dust, you can use a pressure air gun to remove hard at adhesive dust from the heat plate.
3. Relocate your computer. No matter how hard the fan is working, if your computer is in a hot or sunny area, it can overheat and shut down. Make sure your computer is never located in direct sunlight throughout the day or put it in a cooler room.
If you live in a country where the temperature is very hot consider having an air conditioner in your room if that is possible otherwise make sure that your room has a proper ventilation system because a processor fan eventually thrusts hot air which significantly gets your room to a higher temperature.
4. Make sure your CPU fan is working. Check the fans on your computer while it is open to ensure they haven’t come loose or fallen off. It might be possible to reattach your fans with a screwdriver or glue, depending on your fan model.
Open your computer cabinet case and check whether your CPU fan is running or not, in most cases CPU fan runs it at stable speed and whenever it gets hot the fan speed increases automatically.
5. Do not overclock. When overclocked, the system’s fan cannot keep up with the increase in heat. A frequent shutdown can damage circuits and result in overheating errors and circuit damage.
For example, K variant of the Intel processors requires a liquid cooling system because they can be overclocked which requires more electrical power.
6. Take care of your CPU fans. For this step, turn off your computer, turn off the power supply, and open up the case. The interior of the box can be cleaned with an air gun or canned air once it is open. Do not spray any cleaners on any parts, as this is likely to cause serious damage.
Surface products, for example, are not designed to be opened, and so that might void their warranty or cause permanent damage to them. Consult the official support manual for your device or contact customer service if you’re unsure.
Be sure to turn off all electrical sources and completely turn off any electrical device before you check the inside. If you are turning your computer off, make sure you select Shutdown, not Sleep.
7. Install a new CPU fan. It may be that your fan is simply broken, and needs to be replaced. The repair of the fan may be covered by your computer’s warranty. You may be able to get a free or discounted replacement part if you purchased the fan separately. If you have a high-end processor, consider having a Liquid cooler, a Corsair liquid cooler’s fans are configurable using software called Corsair Link.

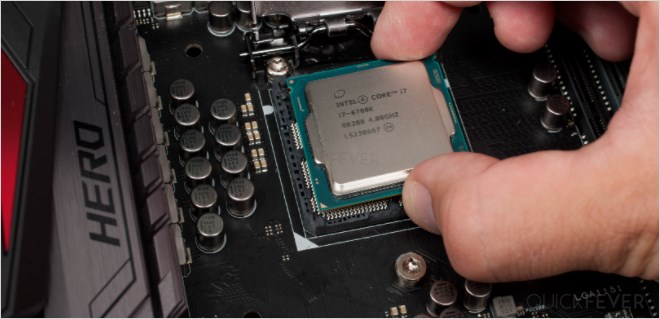
8. Locate the CPU fan. Make sure that the CPU fan is installed correctly if you installed it yourself. The CPU header on the motherboard must be connected to the connector. When you turn on the computer with the fan connected elsewhere, the CPU will not be adequately cooled, as it is the fan’s main purpose.
CPU headers look like they’re labeled “CPU Fan,” but if they aren’t, the three holes indicated the three-pronged plug for the fan.
There also will be a Pump Fan header which works but the functions will be limited in terms of BIOS to fan connection.
9. Change CPU fan headers. Plug the CPU fan into a different slot on your motherboard if you have multiple CPU fan headers. Sometimes, this fixes the CPU fan error.
10. Modify the BIOS settings. You can bypass the CPU fan error message in step No. 8 if you can see your computer’s CPU fan working properly and your computer isn’t overheating. Some manufacturer like MSI makes it hard to access the bios however there is always a way.
11. Resolve fan speed issues. Ultrabooks are light in weight, so their hardware does not have bulky fans. In addition, manufacturers lower fan speeds to reduce battery usage and reduce noise. Using this guide, you can change the fan’s speed manually.
FAQ
What does it mean when it says CPU fan error?
- Cpu fan error message when botting means that your computer is experiencing CPU fan communication problems. This warning is mainly caused to your computer shutting down due to overheating. Changing CPU fan speed is easy with these steps.
Enable Fan control in BIOS
- Press F2 during boot, enable the Advanced option (MSI F7).
- Fan settings and information such as RPM and power can be controlled from there.
