In this guide, we will discuss how you can create a bootable USB device from an image file of any operating system, including ISO, IMG, and BIN files.
With DVD drives virtually gone from modern laptops, ultrabooks, and desktop PCs, using a USB flash drive to install or reinstall an operating system is now the standard method. We will start with Windows 11 and Windows 10, then move on to Linux, ChromeOS Flex, and Android OS, along with the best free tools to get the job done quickly.
Here are the best tested tools for creating bootable USBs. Download the one that best fits your target operating system:
| Tool Name | Download Size | Best For | Official Site |
|---|---|---|---|
| Rufus | ~2 MB | Windows 11 and 10 (TPM, Secure Boot, local account bypass) | rufus.ie |
| BalenaEtcher | ~140 MB | Linux, Android OS, and Raspberry Pi raw IMG files | etcher.balena.io |
| Ventoy | ~16 MB | Multi-boot (copy multiple ISOs directly to one USB) | ventoy.net |
| Media Creation Tool | ~20 MB | Official Microsoft downloader and flash utility | quickfever.com |
Where to Download Official Operating System ISOs
Before preparing your flash drive, you need an official image file of the operating system you plan to install:
- Windows 11: Download directly from Microsoft or follow our Windows 11 ISO download guide. If you want early access builds, check our Windows 11 Insider Preview download.
- Windows 10: Grab the latest original ISO using our Windows 10 ISO download guide.
- Linux: Download official ISOs from Ubuntu, Linux Mint, Fedora, or Debian.
- ChromeOS Flex: Create a cloud-first system using our ChromeOS Flex bootable USB guide.
System Architecture Note: Check whether your computer runs a 64-bit or 32-bit operating system before downloading. Press Windows + R, type msinfo32, press Enter, and look under System Type.
How to Create a Windows 11 or Windows 10 Bootable USB with Rufus
Rufus is portable, fast, and handles modern UEFI requirements automatically. Both Windows 11 and Windows 10 ISO files work reliably with Rufus.
Step 1. Plug your USB flash drive (at least 8 GB space required) into your PC, download the latest Rufus portable tool from rufus.ie, and open it.
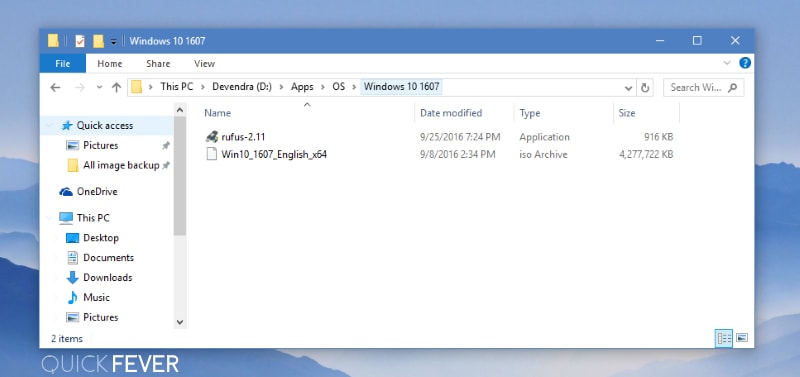
Step 2. Under Device, select your USB drive. Under Boot selection, click Select and choose your downloaded Windows ISO file (or drag and drop the ISO directly into Rufus).

Rufus automatically configures the best default options, but here is what each setting means:
- Partition scheme: Select GPT for modern UEFI computers (standard on almost all machines manufactured in the last ten years, and mandatory for Windows 11). Choose MBR only if installing on an older legacy BIOS motherboard.
- Target system: Locks to UEFI (non CSM) when GPT is selected.
- File system: Leave as NTFS. Modern Windows install images exceed 4 GB, which requires NTFS formatting.
- Cluster size: Leave at the default 4096 bytes.
Step 3. Click START. For Windows 11, Rufus displays a customization prompt where you can remove the TPM 2.0, Secure Boot, and 4 GB RAM requirements, and skip the mandatory Microsoft account login. Check the options you prefer and click OK.
The flashing process takes roughly 5 to 10 minutes. When the progress bar shows READY, your bootable USB is complete. You can now follow our walkthrough to clean install Windows 11 on any PC.
Creating a Linux Bootable USB (Ubuntu, Mint, Fedora)
Rufus also handles Linux distributions without issue. Select your USB drive, choose your Linux ISO file, and click Start. When Rufus asks how to write the image:
- Write in ISO Image mode (Recommended): Keeps the drive accessible in Windows and works on standard installations.
- Write in DD Image mode: Writes raw disk blocks directly. Use this if your motherboard fails to recognize the installer in ISO mode.
If you want a portable live Linux system that saves your personal files and settings between restarts, drag the Persistent partition size slider (1 GB to 5 GB) in Rufus before flashing.
How to Create a Bootable USB for Android OS on PC
Running Android on a PC is a great way to breathe new life into older laptops or run mobile apps with keyboard and mouse input. While early projects like Remix OS and Phoenix OS have shut down, modern alternatives like PrimeOS and Bliss OS provide active, full desktop Android builds with app store access.
- Download your chosen Android OS ISO (PrimeOS, Bliss OS, or generic Android-x86).
- Open Rufus, pick your flash drive, and select the Android ISO file using the Browse button.
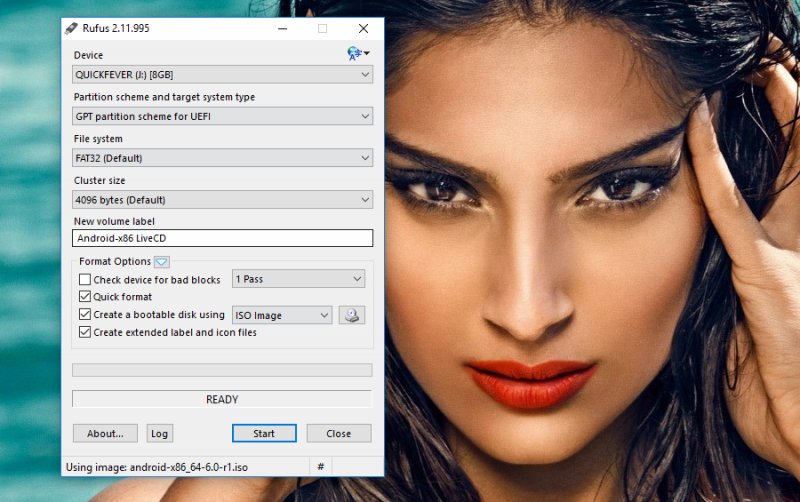
- Click START and choose ISO Image mode when prompted.
- Once flashing completes, keep the drive plugged in, reboot your computer, and press your boot menu key (F12, F9, ESC, or Del) to boot into Android. You can test it in Live Mode without altering your hard drive, or install it alongside Windows.
Motherboard Boot Menu Keys Reference
When starting your computer with your bootable USB plugged in, tap your manufacturer’s boot key repeatedly as soon as the screen turns on:
- HP: F9 or Esc
- Dell and Lenovo: F12
- Asus: F8 or Esc
- Acer, MSI, and Gigabyte: F12 or F11
Did your USB flash successfully, or did your machine have trouble booting from it? Leave a comment with your motherboard or laptop model and we will help you out!