
How to Change Account Lockout Duration in Windows 11
Advertisement
In this article, we will show you how to change account lockout duration in Windows 11 so you can have more control over your account settings and decide how long you want to wait before being prompted for your password again.
Windows 11 is a new version of Microsoft’s operating system that was introduced in October 2021. It comes with a number of new features and enhancements, but it also has some downsides. One of the issues that users are reporting is the account lockout duration. Some people are reporting that they need to enter their password after just one minute of inactivity, while others say they can be inactive for hours before they need to reset their password.
Change Account Lockout Duration Using Local Security Policy
The account lockout duration is set to 10 minutes by default on Windows 11 machines. This means that after an account has been locked out for 10 minutes, it can be unlocked by the user.
The default duration can be changed using the Local Security Policy.
In order to change the account lockout duration, you need to open the Local Security Policy on your computer. You can do this in the following way:
- Open a Command Prompt /or type Windows + R then type secpol.msc
- Simply search for Local Security Policy and click on it.
- Navigate to Account policies > account lockout policy > Account lockdown duration.
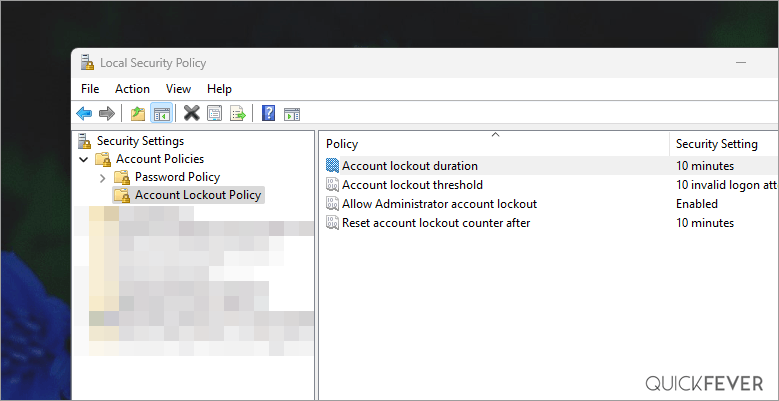
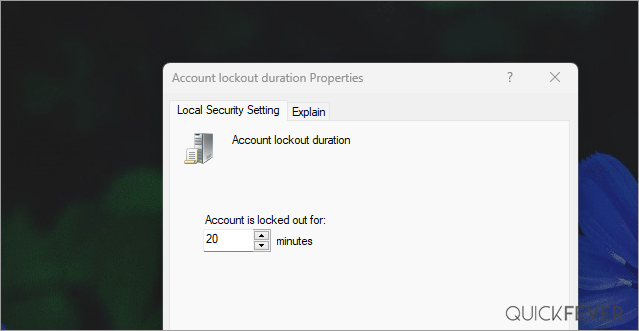
- Click on the account local duration configuration and increase the time period according to your preference for example I will set a to 20 minutes.
You can change this time according to your work scenario. For most people 10 – 30 minutes are fine.
Pro Tip💡 For a private PC that you want to restrict access to but can’t stop people from using it keep the duration to just 5 minutes so they have to reenter the password while you disappear from their eyesight.
In Windows 10, you can set the device to be locked out after a certain number of unsuccessful password attempts. This is like the previous method with the added bonus of not allowing any failed login attempts while the computer is locked. This is an excellent security measure for parents who want to limit their child’s access time but still allow regular account maintenance. It’s also useful for users who travel frequently and want their devices safeguarded at home or at work. However, note that this also prevents users from making changes to the computer if they’re an administrator.
Account lockout duration is an easy way to protect your computer without inconveniencing yourself or limiting your ability to use the Internet when necessary. You can easily change how long someone must unsuccessfully login to a Windows machine without needing any technical knowledge or third-party software. Essentially, changing account lockout duration is as easy as going through these steps: 1- open Control Panel 2- select User Accounts 3- select Activeanna Lockout Duration 4- press Change button 5- select desired setting 6- press OK and close windows, when finished To sum up, changing account lockout duration, is easy with some technical background knowledge if you are an expert or willing hand if you are newbie!
That’s it forks easy for you to change account lockdown duration on Windows 11 please help us by following our Instagram account and you will get short tech videos there. You can achieve similar by tweaking the screen off and sleep time, so your PC won’t turn off the screen and go to sleep mode. Some people who work online may need to keep their PC awake.