Windows 11 hosts file allows you to change resolving IP addresses. Here is how you can Edit Hosts file on your Windows 11 PC.
Hosts file store information that maps hostnames and IP addresses to servers. However, Windows still synchronizes the Hosts file, even though DNS is increasingly used to resolve IP addresses.
Occasionally, it becomes necessary to edit this Hosts file. Remarkably, by leveraging the Hosts file, one can manipulate their computer into resolving to a specific IP address. There exist various reasons why individuals may desire to revise the Hosts file. For instance, certain software applications may disregard domain names entirely, necessitating direct IP address references. Additionally, during the process of transitioning a domain from a separate server, verifying the accuracy of DNS settings becomes crucial. Fortunately, the advent of Windows 11 has simplified the task of editing the Hosts file, irrespective of the underlying motive.
Be safe!
Always back up the host file you are trying to change so that if something goes wrong you can restore the previous version.
Go to the following directory using File Explorer: C: → Windows → System32 → drivers → etc folder. If you have Windows installed in a different directory, open that drive accordingly.
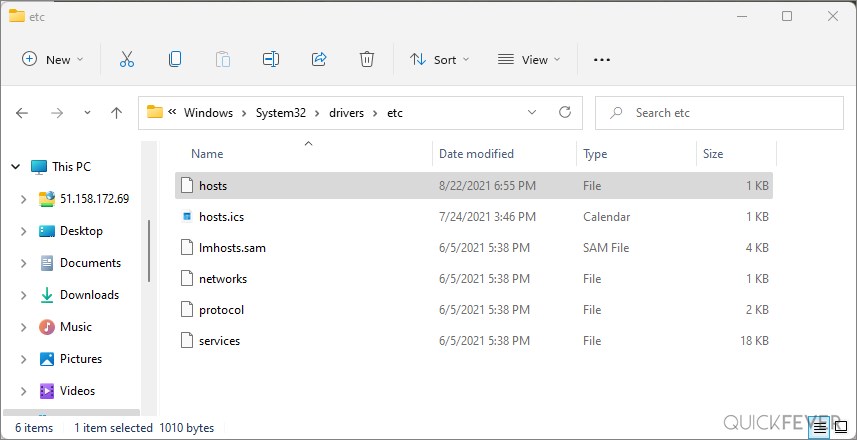
Copy this file somewhere safe. You can always upload it to a cloud storage service when in doubt. Many of them have been reviewed by us.
Edit Hosts file in Windows 11 using Notepad
Ensure that Notepad is running as an administrator. The Notepad app icon in the Start menu can be run as administrator by right-clicking the icon and selecting the ‘Run as administrator’ option.
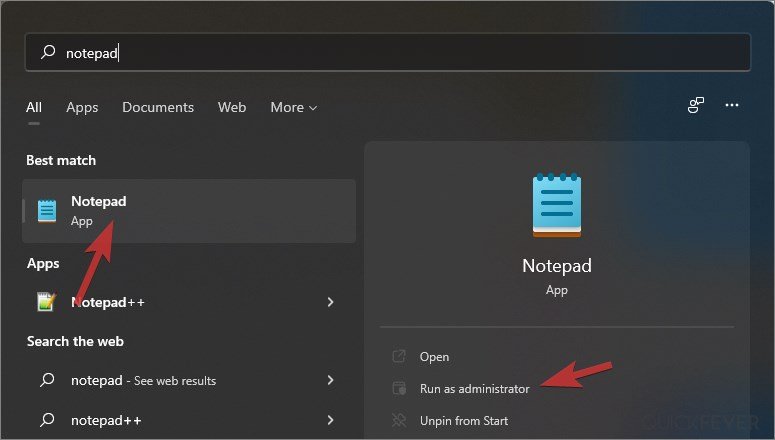
Windows will display a permission prompt asking, “Do you want to allow this app to make changes to your computer? Select ‘Yes’ from the dialogue box. Notepad will be opened with administrator privileges allowing you to edit the host file.
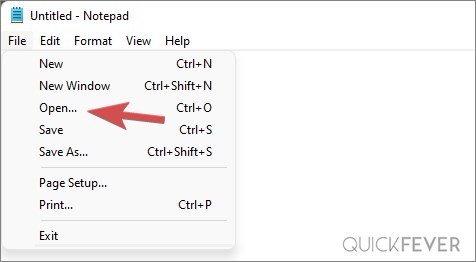
From the File menu, click Open (Ctrl+O) a prompt Windows will appear asking for the location of a file. Navigate to the Hosts file and open it.
Save the file by using Ctrl + S keyboard shortcut and adding the new IP addresses and domain names that you wish to resolve. The Notepad application is open in Administrator mode, so you can save the file without any further permissions being required.
Tip: You can do the same with other text editor programs such as Notepad++. For example, I opened the Hosts file in Notepad++.
There may be a lot of visual differences between Windows 11 and Windows 10. The Windows system folder structure remains largely unchanged, especially the files and folders. So now you’re familiar with the Windows hosts file and what does it do; don’t forget to bomb this article to someone who needs it.