It’s about time people are confused with TPM requirement; if your PC doesn’t have a TPM card or disabled TPM 2 support in BIOS you can very well bypass it along with Secure boot; this article will guide you. Earlier we’ve covered a similar topic where we installed Windows 11 on a Legacy BIOS without TPM 2 and Secure boot.
In our opinion, this requirement is crucial and will allow Microsoft to only deliver this update to newer computers. There is a saying that Windows OS is slower and unoptimized compared to macOS, this is going to change because technically hardware is what makes an OS run smoother. And Microsoft will be eliminating (soft restriction) older hardware so there will be less negative mess about Windows 11 working slow on slow hardware.
FAQ: Frequently asked questions about Windows 11
We hope that this article will help you with the following things.
Windows 11 TPM 2.0 fix: It can be either fixed by enabling TPM from BIOS or installing a TPM card; that’s like an overkill requirement that can be easily avoided during Windows 11 installation.
Windows 11 TPM 2.0 bypass: A registry method is available to bypass the TPM 2.0 check which stopped working on the first final Windows 11 release.
Install windows 11 without TPM: TPM is a Windows 11 requirement but it can be easily bypassed.
Appraiser dll windows 11: Changing these files works for some users with Legacy BIOS but on UEFI you need to use the methods given below.
Method 1 of 2
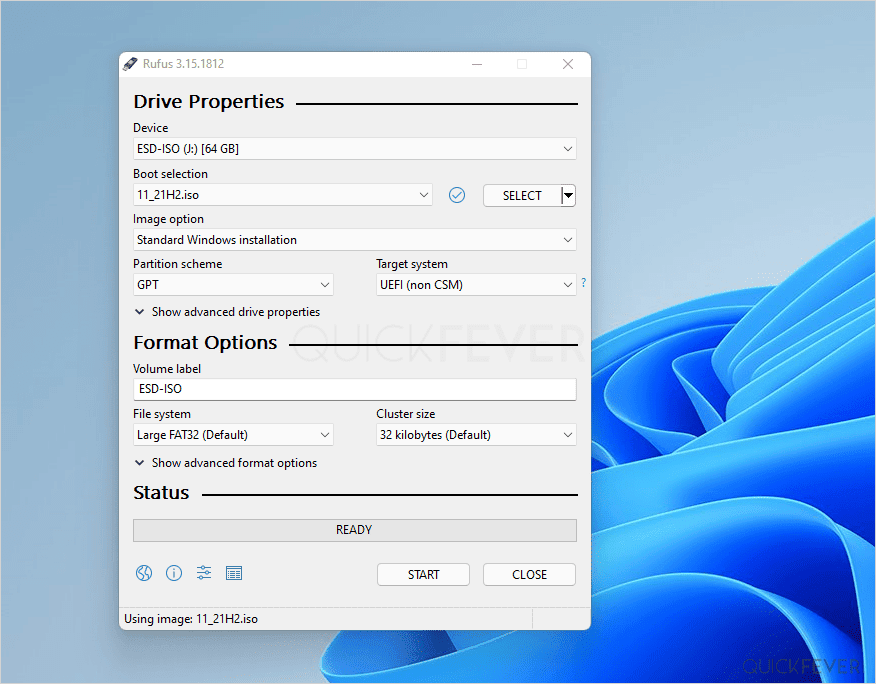
Use Rufus tools
Rufus is a great utility that allows quick windows installation media creation. It now adds an extended installation that does bypass the TPM and secure boot requirement.
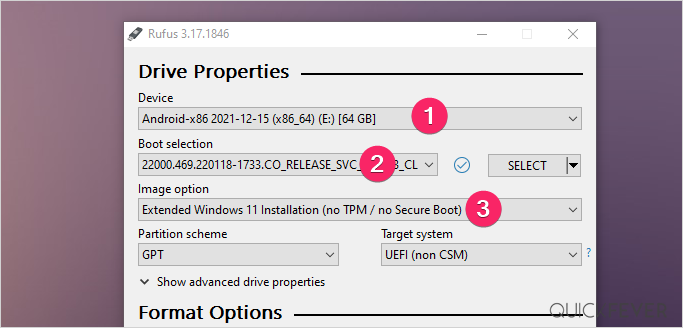
To create a Windows installation using Rufus follow the instructions.
- Download from the official side measure it is the latest version.
- Open Rufus application and select the ISO of which you want to create bootable installation.
- In the image option select extended Windows 11 installation and click Start button.
Method 2 of 2
Use Media Creation tool
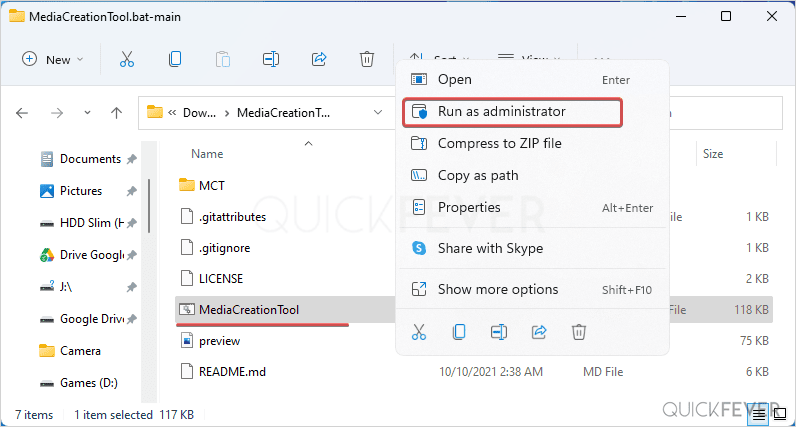
- Grab the tool from this Github page, select download ZIP, and save it on your computer.

2. Now, extract the ZIP file and open MediaCreationTool.reg file.
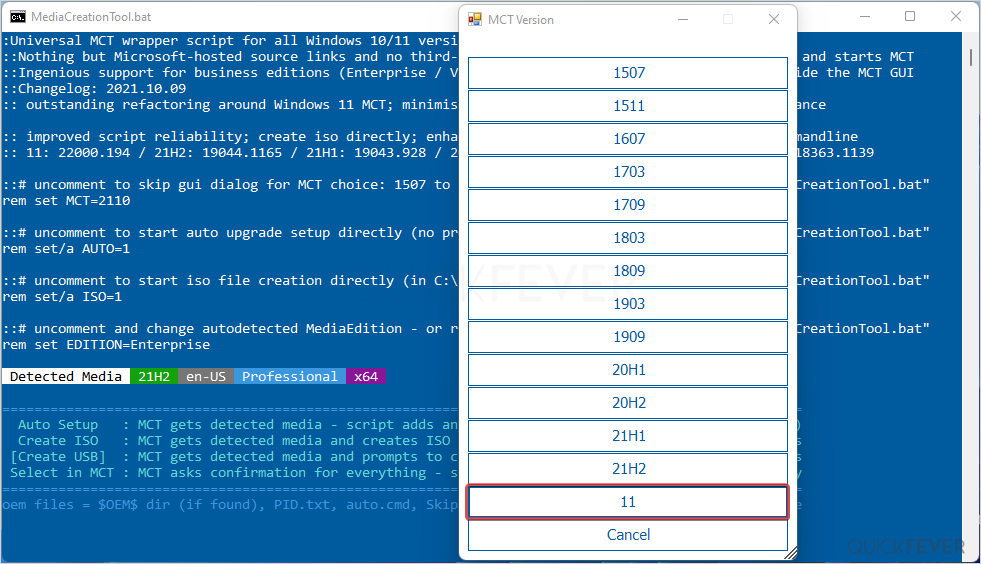
3. This starts with a scary script but doesn’t worry just select “11” in the MCT version prompt. This will create Windows 11 21H2 version.
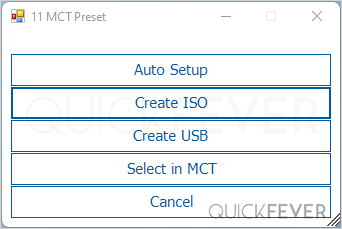
4. A further box will ask whether to create an ISO file or create a bootable USB. For instruction, we’ll use the Create ISO button.
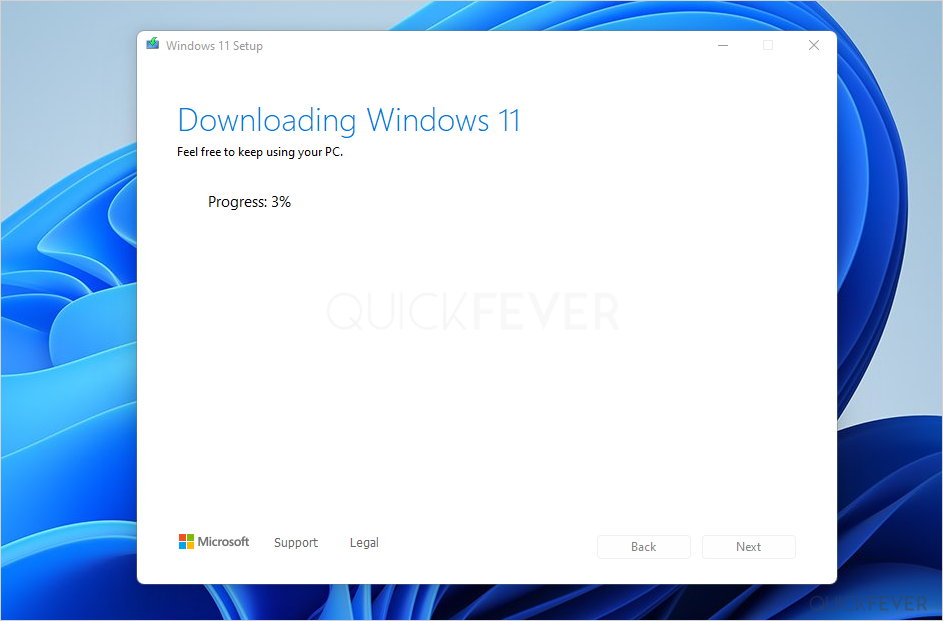
5. Magically the script now opens the Windows media creation tool and starts downloading the Windows 11 ISO file. This is what basically happens, the tool fetches the windows 11 ESD file later it converts it to an ISO file while applying the TPM, CPU, and secure boot bypass.
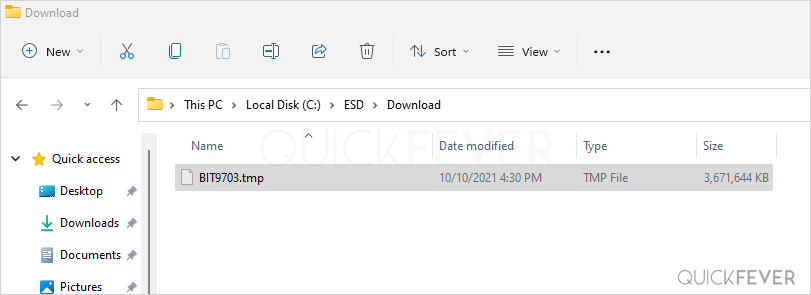
💡 Do you know, the tool temporarily downloads the ESD file as Filename.tmp inside the ESD\Download folder.
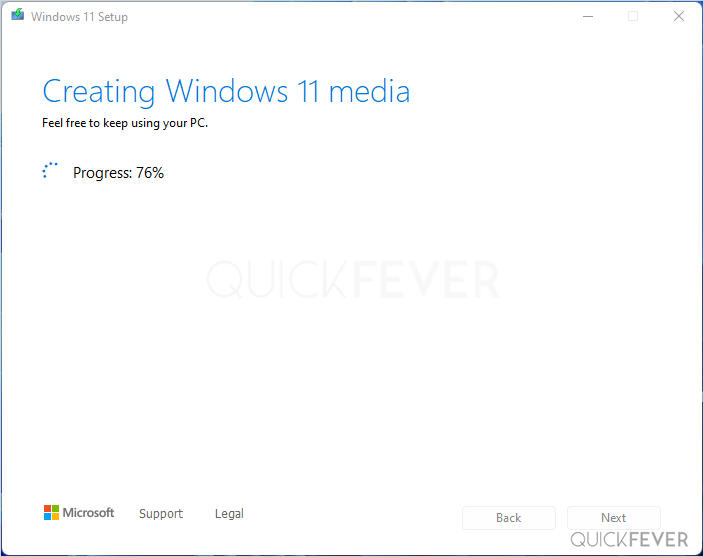
6. Subsequent progress now takes place and converts the ESD file to Windows 11 ISO system image which you can tinker with by burning to a USB drive.
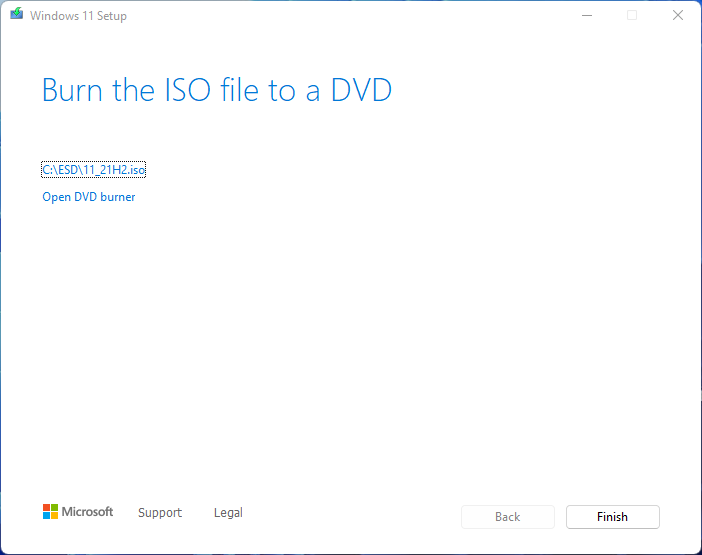
7. Once the tool is done with creating the ISO you will get a message that will display the location of the ISO file and when you click on it it will open the file in a File Explorer window.
8. It’s time to use this ISO file to burn it to a USB drive so you can installed Windows 10 on literally any computer regardless of the incompatible CPU, DPM requirement and disabled secure boot.
Method 3: Modify Registry (doesn’t work now)
Do this when you’re running Windows 10 on a computer and trying to update it to Windows 11 using setup.exe.
To install a new operating system, simply edit the Windows Registry during installation. An error message will appear on your screen if you attempt to install the new OS on an unsupported device.
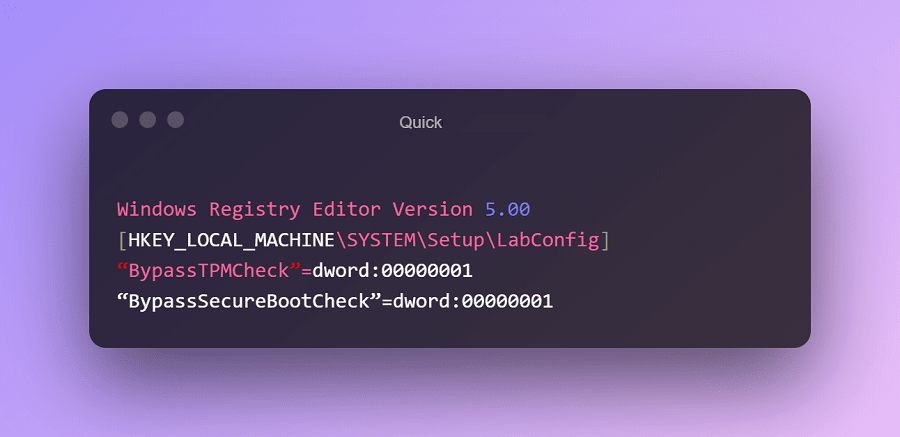
To modify the registry, you need to press Shift+F10 to open Command Prompt. It is necessary for you to run regedit.exe and create a key “LabConfig” in HKEY_LOCAL_MACHINE/SYSTEM/Setup through Command Prompt. Two new entries should be created under the “LabConfig” key:
- BypassTPMCheck=dword:00000001
- BypassSecureBootCheck=dword:00000001
You will no longer see compatibility errors after saving the changes.
Clean Install Windows 11 from USB (doesn’t work)
Alternatively, a .reg file can be created by using the following code:
Windows Registry Editor Version 5.00 [HKEY_LOCAL_MACHINE\SYSTEM\Setup\LabConfig] “BypassTPMCheck”=dword:00000001 “BypassSecureBootCheck”=dword:00000001
- or just download the reg file.
- Get Windows 11, create bootable USB, save this (.reg) file in the USB drive root folder.
- Pressing Shift + F10 during the installation window opens Command Prompt.
- Type notepad and hit Enter key to open Notepad.
- From the File menu, click Open. browse to the USB Drive fodler and then right-click registry file and choose Merge.
- A message should appear saying the key sucessfully addedTPM and SecureBoot will not be required with this approach.
- When on the browse screen, right-click and select Install option that adds the registry information and you can now skip TPM and secure boot requirment.
That’s all folks, now enjoy the new Windows 11 OS on your computer without any restriction of TPM and Secure boot. Share this story with someone and don’t let them stress out about this unnecessary Windows 11 installation requirement.
1 comment
Thanks for info bypass mpt. Securi boot