Article Summary: Our method of Uninstalling fonts from Windows 11 will comprise three possible options. First, we learn to uninstall fonts using the modern Settings app, then using the control panel and file explorer.
Several fonts, as well as graphics and emojis, are used by Graphics designers and many people today to enhance the visual appeal of their content including Graphics, Video, and Social images. Due to this, Windows users tend to download arguably more fonts. We will use the three possible methods to install fonts from Windows 11 will start with setting apps then we move to the control panel and file explorer.

Uninstall fonts from Settings: Windows 11
Note 1. Removing or installing all the fonts in Windows 11 is such a bad idea. Instead, we will guide you to remove specific fonts from your Windows 11.
Note 2. You will require administrative privileges to perform the process and it will have an effect on all the users.
- From your desktop right-click and select personalize.

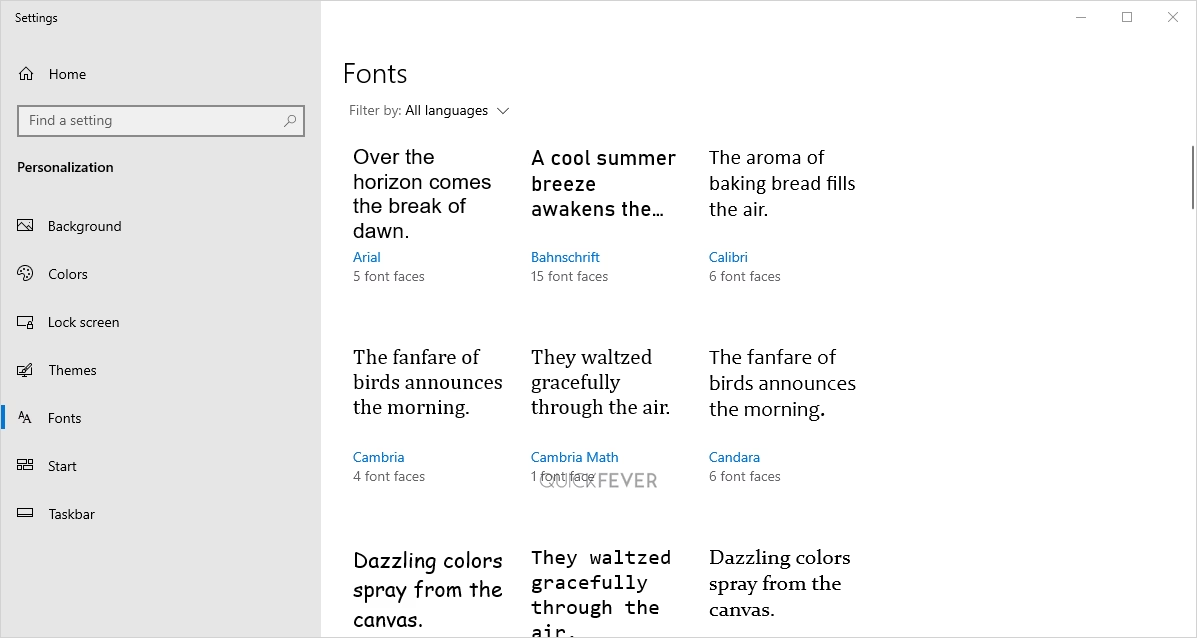
- Now move to the Fonts tab.

- Select a font and remove it. (Also you can click on three dots and an Uninstall button will appear)

The search bar can also be used to find that particular font that you may have downloaded earlier so that you can have it removed because sometimes that is what you want. Several of my preferred fonts have been installed on my Windows machines and I frequently find myself playing with the different fonts, but I occasionally find myself in a situation in which I want to remove all of the fonts I have installed.
Remove fonts from Windows 11 [Control Panel]
- Open up the Control Panel.
- Select Large Icons in View by option, This simplifies the interface and you can easily spot the fonts option.
- Click on it and you’ll see all the installed font not let a phone and click on the delete button.
- You can paste this in File Explorer to open the Control Panel fonts management page, Control Panel\All Control Panel Items\Fonts
PS: The control panel fonts page is similar to the below File explorer method.
Remove fonts from Windows 11 [File Explorer]
- Open file explorer and paste this location C:\Windows\Fonts
- This step is quite similar to what we have seen on the control panel method so basically, all the fonts in Windows are located inside a folder that you can even access in file explorer, and just similar to how you manage your file your fonts
- If you want you can also select multiple phones and hide or remove them from your system.

Tip: Run Windows + R and type fonts to open it in file explorer.
Editor’s note:
Fonts do help in designing projects, the font of the logo of this website is called “IKAROS” someone made it in 2016 and since then we’re using it. The urge to install several fonts in your system to tinker is irresistible. Having literally thousands of fonts may rarely slow down your PC, but not in this case as we’re talking about Windows 11 that out of the box supports only newer processors (workaround are there too).
Tip: You can literally change fonts types to each other, i.e. web fonts to system fonts and vice versa. Perhaps you can explore Google Fonts (they are adding fonts constantly). Websites such as Befonts offer both free and paid fonts. Did you know that famous websites (Lifehacker, TNW) use high-quality custom fonts, which is one of the reasons why their typography stands out from the competition? Having said that, we do not intend to imply that Google Fonts or free fonts are bad unless you are unaware of their existence.
Liked a font you saw on a site? If you like to play with fire here, you can view the source of the fonts of any website using inspect elements and then add that script to your website to see how it will play in your case. We’ve done it but you don’t want to get into legal troubles, so be nice and ask for permission before you go out and perform such things.
If you’re wondering, there is an article in which we taught you how to use Google Sans fonts on your website.


