
How to Change PC Name on Windows 11 and 10

Advertisement
Have you thought about changing the randomly generated PC name? Windows 11 has made things even more manageable despite being leisurely in previous versions. Computers can now be renamed in their settings, in the ‘System’ tab, on the main page of the setting screen. Find complete steps in this article.
If you’re looking to change your computer’s name on Windows 11, you can do so through the Settings, PowerShell, or the Command Prompt. It’s a simple process whether you’ve just bought a new computer or have another reason for it. I changed my PC name to something simple, like “Yoo,” so every time my Alexa Echo announced it was connected, it would say “Now connected to Yoo” instead of some weird gibberish name.
RECOMMENDED BY OUR EDITORS
How to get Windows Photo Viewer in Windows 11
How to Turn On Bluetooth on Windows 11
How to Rename PC Name on Window 11
Follow these simple steps and you’ll have a new PC name in no time.
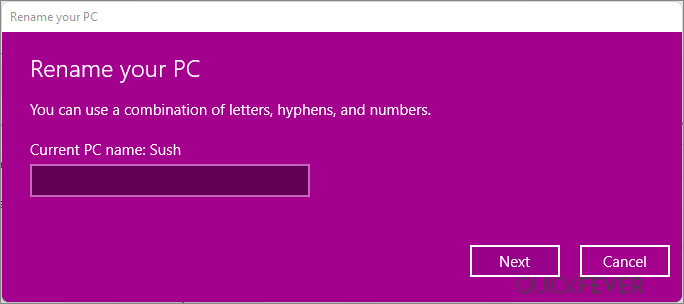
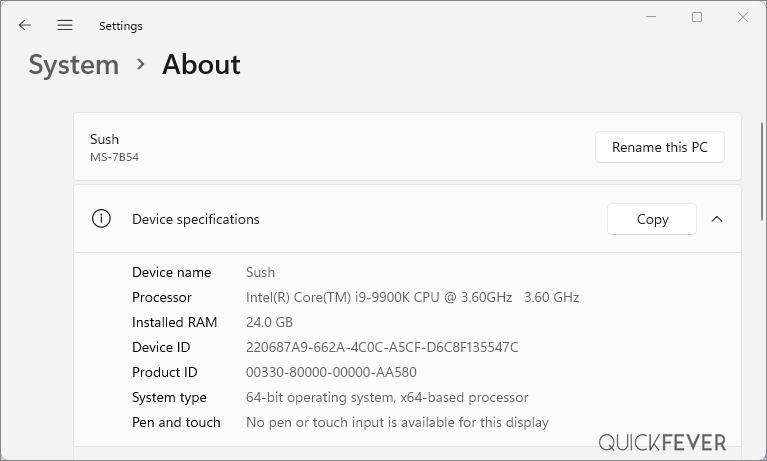
- From Start > Settings > System > About.
- Select Rename this PC
- A box will appear asking you for a New Name, Enter a new name for your PC, and click on Next.
- Select Restart now or Restart later.
The process involves pressing the Windows key, select the ‘Start Menu’, searching for ‘Settings’, and launching the relevant app from the search results. (Press Windows + I to open Settings as a keyboard ninja).
Step 1.
At the top of the screen, you will see your computer name prominently displayed. You can rename the computer by clicking the ‘Rename’ option.

Step 2.
Now, enter the new computer name in the text box and click on ‘Next’. You PC now ask you to logout, save all your work and click proceed.
Step 3.
For the new computer name to take effect, you must rename your computer. In the settings, you’ll see the new computer name after restarting the computer.
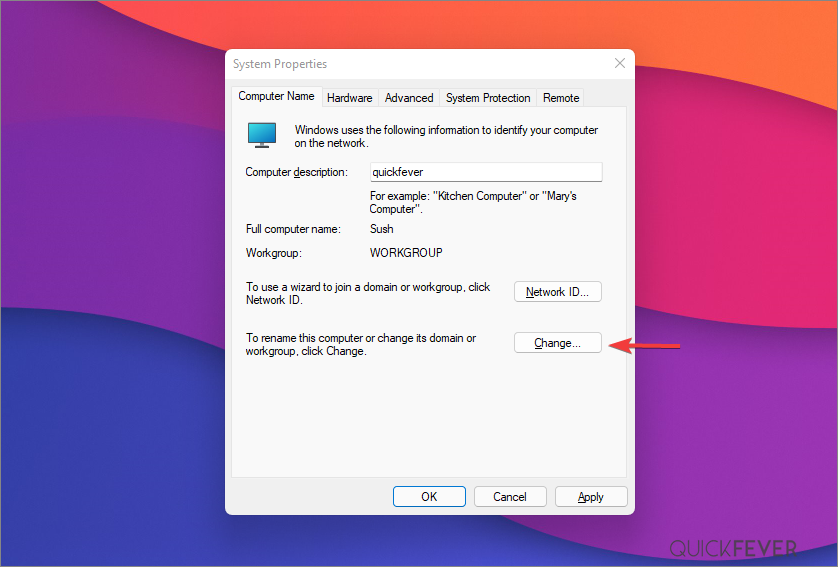
Change PC name from System Properties
Changing the computer name can also be done through the properties menu. Using this method, a dialog box appears when you enter a character that’s no longer permitted, displaying the list of acceptable characters. The characters can then be deleted and a name can be created that is compliant with the standard.
In Windows, press the Windows key to open the ‘Start Menu’, type ‘sysdm.cpl‘, and click the search result for the desired computer name.
Press Windows + R and enter the same
Step 1.
‘System Properties’ opens automatically with the ‘Computer Name’ tab selected. Choose ‘Change’ from the menu. the next prompt will ask you for a new computer name, please select anything and click on Next.
Step 2.
If the computer needs to be restarted, please select ‘Restart now’ to restart it immediately. It is very important to make sure that all your files are saved before restarting the computer. Once you’ve saved all the work, restart your PC and it’ll be known by the new name.
Other methods to Change PC Name
#Command Prompt
Open a Command Prompt and type the following command, make sure to change the values accordingly.
wmic computersystem where name="OLD NAME" call rename name="NEW NAME"
Note: Don’t use the above command as it is, change OLD name with current PC name and New Name with anything you’d like. there are many people
If the method was successfully executed, then a message will say the same.
#PowerShell
You can also use PowerShell to rename your PC name, use the following command with your preference.
Rename-Computer -NewName "New Name"
Did you change your PC name?
It doesn’t matter which method you choose, since the end result remains the same. The two first options, however, should be used if you are not familiar with ‘Command Prompt’ and ‘PowerShell’. Since the end result is the same regardless of the method, there is no difference between them.


1 comment
Thank you quickfever for writing this, it was very easy when doing