How to change DNS server on a Windows 11 PC, and best public DNS servers list.
DNS Servers are used to resolve IP addresses assigned to Domain names. You will browse faster if you use a fast DNS server. This article will help you to change the DNS server on Windows 11 PC plus read our list of best DNS servers.
TIP: Windows 11 lets you Edit Hosts File: here’s how
What is a DNS server and why it’s important
DNS servers do their work by resolving a website name to their associated IP address. Let me make it more simple when you type a website name on your browser’s address bar — the browser sends a query to the DNS server and receives the associated IP address to that domain name. The browser then makes a request with the IP address to open the website. Google (external link) and Cloudflare offer free (external link) and reliable public DNS servers that you can use for faster and better IP resolving resolution.
Change DNS server on Windows 11 🔀
Before you jump into your router’s settings and messing things wait, hold on a second.
Type ipconfig /all in Command Prompt and it’ll show the current DNS server, make a note of this. I am using Cloudflare’s DNS since it is showing 1.1.1.1 as DNS Server on our computer.
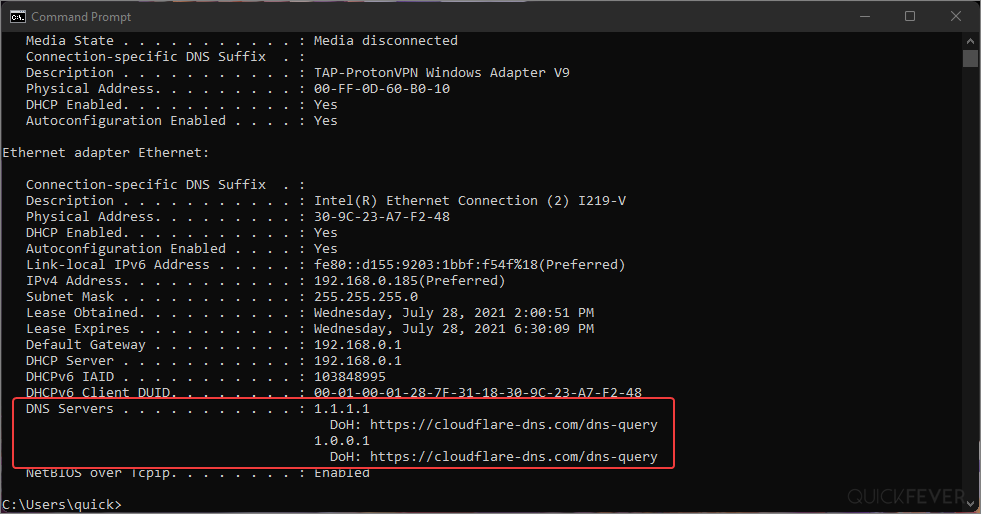
ProTip: Command prompt only shows what you have set, to see if the DNS server is actually working open dnsleaktest.com and it’ll show your DNS server under the ISP section.
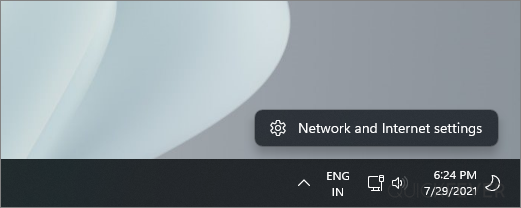
First of all, you see that network icon on your taskbar right-click on that and select “ Open Network and internet settings” you can also go to the control panel and then find a similar setting.
Choose a DNS server using public benchmark 🥤
Selecting a DNS server might be confusing for you as you don’t see any noticeable changes when browsing websites. To ease out the process, we’ll use the DNS performance report by DNSPerf.com to open the site and select your sub-continent. we’re choosing Asia and the website shows the best DNS resolvers by their performance.
- For the Asia continent currently, DNSFilter, Cloudflare, and Google DNS are similar in performance terms.
- North and South America: DNSFilter, Cloudflare, Cisco Umbrella, and NextDNS are good.
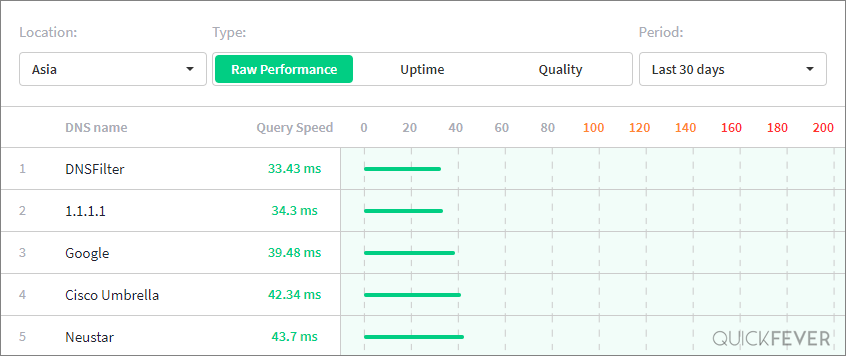
So I’ll pick Cloudflare (showing 1.1.1.1 in the screenshot) since it is widely famous and popular than DNSFilter. Again, you’re free to test out options.
So every DNS resolver provides you with two IP addresses, the first is used as default and the second is fallback IP.
Choose a DNS server; DIY benchamrk🥤
Okay, these public DNS resolver benchmarks are average and sometimes won’t do justice for you. Take this example, for Aisa, it shows Google’s DNS average time is 39ms, for on my computer it’s just 10ms. So it varies from device to device.
I am listing two tools that run a benchmark of popular DNS servers on your computer so you can measure with your eyes.
- DNS Jumper: benchamrk, apply DNS with one click.
- GRS’s DNS tool: benchmark, old tool 🤢
Changing DNS Server on Windows 11 🧃
You are more likely to get the fastest DNS servers through your internet service provider. You often have to wait for your browser to figure out the IP address for each website you visit.
DNS servers provided by Google and OpenDNS allow you to browse faster. It is important to understand that doing this will not improve your internet speed; it will only enable your browser to determine the IP address of any website you visit quickly.
Step 1. Right-click on your Network icon which is on the right side in the taskbar. A pop-up will appear that’ll say network and Internet settings you have to click on that.
Step 2. From there find Ethernet and then DNS server assignment. Scroll down a little until you find this option.

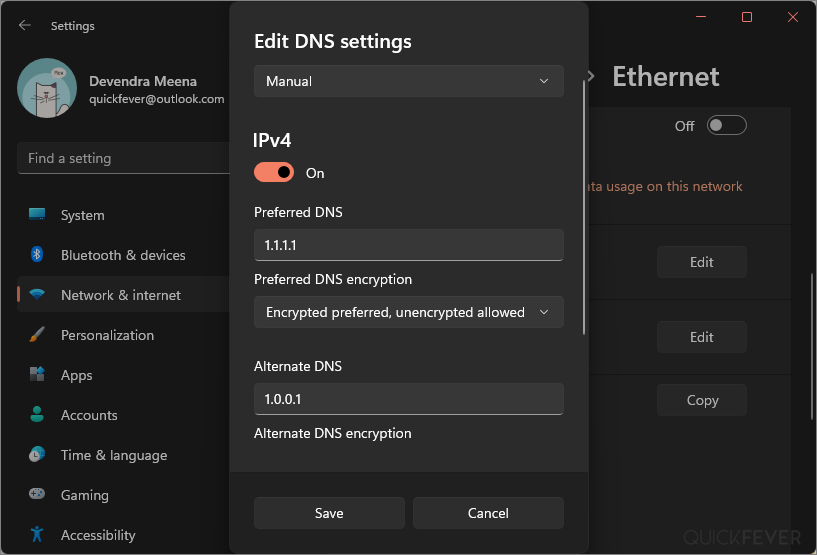
Step 3. Click on the drop-down menu that currently says Automatic (DHCP) and set it to Manual. This enables you to choose a custom DNS Server. Two blank text areas will appear where you’ll enter primary and secondary DNS, remember to select encrypted DNS encryption for both the DNS.
You can be creative here, for primary DNS you can enter Cloudflare DNS 1.1.1.1 and in alternative DNS you can fill 8.8.8.8 which is Google’s DNS server. It can be anything as long
Well, most of the users probably want this, just to be sure check your new DNS server by vising the dnsleaktest.com
Changing the DNS server helps to access blocked websites and slow websites, especially if your ISP is interfering with your browsing. In addition to that add a dedicated VPN if that helps.
Method 2. Change DNS server from Control panel
This guide is for people who prefer Control Panel rather than the new Settings.
- Open control panel
- Navigate to network and Internet ➜ network and sharing center
- From the left side click on change adapter settings
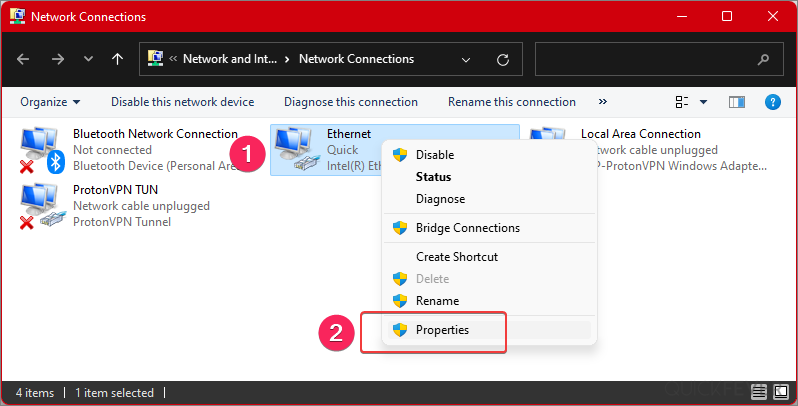
- Select your Internet connection right click on it and select properties
Then under changing your network settings tap on the option that says “change adaptor options” if you are connected to a WiFi network you can go to the Wi-Fi tab from the left sidebar and then under related network settings choose the change adaptor options both will open up a page listing your network connections.
Now you need to find which network connection is used to connect to the internet right click on that Network and go to its properties. Only choose the network on that you want to apply the DNS setting that we are going to put in the next step.
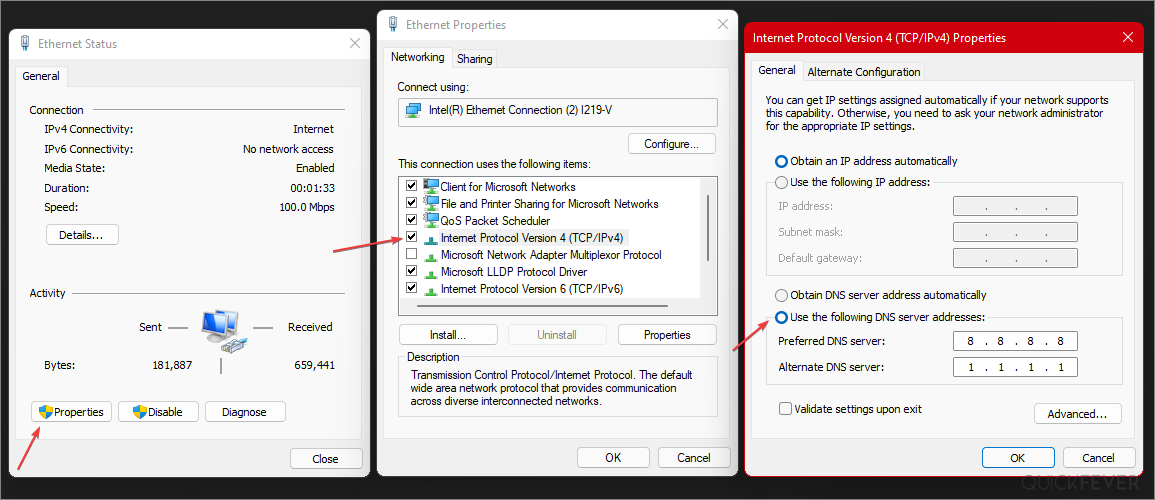
See the below screen show and follow it to get to the DNS Server address page, enter both Primary and secondary DNS here and hit save, and voila.
Is my DNS server actually Working?
So you installed the best DNS server you could find, what’s next?
There are tools that quickly check if the DNS service you’re using does work or not.
The first thing we’ll try is pinging a website, open Command prompt, and type
nslookup quickfever.com
This uses the DNS server you have or changed to.
If it gives a result, your DNS server is working.
Also, type nslookup quickfever.com 1.1.1.1
This uses Cloudflare’s DNS server to ping websites
okay, that was quite an old way.
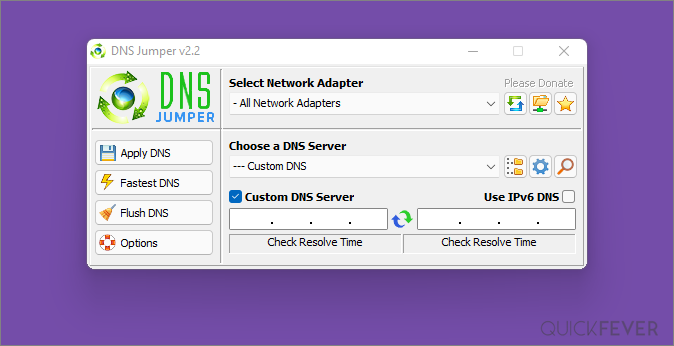
We’re using the DNS Jumper, which is quite an amazing tool, that can measure various Public DNS servers and apply them on your Windows 11 PC in just one click.
Here is how you can test a custom DNS server to see if it really works.
Find the fastest DNS server for your computer
Step 1. Open DNS Jumper tool, Select a DNS Server from the list or manually enter by ticking Custom DNS Server.
Step 2. Press the refresh icon which is between primary and secondary DNS server IP. The tool displays the resolve time, and you can compare it with other DNS servers.
Step 3. Use the tool’s Fastest DNS button to start an analysis, click on Fastest DNS test, and in a few seconds, it will sort DNS servers from low to high resolve time. Apply any DNS server which gives you 10ms to 50ms.
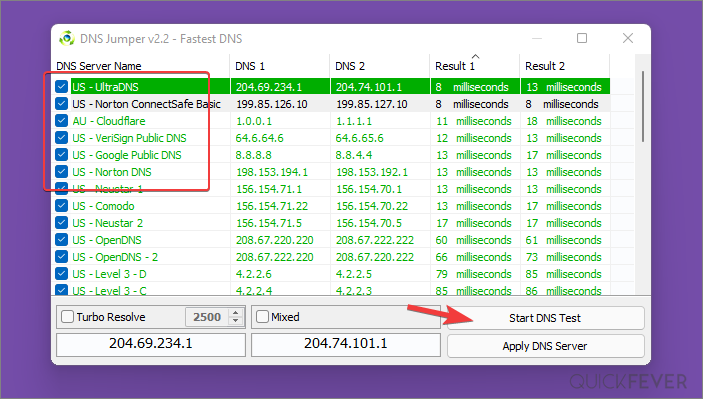
For me, UltraDNS, Cloudflare, Verisign, and Google DNS work best. Tell us which DNS server you’re using and mention their resolve time.