
Update: Article updated to address all the SSL bugs, the article applies to grandfathered free servers as they moved to paid-only plans.
This method adds Let’s encrypt SSL to your WordPress site created using Serverpilot and hosted on Digitalocean (can be any VPS). ServerPilot offers auto installation of Letsencrypt when you upgrade with $10 per month. The following script saves time and works with a free Serverpilot account. Let’s see how to install SSL + a cronjob for auto-renew purposes.
- Install WordPress with CyberPanel, OpenLiteSpeed, and LSCache
- How to install WordPress with Runcloud and Let’sEncrypt
Remember: If this article helped you, consider signup using this link to DigitalOcean to get a $10 bonus for your droplet, (that's about 2 months of free hosting). I spent about 5 days to test this, created script and added every possible help with all the required resources.
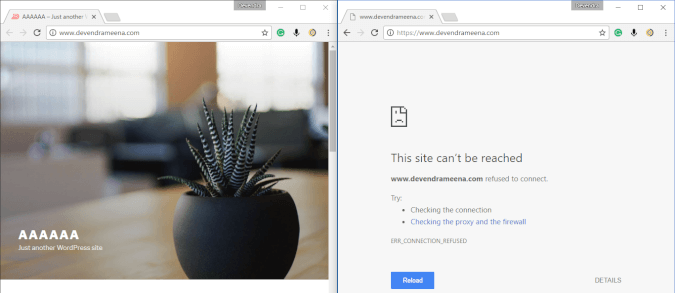
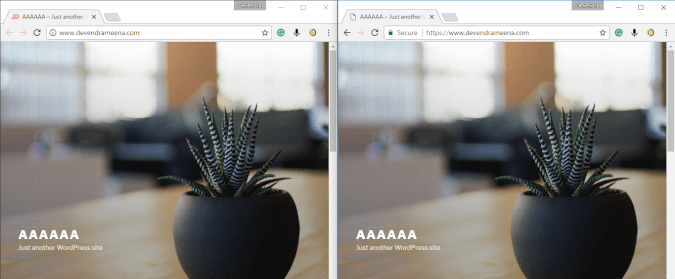
I tested this on devendrameena.com, So in the starting, you can see that the https is not enabled on the website.
Important Notice
Create Droplet Snapshot: Visit your droplet > Snapshot and create a snapshot, will take 5-minutes, in case something goes wrong, you can restore it with one click.
DNS: Visit your DNS management site, and make sure you have added Digitalocean nameserver. If your domain name DNS is not pointing to your website, simply the Lets Encrypt verification will fail and you won’t get SSL. So you need to ensure both www and non-www domain points to your website.
Even though we tested all the things before publishing this article, we take no responsibility whatsoever you might face in the process. Do it at your own risk.
What Do you need?
1. Putty (To give ssh command)
2. Droplet’s root password. (You can always reset going to DigitalOcean > Droplet > Access > Reset Root Password). Similar to other VPS.
3. appname is the name of the WordPress installation. Visit Serverpilot > Server > Apps and check the app name. See the screenshot below highlighting app name.

Or use an SFTP client like Cyberduck and log in and locate this to find the appname.
/srv/users/serverpilot/log/$appName/Open SSH login to your Droplet
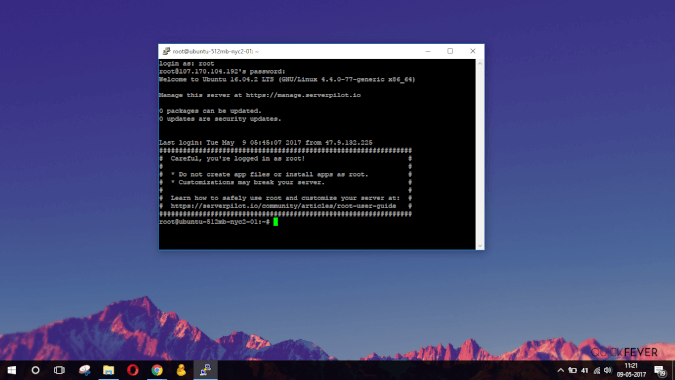
Open Putty, enter your droplet IP address, and click on the “Open” button. If you created SSH secrete key earlier, you don’t need to enter a password but that’s the step you should have done when creating Droplet (DigitalOcean).

Type root when asked login as. And then your root password (it won’t show just type and hit enter). You can copy the password and then right-click on the windows and press the enter key to log in.
Installing LetsEncrypt Repository
If git isn’t installed on your droplet, install it using this command, this will also get letsencrypt lib.
apt-get update && \
apt-get -y install python3-pip build-essential libssl-dev libffi-dev python3-dev
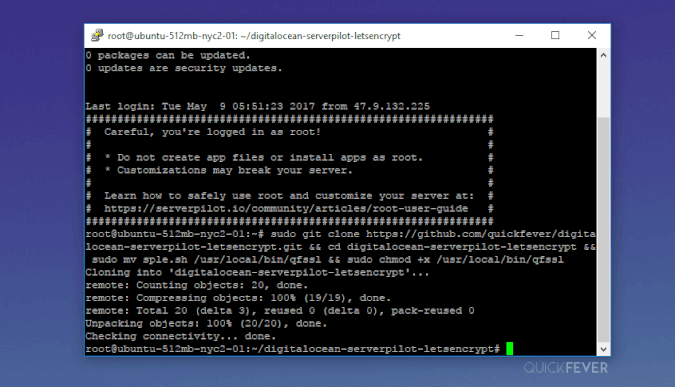
Now enter the following code line. This will copy the script to your server and will execute it.
pip3 install rwssl==2.0.4
If this worked you should be able to use rwssl -h to bring the menu.
Otherwise use this to copy repo to **/usr/local/bin** and make it executable. That’s it, no more codes.
Note: LetsEncrypt allow only 5 SSL certificates per domain per week. If you think you already made this mistake, you’ve to wait for a week before using this method or use a different domain or subdomain of the domain you’re adding SSL for.
Install Letsencrypt SSL to Your Domain
Here are the simple steps to install SSL on your WordPress installation.
For main domains
Open SSh to your Droplet IP address using Putty and type the following commands.
rwssl getcert --app foo
Remember to change app with your server app name.
Visit serverpilot > Server > App, write down the app name.
More commands
| Command | Details | Examples |
|---|---|---|
| getcert | Get letsencrypt cert for an app. | rwssl getcert --app foo |
| getcerts | Get letsencrypt certs for all apps. | rwssl getcerts for all users apps or rwssl getcerts --user john for john’s apps |
| removecert | Uninstall SSL cert from an app. | rwssl removecert --app foo |
| removecerts | Uninstall SSL certs for all apps. | rwssl removecerts for all users apps or rwssl removecerts --user john for john’s apps |
| forcessl | Force SSL certificate for an app. | rwssl forcessl --app foo |
| unforcessl | Unforce SSL certificate for an app. | rwssl unforcessl --app foo |
| forceall | Force HTTPs for all apps. | rwssl forceall for all users apps or rwssl forceall --user john for john’s apps |
| unforceall | Unforce HTTPs for all apps. | rwssl unforceall for all users apps or rwssl unforceall --user john for john’s apps |
This is how it will look like.
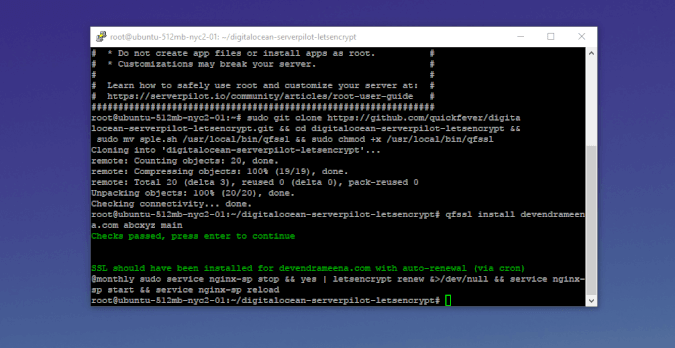
Security Note: If you wonder why it didn’t ask for your email and agree to terms as Default Letsencrypt installation asks so, I used this command to get past that.
// letsencrypt certonly --register-unsafely-without-email --agree-tos -d $domainName -d www.$domainName // Perhaps, It doesn't matter.
Uninstall SSL
rwssl removecert --app foo
rwssl removecerts --user
Renew SSL Easily
You get SSL for 90 days, and after 60 days you can perform a manual renew of SSL using these commands.
- sudo service nginx-sp stop / will stop the nginx so SSL can re-deploy.
- letsencrypt renew / This will make attempt to renew SSL.
- sudo service nginx-sp start / Start nginx again.
Any questions? Ask me in the comment section.
Htaccess Changes.
If your site runs at www
You may want to redirect http, https:// to secure https://www, use the following code and add it to your .htaccess file.
RewriteCond %{HTTPS} !on [OR]
RewriteCond %{HTTP_HOST} !^www\.
RewriteRule (.*) https://www.example.com%{REQUEST_URI} [L,R=301]
This will redirect http:// and https:// to https://www version.
If your site runs at non-www
You might want to redirect http, www, https://www to secure https://, use the following code and add it to your .htaccess file.
RewriteEngine on
RewriteCond %{HTTP_HOST} ^www\.quickfever\.com [NC]
RewriteRule ^(.*)$ http://quickfever.com/$1 [L,R=301]
RewriteCond %{ENV:HTTPS} !on
RewriteRule ^(.*)$ https://%{HTTP_HOST}%{REQUEST_URI} [L,R=301]
RewriteEngine on
RewriteCond %{HTTP_HOST} ^www\.example\.com$
RewriteRule ^(.*)$ "https\:\/\/example\.com\/$1" [R=301,L]
RewriteCond %{ENV:HTTPS} !on
RewriteRule ^(.*)$ https://%{HTTP_HOST}%{REQUEST_URI} [L,R=301]
RewriteCond %{QUERY_STRING} ^m=1$
RewriteRule ^(.*)$ /$1? [R=301,L]
This will redirect everything into https:// version.
RewriteEngine On
RewriteCond %{HTTPS} !=on
RewriteRule ^/?(.*) https://%{SERVER_NAME}/$1 [R,L]
Ensuring you’ve got SSL
crt.sh site keeps tracks at your issued SSL.
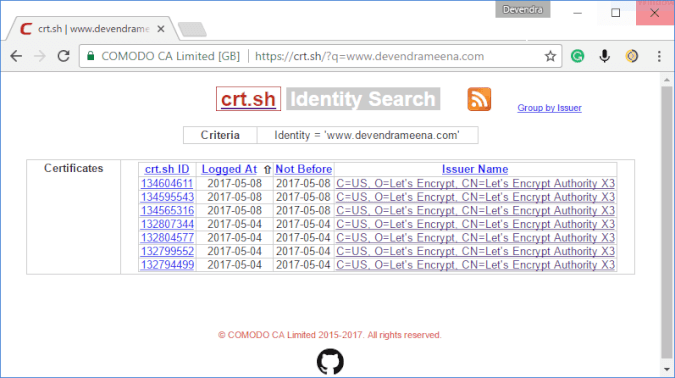
Check SSL using SSLshopper.com or see the lock icon in the address bar in any Web browser.
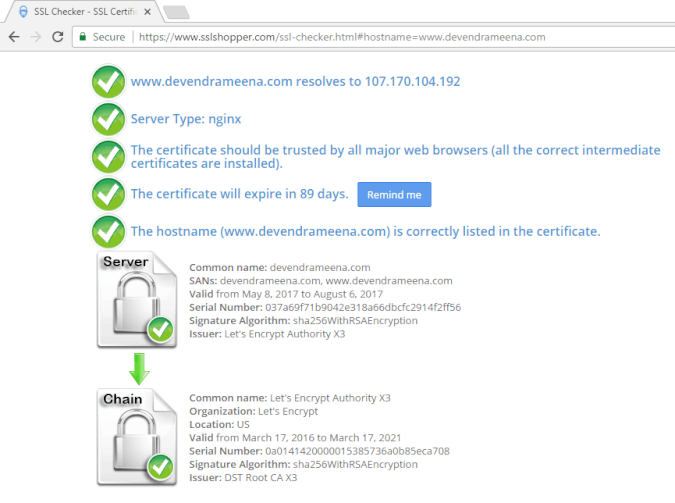
Further Note: I used devendrameena.com as a demo in the process, as it’s more of a personal site, I’ll move it back to blogger server.
Conclusion
If this article helped you, consider signup using this link to DigitalOcean to get a $10 bonus for your droplet, (that’s about 2 months of free hosting).
If you’re using Yoast SEO plugin and enabled Sitemap; visit the sitemap page in Yoast SEO settings and disable-enable to force sitemap to change HTTP to HTTPS.


9 comments
I followed all the steps, when i entered rwssl getcert –app foo with my app name, it says:
rwssl: command not found
Can you help me please?
Hello, The script might get old, I’ll have to research…
Hi. Does this still work? The article is 1 month old but the script is 3 years old.
Hi Laura, I updated it to work with the latest scenario. But i suggest you move to cyberpanal, a more powerful service to make wordpress blog, and ssl is 1 click too.
it’ good tutorial, very work in my server end domain….Renew SSL?
Any questions?
thank
Andreas.
the time Renew SSL?
It will be auto renewed, but you can renew manually by giving “letsencrypt renew” command if SSL is expiring in next 30 days or less.
can renew ssl by cron job ?
help me …
thank
The script will add the corn job. you don’t have to manually renew.
Or you can run “letsencrypt renew” anytime.