In Windows 11 some apps start with Windows login as a feature while some don’t. Learn to add programs to Startup manually in the new Windows 11.
Start-with-log-in programs start themselves as you turn on your PC and don’t need any manual execution for the same. A few of these programs and services are necessary for Windows to function correctly, but they aren’t all required. The delay caused by such programs and services at startup takes its toll on your PC’s overall startup time. Increasing the number of services and programs that launch at startup will also result in a longer boot time for your PC. These apps launch during start-up, therefore increasing the startup time. These apps are configured to run as Windows boots up, for example, graphics driver(s), anti-virus programs, discord, etc.
RECOMMENDED BY OUR EDITORS
How to Change DNS Server on Windows 11
How to manage Startup Apps on Windows 11; Add, enable, or disable
How to Delete Temporary Files in Windows 11
You can make apps automatically launch at startup if you happen to use them regularly after booting into the OS. While some apps offer this behavior to be configured, but there may be many apps that don’t. For example, you always open, say a web browser or music player app after boot and the respective app doesn’t offer to configure any such automatic start-up option. Not only just apps, but you can also make any file, document, folder, URL, etc to fire up at boot up easily. If you want to do something similar, this is what you’re looking for. All the methods work with Windows 10, 8, 8.1, and 7 as well.
Making programs to launch automatically when Windows boots are quite easy and involve placing desired shortcuts in a startup folder, the contents of which are launched at startup. To do so, follow the steps below.
Let’s divide this article into three sections.
- Manage Startup apps
- Disable a Startup app
- Enable a Startup app
- Manually add an app to Startup apps
- Manually add an app to Startup apps using Registry Editor
Manage Startup Apps on Windows PC
Windows settings app now includes Startup Apps that make it easier to enable and disable programs. Well you could do the same from the task manager let’s see how to manage Startup apps using task manager.
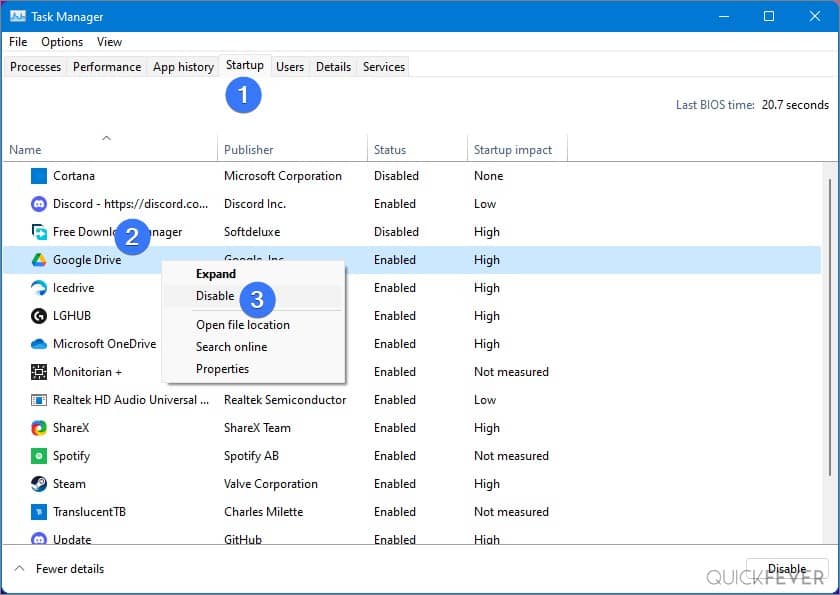
Using task manager
Once you added all your favorite programs you can manage them easily from the Task Manager. Manage all the startup entries from the Startup tab inside task manager, the screenshot was taken on Windows 11.
Using Settings Apps
Add a Program to Startup Apps in Windows 11 PC
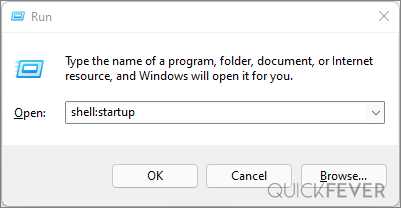
Add apps/folders/files to launch at startup, you need to place the desired shortcuts in a folder named startup. A startup folder is a common place where such shortcuts are placed in order to launch them at startup. If you so desire, you can even remove some of the unwanted shortcuts to reduce the boot time. To do so, follow the steps mentioned below.1. Press and hold the Windows key + R to open the Run dialogue box.
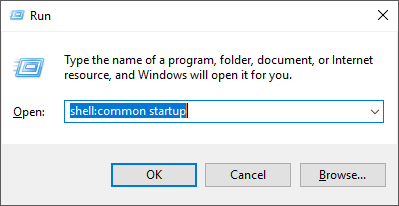
1. Type in shell:startup for current users and shell:common startup for all users.
Optional: This should open the startup folder we’re talking about. In case you’re wondering, you can also type in the below address in the File Explorer’s address bar to browse to this folder.
%APPDATA%\Microsoft\Windows\Start Menu\Programs\Startup for current user
C:\ProgramData\Microsoft\Windows\Start Menu\Programs\StartUp for all users
2. This should open the startup folder we’re talking about, place the shortcuts of the apps you want to launch at startup. You can likewise add folders and files shortcuts as well.
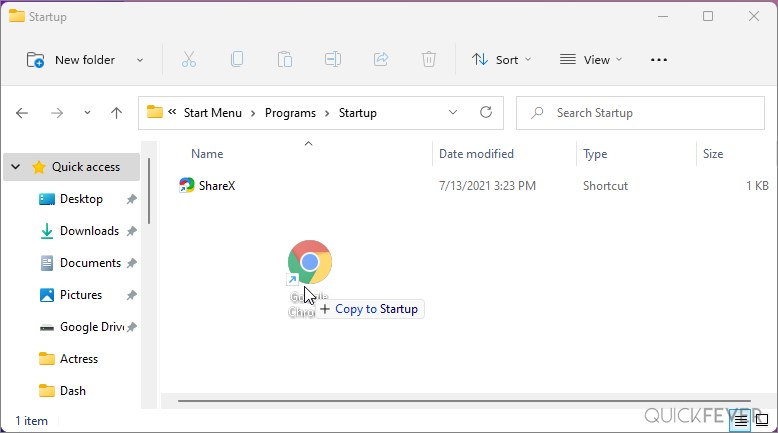
3. To remove apps, delete the unwanted shortcuts from this folder to stop them from launching at startup. That’s it. This is how easily you can add apps, folders, or files to startup while booting. These shortcuts placed will launch while booting into the OS for the current user.
Add startup program in Windows 11 with Registery Editor
You can use the Registry Editor to browse and edit registry entries on your Windows PC. One such use of the same is to add or remove startup programs.
for current user
Add or remove programs from startup for the current user, follow the steps mentioned below.
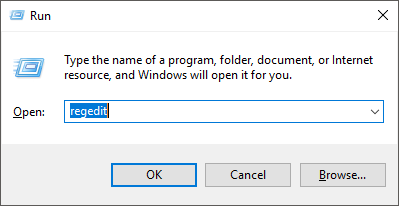
1. Press Windows key + R to open the Run dialog box.
2. Type in Regedit and hit Enter to open the Registry Editor window.
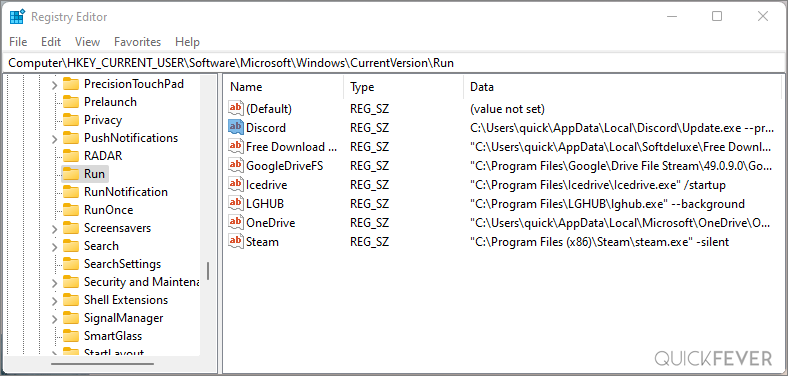
3. Browse to the following path using the left pane.
HKEY_CURRENT_USER\Software\Microsoft\Windows\CurrentVersion\Run
The entries here are the programs configured to run at startup.
4. Add a program, right-click on empty space and select New and click on String Value.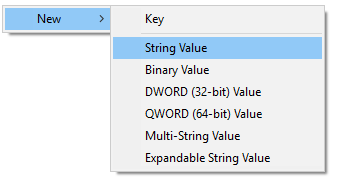
5. Name it and right-click on the newly created entry and choose Modify.
6. Type in the address to the file location of the program executable in the Value Data field and hit OK.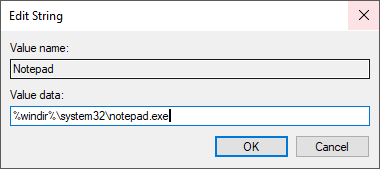
If you wish to delete a program from startup, remove that program’s entry.
7. On the confirmation prompt, just hit Yes.
8. All the program entries in here will get executed during startup for the current user.
for all users
Add or remove programs from startup for all users, follow the steps mentioned below.
1. Press Windows key + R to open the Run dialogue box.
2. Type in Regedit and hit Enter to open the Registry Editor window.
3. Browse to the following path using the left pane.
HKEY_LOCAL_MACHINE\Software\Microsoft\Windows\CurrentVersion\Run
The entries here are the programs configured to run at startup for all the users.
4. Add a program, right-click on empty space and select New and click on String Value.
5. Name it and right-click on the newly created entry and choose Modify.
6. Type in the address to the file location of the program executable in the Value Data field and hit OK.
If you wish to delete a program from startup, remove that program’s entry.
7. On the confirmation prompt, just hit Yes.
8. All the program entries in here will get executed during startup for all the users.
Using the above methods, you can easily add or remove apps/folders/files to startup for all as well as just the current user. These methods don’t require any additional third-party software to be installed and will work on Windows Vista and later.
Add startup programs for current user (using registry)
You can use the registry editor to browse and edit registry entries on your Windows PC. One such use of the same is to add or remove startup programs. To add or remove programs from startup for the current user, follow the steps mentioned below.
Press and hold theWindows key + R to open the Run dialog box.
Type in regedit and hit Enter to open Registry Editor window.
Browse to the following path using the left pane.HKEY_CURRENT_USER\Software\Microsoft\Windows\CurrentVersion\Run
The entries here are the programs configured to run at startup.
To add a program, right-click on empty space and select New and click on String Value.
Give it a name then right-click and choose Modify. Type in the address to the file location of the program executable in the Value Data field and hit OK.
To delete, just select the desired entry and delete it. On the confirmation prompt, just hit Yes.
All the program entries here will get executed during startup for the current user.
Add startup programs for all users (using registry)
To add or remove programs from startup for all users, follow the steps mentioned below.
1. Press and hold the Windows key + R to open the Run dialogue box.
2. Type in Regedit and hit Enter to open the Registry Editor window.
3. Browse to the following path using the left pane.
HKEY_LOCAL_MACHINE\Software\Microsoft\Windows\CurrentVersion\Run
The entries here are the programs configured to run at startup for all the users.
4. Add a program, right-click on empty space and select New and click on String Value.
5. Name it and right-click on the newly created entry and choose Modify.
6. Type in the address to the file location of the program executable in the Value Data field and hit OK.
7. If you wish to delete a program from startup, remove that program’s entry. On the confirmation prompt, just hit Yes.
All the program entries here will get executed during startup for all the users.
Using the above methods, you can easily add or remove apps/folders/files to startup for all as well as just the current user. These methods don’t require any additional third-party software to be installed and will work on Windows Vista and later.
Disable startup programs
Have any similar tips to share? Shoot them in the comments section below!
4 comments
How can we (entirely) REMOVE entries from the Task Manager Startup list?
How do you add windows explorer (the file manager, not the browser) to startup?
Create an Explorer Shortcut and move it to the Startup folder.
👍 works!