
Windows 11 Recovery USB Drive – How to create and Why you need one

Advertisement
Create a Windows 11 Recovery drive because it might come in handy at a time when something unexpected issues hit your computer. It’s advisable to have a recovery drive when you’re upgrading to a new OS, doing something that may cause OS instability or even just having one at your hand when you face hardware failure or software issues.
This article is about how to create a Windows 11 recovery USB drive. This is a very useful tool for people who are using Windows 11 and want to create a backup of their system. A recovery USB drive is an external storage device that you can use to store backups of your important files and folders or even your entire system. The USB drive can be plugged into any computer, so in the event that your system crashes or you’ve lost all of the data on it, you can plug in the USB drive and recover the data from it.
The recovery drive will quickly help to reinstall Windows so you work again on your Computer in no time.
Create a Recovery Drive from Windows 11
Creating a recovery USB drive on Windows 11 is possible, here is the shortest method. In no time you’ll have a bootable USB Recovery Drive that can be used to do sort of things including Resetting your PC, repairing system files, fix boot issues.
Follow the instructions carefully.
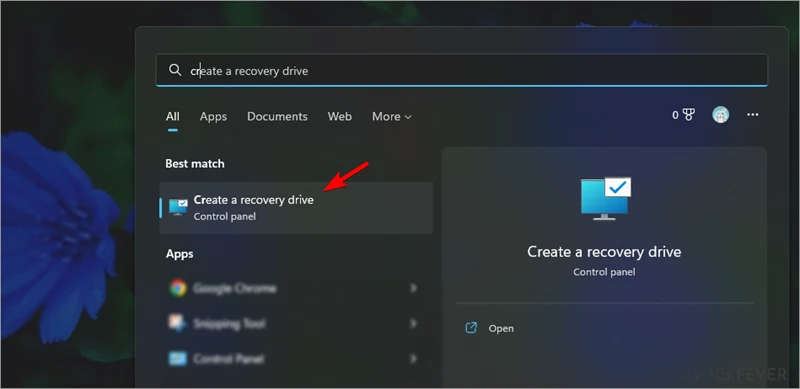
- Go to the Start button and type create a recovery drive.
- Click on the Recovery Drive option that appears.
- Untick “backup system files” that depend on your preference. and click Next.
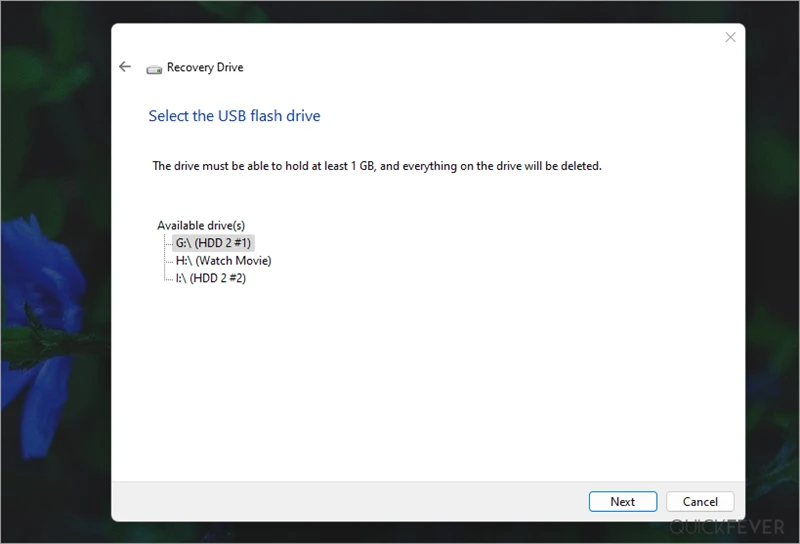
- Select a USB Drive (backup your file as it’ll be formatted in the process).
- Click next to start the process.
- It takes a few seconds to copy all the utilities to the USB drive.

How to Use Windows 11 USB Recovery Drive
All the USB recovery Drive created without the system files backup can still do many things to help you recover your PC or remove all the files from a Drive to reset your PC.
To get the most out of your Windows PC, you’ll want to regularly recreate your recovery drive. This is because Windows gets periodic updates for security patches and new builds of the operating system annually. We suggest that you have a recovery drive and annually update the recovery drive to keep your PC running smoothly.
- When starting your PC, press Del/F12/F9, *(it’ll be one of the buttons) to access your BIOS options or Boot menu.
- Once you press, all the boot devices will show, from there simply select the USB drive that we just created using recovery media creator.
- Use the arrow button to navigate and space or enter to choose.
- Now there are many options, choose one according to the situation.
How to create Windows 11 Bootable USB Drive
Perhaps you’re simply looking for a way to create a bootable USB of Windows 11 to simply install the OS on a computer, if that is the case try the following methods.
- The first step to making a Windows 11 USB recovery drive is to download the Windows 11 ISO file. You can download it from Microsoft’s website.
- Next, you need to create a USB thumb drive with at least 16 GB of storage space. You can either use a flash drive or an external hard drive. Then, follow these steps:
- Download and install the Rufus program on your computer
- Launch the Rufus program and select your Windows 11 ISO file
- Select your USB thumb drive from the list of options
- Click start and wait for it to finish creating your recovery USB
That’s all friends, you can create and use a recovery USB drive using Windows 11 and use it on any computer. It’s your turn to apply and create a handy USB drive so it can save your PC some other time.