
How to Clean Install Windows 11 version 24H2 on PC and Laptop
Advertisement
A bootable USB Drive is not required to clean install Windows 11 when your PC is already running on an older Windows 11 version.
This article also includes steps after you’ve created a Windows 11 bootable media device (either using an ISO or media creator tool. If you didn’t know by now, or to make Bootable USB using a Windows 10 ISO read this guide.
But before you start, you should check if you can install Windows 11 and pass all the requirements checks.
Check if your computer is compatible
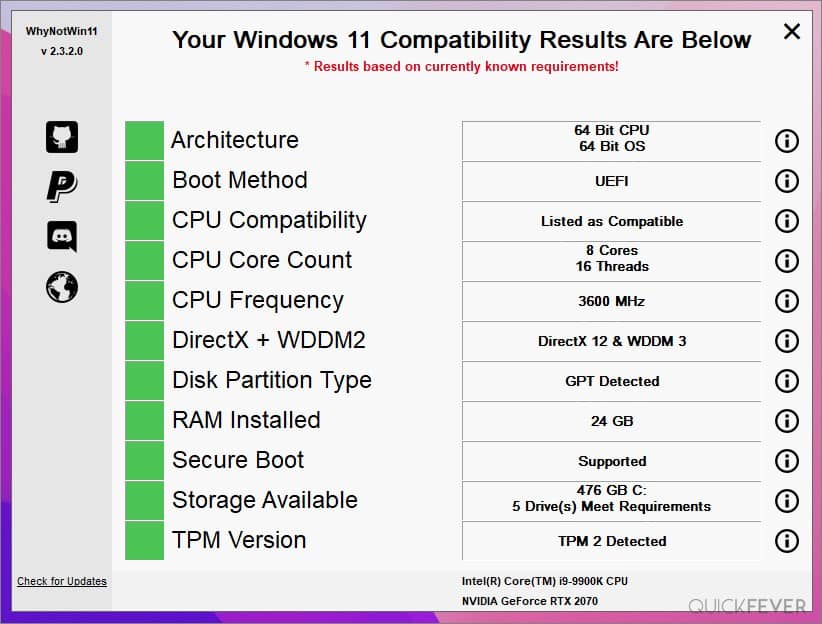
We’ve already covered Windows 11 Compatible Laptop & Processor List, and for custom PCs, it can be hard to figure out if everything aligns. However, someone made an unofficial tool to test all the requirements, it goes by the name WhyNotWin11 on Github.
- How to Install Windows 10 From USB
- Download Windows 10 S (ISO) and install it on your Computer
- Download Windows 10 ISO
- How to Download Windows 10 ISO Legally and Original
- Windows 10 Insider Preview ISO Offline download.
Clean Install Windows 11 24H2 without USB
It’s easier now to install Windows 11 version 22H2 without the need for a USB drive follow these instructions and you will have Windows 11 call on your computer.
Step 1. Get an ISO file of Windows 11.
STEP 2. Mount that image on Windows and start setup.
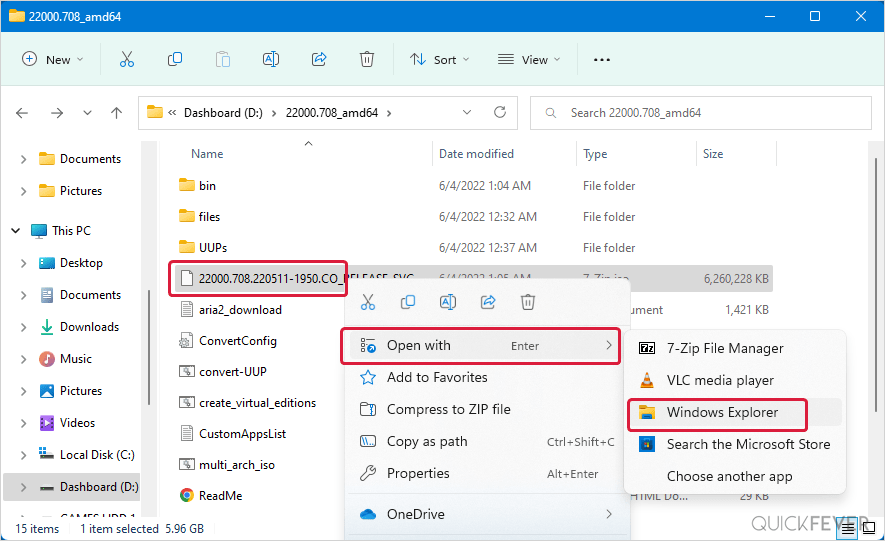
STEP 3. You will see an extracted folder, now you need to run the setup file.
STEP 4. It will take a few minutes and then you will see this prompt where you can choose if you want to keep files and settings. Since we aim for Clean installation I will choose the option nothing.
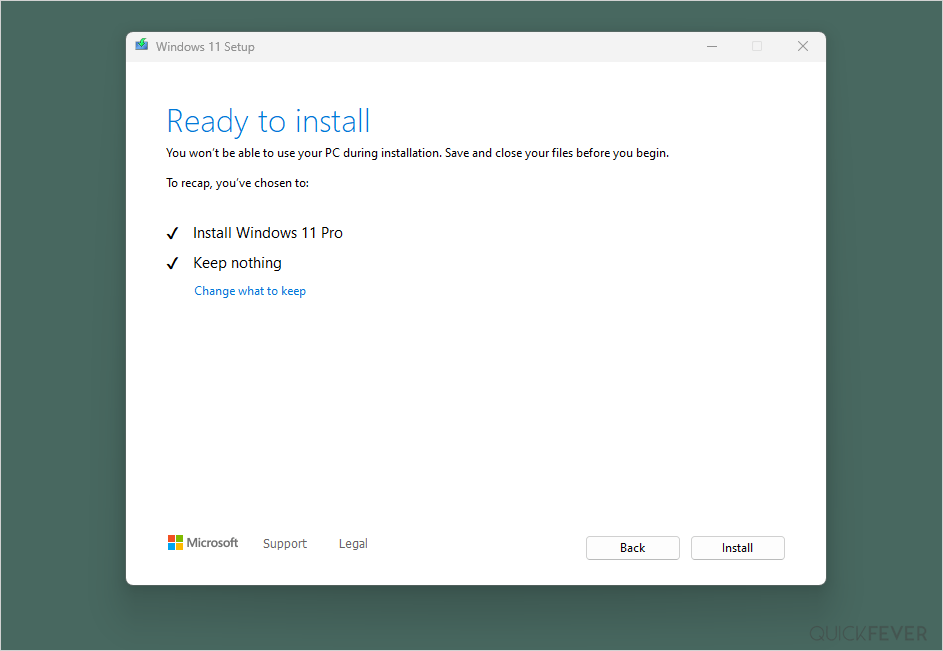
STEP 4.1 If the tool suggests you to keep settings, manually toggle that to nothing.
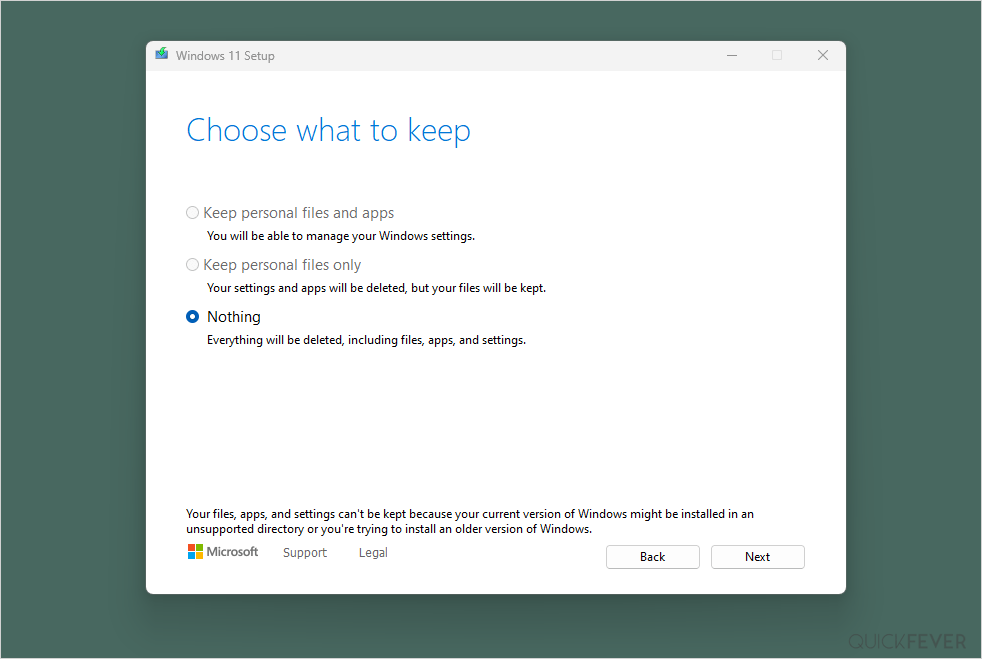
STEP 4.2. Once you are done click on the next button.
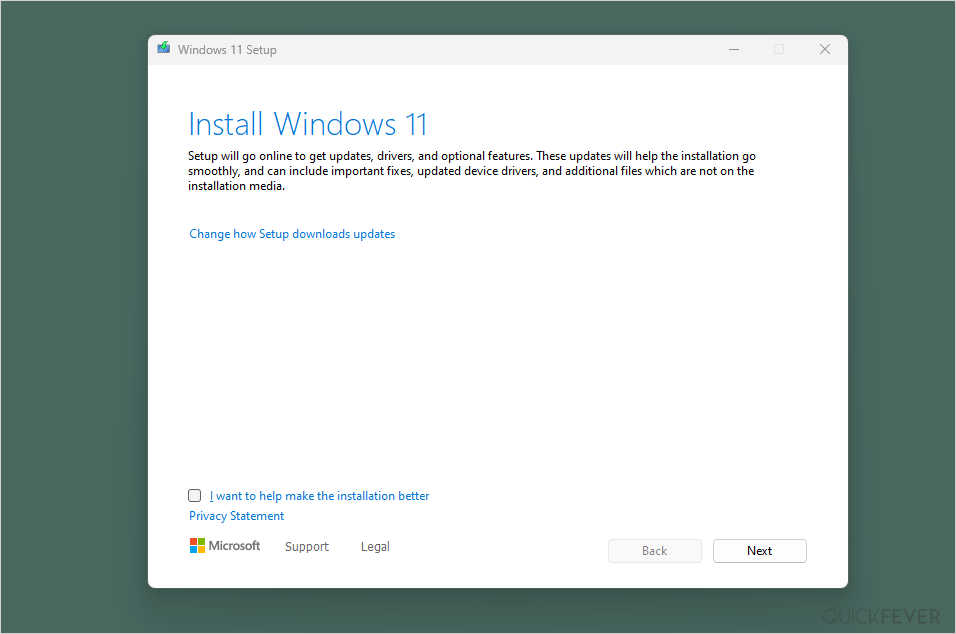
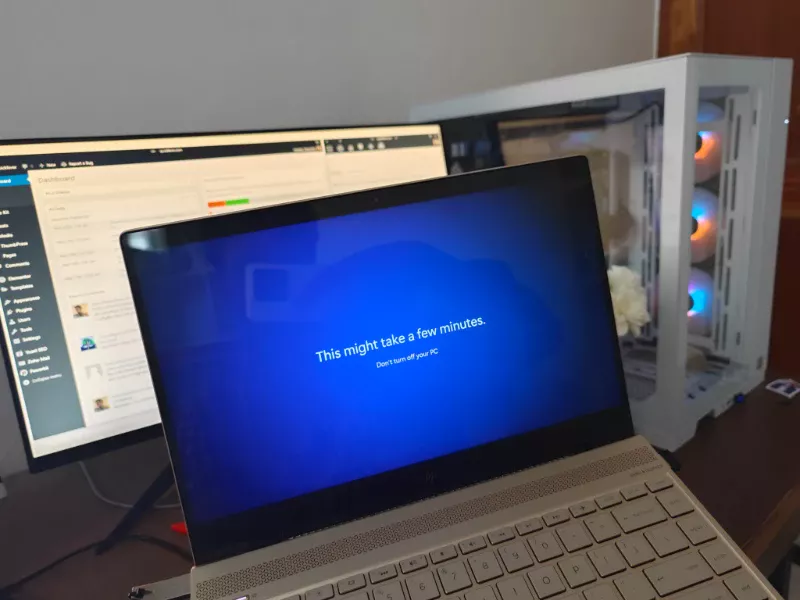
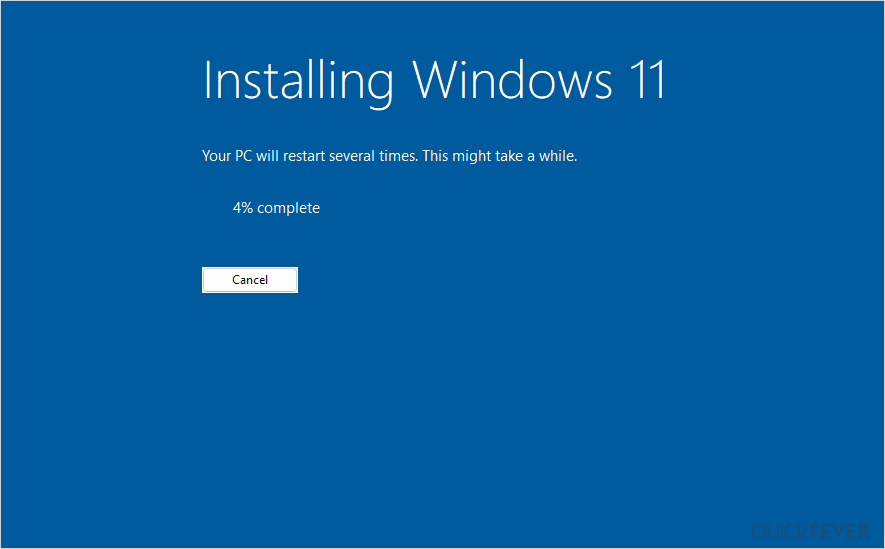
STEP 5. Again click on the next button. You will see a blue background screen with a progress bar, it will take somewhere 2-5 minutes depending on the type of internal storage. We always recommend SSD for operating systems like Windows.
Clean install Windows 11 version 24H2 using USB
The screenshots are of an early build of Windows 11 Insider Preview version 24H2. So the screenshots are a bit diffrent from the ususal once.
First grab a copy of Windows 11 using one of our article, from here and here.
Second use Rufus to create bootable USB, learn how to do that.
Plug in your USB. Hit the boot-key.
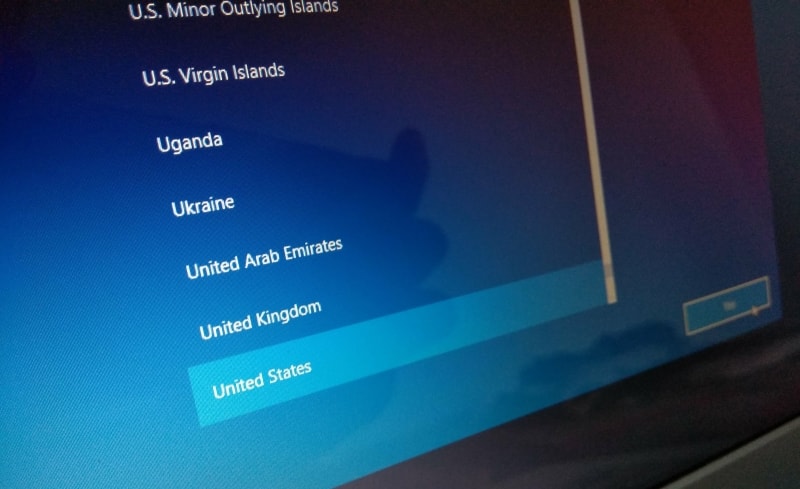
Select the language.
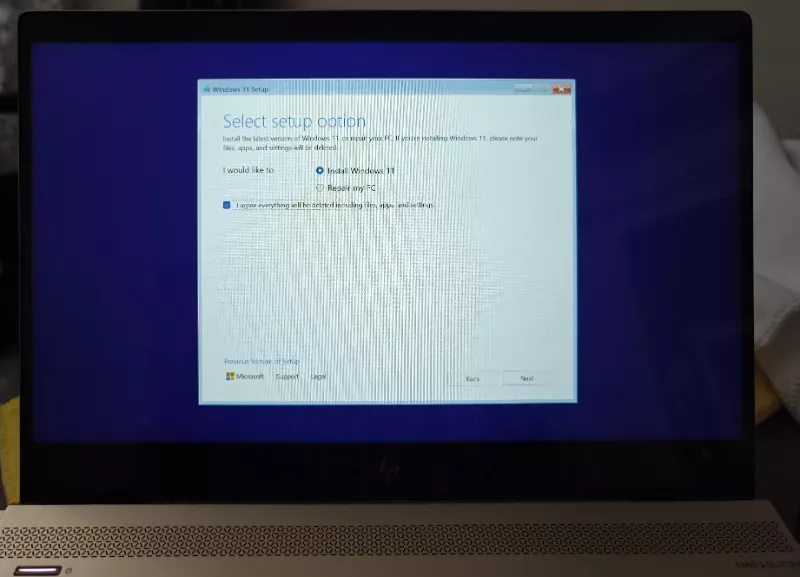
Select “Install Windows 11”
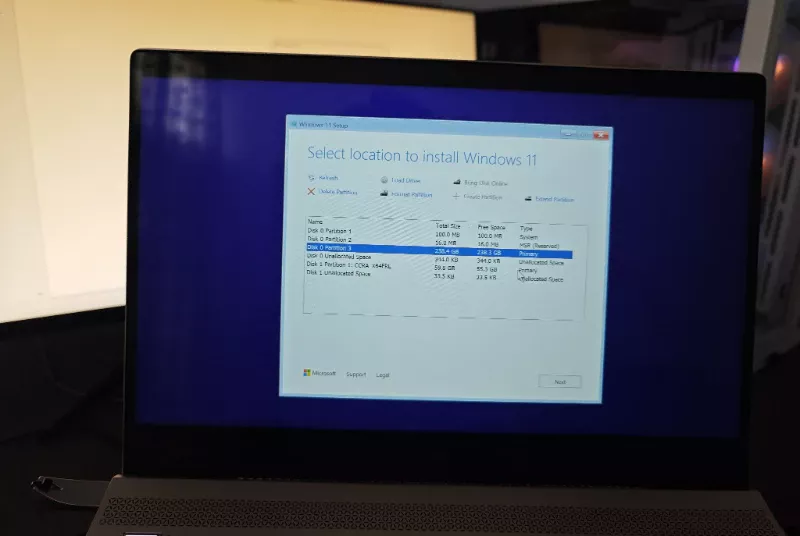
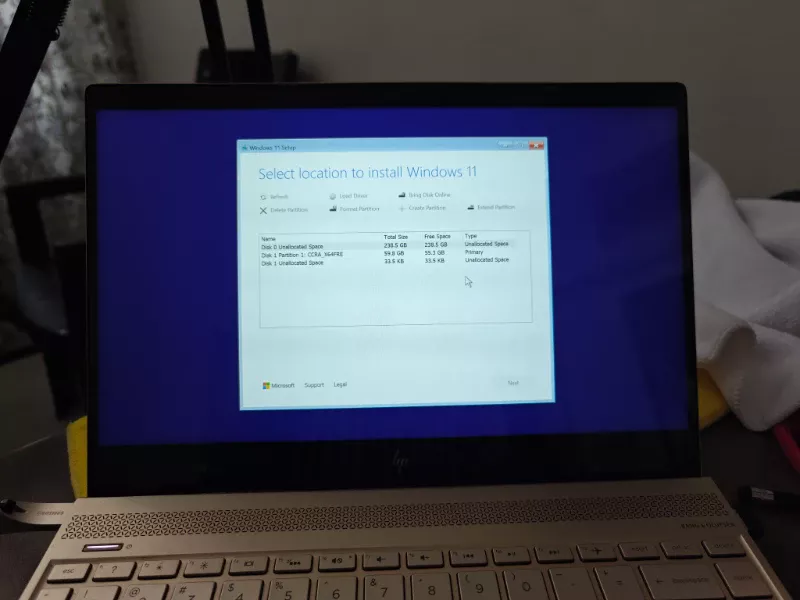
Choose which partition you want to install Windows 11.
Once you created Window 11 Installation Media, follow these steps one by one.
Booting into Windows 11 Setup
The Windows setup consists of two setup phases. First, all files will be copied from installation media. In the second phase, you’ll give a personal touch to your Windows installation.
Pre-installation Setup
Check if your PC can run Windows 11 use either this tool or this tool from Microsoft. Once it hit the green light, backup everything of your current Windows drive, (I’d perhaps copy only important things like images and media files).
Initial Setup Phase 1
Plug the USB and hit the restart button as hard as you can. No, we’re joking, use the Shut-down button or firmly press the power-on button (if the device is off-state).
When booting press a key to select boot device. Usually, the keys are F9, Del, F2 but check with your machine. Now access the “Boot from” menu and select your USB device.
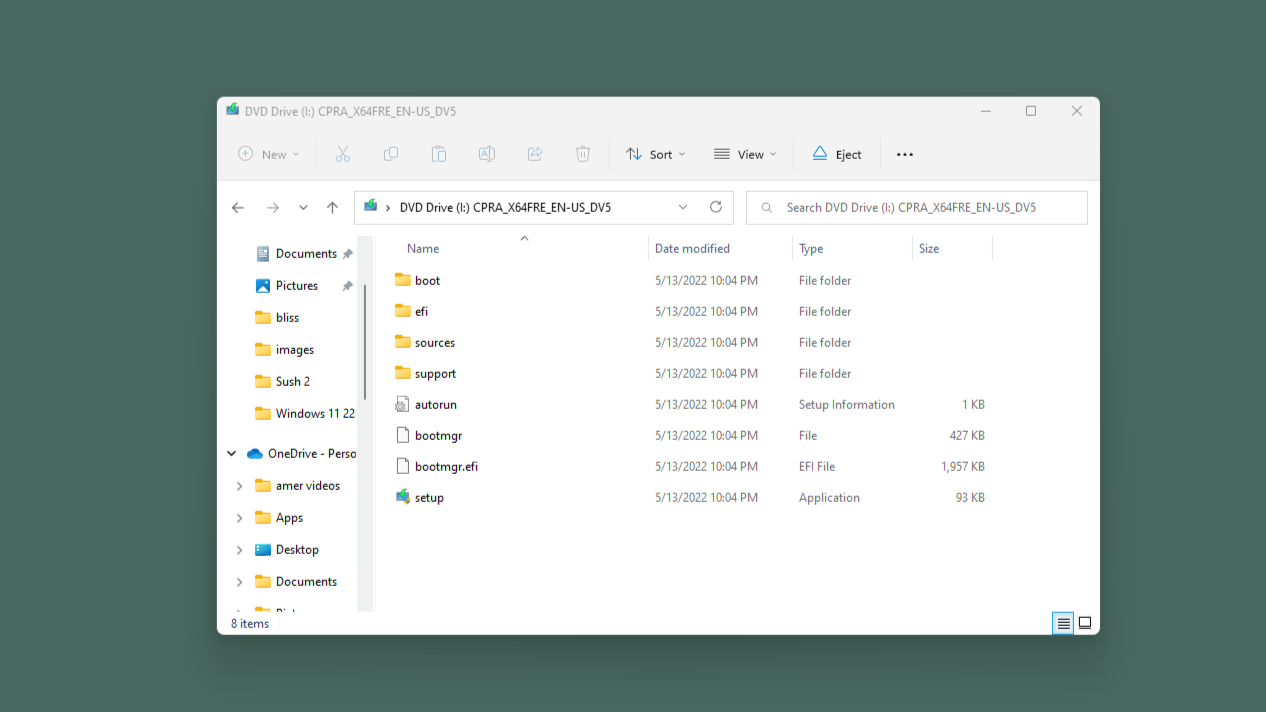
Once you select the USB drive, it starts the Windows 11 setup.
You’ll see these screen
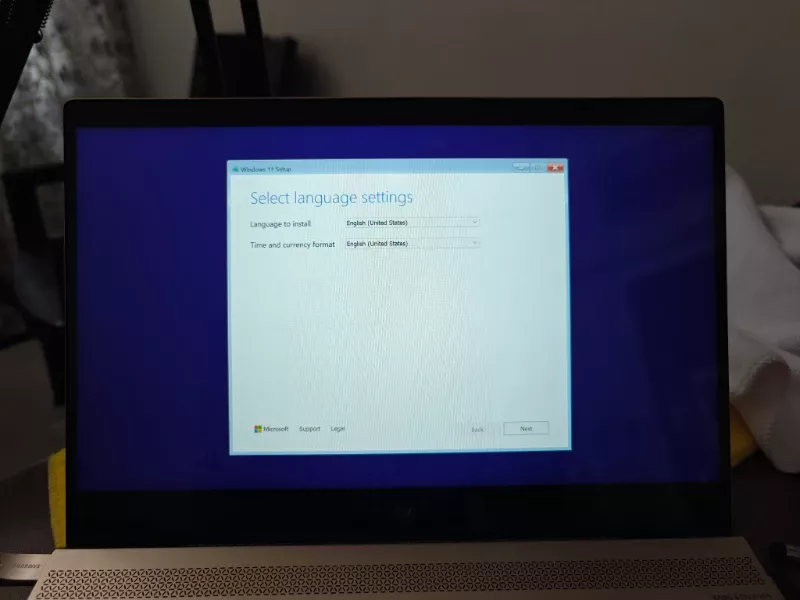
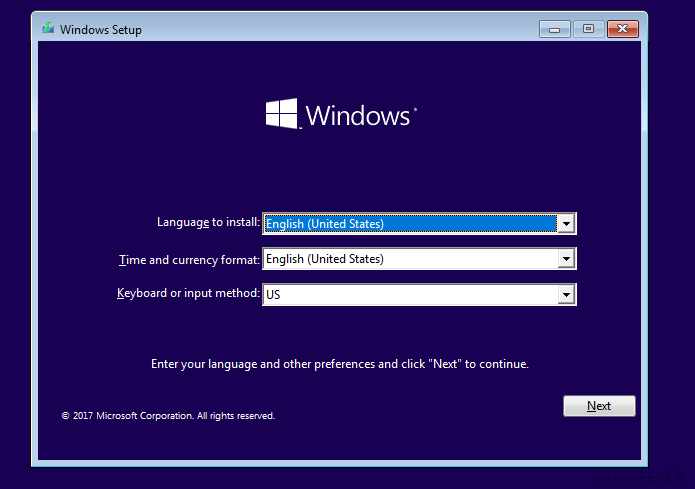
- Language, time, and Keyboard input method. Click next
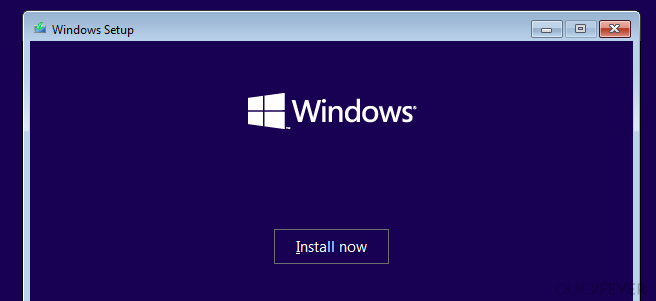
- Install now. Click on it.
- Setup is starting. Activate Windows. Enter the key or click I don’t have a product key.
- Edition selection screen. Select Windows 11 Pro or Home (if laptop) and click next.
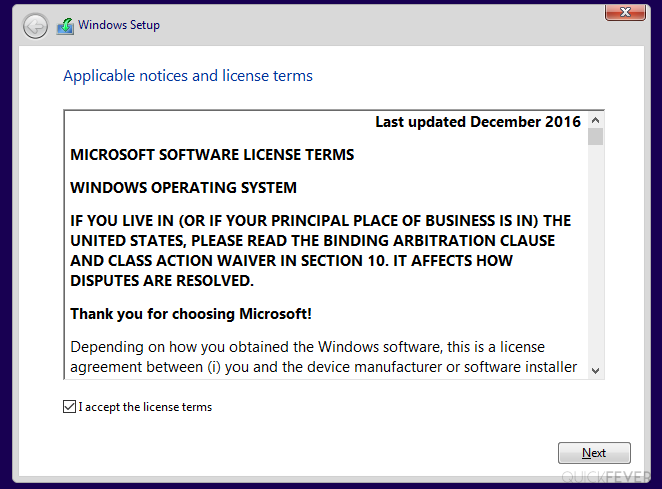
- Applicable notices and license terms. Agree to it and go Next.
- Custom: Install Windows only (Advanced), select this option to clean install Windows 11
- Select Partition. Select a drive, or delete and format a partition.
Your PC will restart, and you can now safely remove the installation media.
Initial Setup Phase 2
- A Getting Ready screen will appear for seconds to up to a few minutes.
- Select a country and Keyboard input method.
- Watch this video for details instructions.
- Getting things ready for you screen.
Post-installation setup
Once windows 11 installation is done you still need to update your graphics and audio drivers. Microsoft made it very simple for audio drivers and you get a generic driver which will work out of the box so you don’t have to install anything for audio. After this setup, if you notice uncomfortable resolution you have to install a graphics driver. When a device doesn’t have a discrete graphics card intel’s Ultra HD driver will be more than enough.
Windows 10 21H2 Installation Setup.
Plug the bootable media device or DVD and start your computer, access the “Boot from” option, and select the drive before the computer boots to the currently installed operating system. On my HP laptop, Pressing the F9 key loads the option to choose the USB Drive to boot to the Windows 10 setup.
You can also go to your BIOS setting and prioritize the bootable media device, so your computer can understand that you want to from that particular drive in which you have windows setup.
Initial Setup / Phase 1
If you have done this correctly you will see this screen. From here you can decide which languages you have to install and the time and currency format. Apart from this, the third option is given to you for the keyboard input method. After selecting the three options, you can click on the Next button.
On the next screen, you will see a big Install Now button you have to click on that button.
Note: Don’t click the repair button, it doesn’t help in fresh windows installation.
You will have to accept Microsoft’s application notice and license terms. if asked for a license key you can safely skip that.
Choose Custom: Install Windows only: As we advise always back up your files from HDD/SDD and do a fresh (clean) installation of Windows 10.
Now the setup will ask you which kind of installation do you want. The Custom option will lead you to the fresh installation of windows 10. The Upgrade option will take extra time and might be a little harsh on your computer and time.

The next screen will ask where to install Windows 10, you’re supposed to install it on the first partition. At that point, it allows modification such as creating, deleting, and formatting. Choose where you want to install windows, make sure that the partition has enough space.
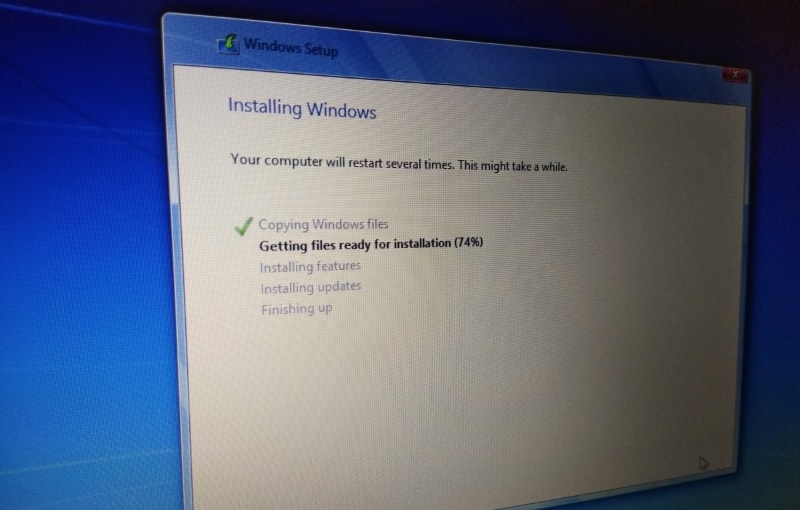
From here Windows setup will start copying files to your computer, the process goes from 0 to 100% and after that, it will ask you to restart your computer or will automatically re-start the computer after 10 seconds.
Windows 10 Setup Phase 2
Now remove any bootable media device, in the second phase of setup, select language, and keyboard language.
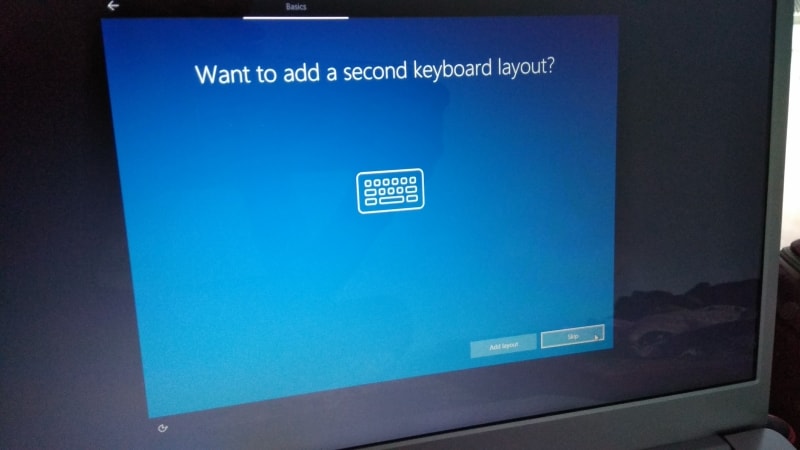
(optional) If needed add a second keyboard layout.
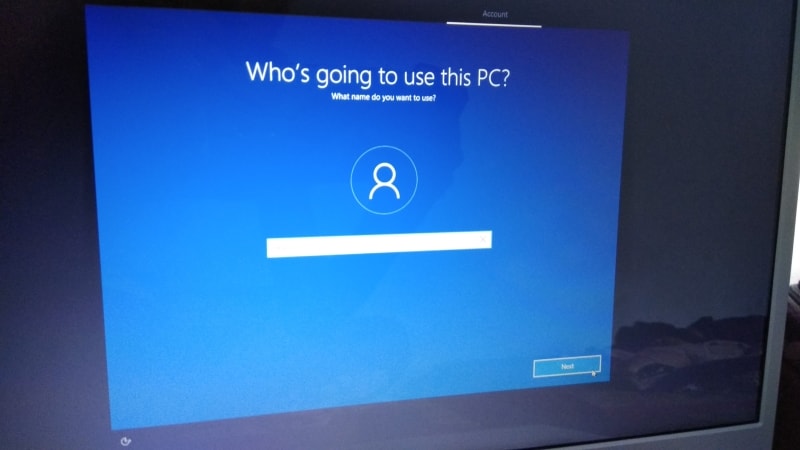
Name the PC, also you can set a password or sign in with a Microsoft account. If you don’t like entering the password each time, simply leave the password field.
You’ll be asked a few other steps in which you can enable Cortana, configure privacy setting,s and connect to a network.
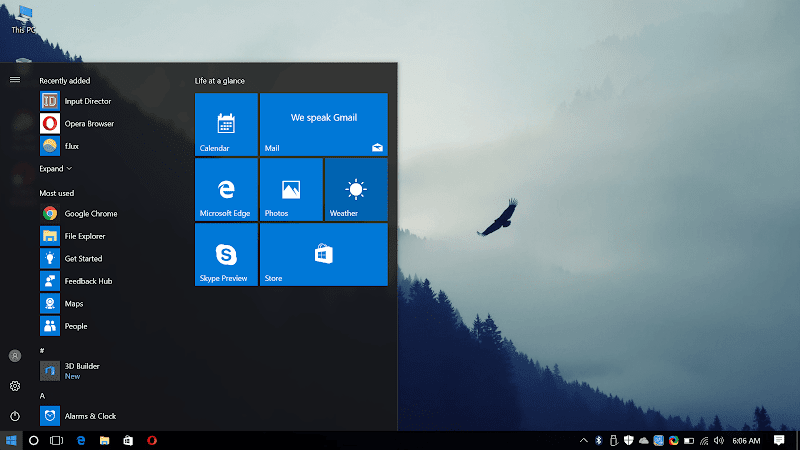
Give your Windows 10 First Magic Touch.
- List for Windows: Best Essential Windows Apps and useful software.
- Enable desktop icons: Right-click on the desktop and select personalize, select desktop icons, and select Computer
- You may want to remove windows 10 forced apps and advertisements, As Windows 10 occasionally install several apps and games on your device that consume bandwidth, moreover disable automatic update service to permanently strict-auto-app-installs.
- Enable a transparent taskbar or change the color.
- More windows 10 registry tweaks.
Did you install windows 10 successfully, or faced some issues? tell us in the comment section.
The article was updated to include Windows 11 instructions in July 2022.


1 comment
I installed prime OS exactly by the same the process as it is shown in its official website . I was using windows and created a partition of 20 gb and then made a new volume and format it in ntfs format.Then i installed the prime os iso file from official website and then use a sandisk pendrive of 16 gb and then make it bootable using rufus and i selected the format option ntfs and then restarted my pc and go to the boot menu using f12 (my pc is dell vostro i3) and selected sandisk in uefi option and then a screen for partition. I selected the one which i created and then format it in ntfs format . I also installed grub menu and then it installed successfully.And i succesfully used it but then when i tried to boot into windows it didnt boot. Dell logo appears and the loading circle.I waited for an hour and it stuck at it.Then i tried to reinstall windows. So i downloaded the iso file of windows and make it bootable in a pendrive using rufus in ntfs format.Now when i selected my pendrive in the boot menu.First it shows some texts in a black screen.one of them was “An NTFS is already loaded”Then it shows a blackscren with some whitish blurry straight marks and then within the marks it shows the windows logo and load and when it load it only shows blue screen and nothing happens.My prime os is working fine but how can i boot windows. I am really in trouble plzz someone help.Any kind of help will be really appreciated.
Thanks