Learn how to make your computer not sleep even when you close it (lid), Sometimes it’s important to close the laptop but not put it in sleep mode. Curious how that works? Let’s find out.
A couple of reasons when you want your laptop to stay awake when the Lid (a hinged cover on which your screen is placed) is closed. One is to close the laptop lid and use an external monitor (windows 8, windows 10) and to close laptop without letting it sleep, in this post we’ve tried to cover how you can keep your laptop awake while the lid is closed.
Close laptop without sleep in windows 10
If you are running on Windows 10 or 8, you can easily plug an external monitor to use it as a secondary display, you probably wanted to close the lid of your laptop and start staring at the external monitor. By default Windows, 10 will put the laptop into sleep mode as soon as you close the laptop’s lid. and sometimes you’ll have to plug a USB mouse/keyboard to resume your laptop session.
Here is the easy workaround for this issue, after that you can close your laptop’s lid without interrupting anything. Follow the steps, and please note that the steps are written correctly according to the windows 10, older windows may have slightly different steps for the same, use common sense in case.
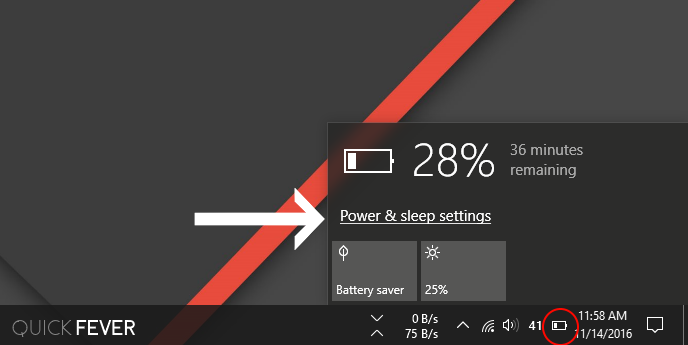
Step 1. Open power settings.
Click on the power/battery icon from the taskbar, and then choose “Power & sleep settings“. or You can hit the start menu and search for “Power options“.
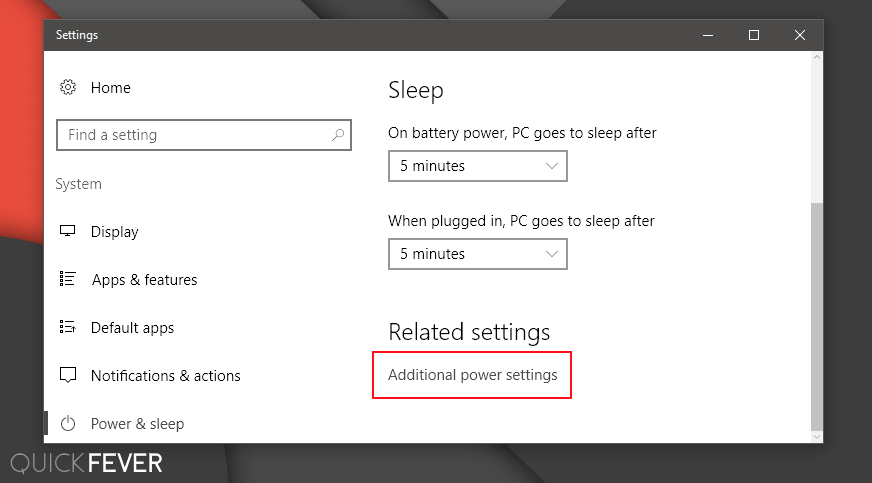
From the opened box, there will be a “Advanced power options“, you need to go there.
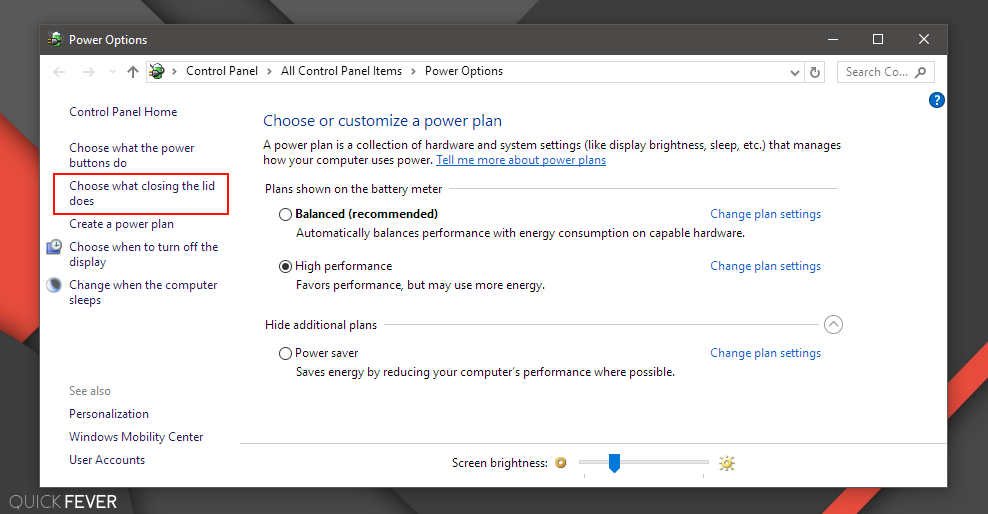
Step 2. Access Lid settings
Change what happens when I close the lid windows 10
From the right side, there will be a link to the “choose what closing the lid does“, or you can search the same from the start menu. Sometimes you may not find the option, it happens when you did a fresh Windows installation, and when you don’t install a graphics driver.
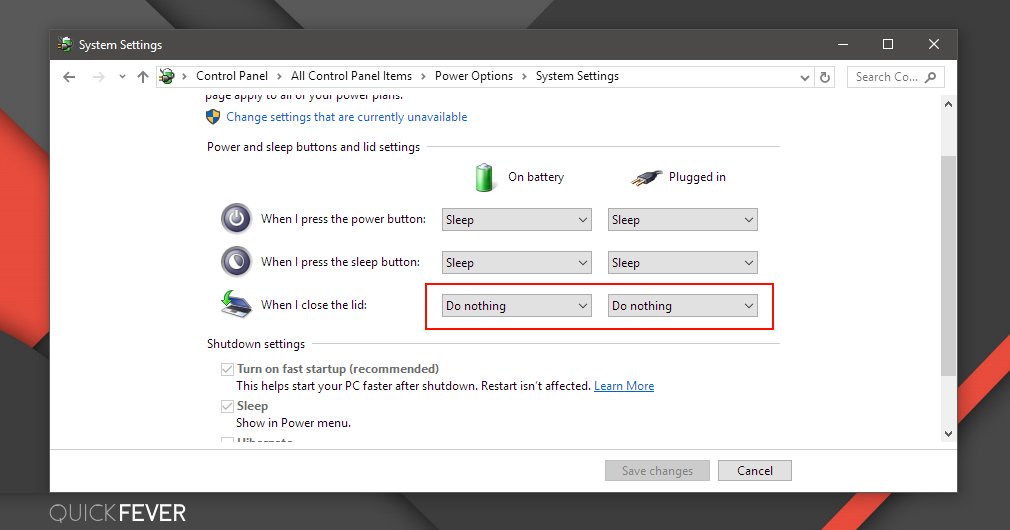
Step 3. choose what the closing lid does.
This is the setting to change what happens when you close your laptop windows 10 or older. Under the When I close the lid, set “Do nothing” in both boxes. So there will be no effect on your computer when you close the lid. Next time closing laptop lid will not make it sleep and it can continue doing the work while the lid is close.
(You can directly open this setting page by searching “change what closing the lid does” in start menu search box.)
Below are some usage of keeping the laptop awake while lid the closed.
1. Close the laptop and use a monitor in windows 10:
The above steps are somewhat similar to each windows version, most of the external monitors are plug-and-play, and thus you don’t need extra settings to use the external monitor while your laptop’s lid is closed. In case ensure you’re doing this right way.
Steps to connect an external monitor.
By default Windows will detect and start using the external display, if not you can press the Win + P button and select how you want to use screens. If you solely want to use the external display click on the “Second Screen only“.

2. Using a remote access software.
You can configure your laptop so it can be accessed remotely via another device (such other computer or smartphone).
Best Remote Desktop Access Software
3. Turning the screen off without waiting.
You can set the laptop screen auto-off to a minimum of 60 seconds, however, there is a tool called Screenoff v2. that triggers turning off the screen when you open it without closing the lid.
Was your laptop keeps shutting off, prevent the issue and make it not sleep using the above-given instructions?
If you think something nasty going on your computer, comment below and we’ll do best to troubleshoot your issues. Please ask a question related to this thread, opposite comments will be ignored.
1 comment
Thank you! I feel like Windows 10 settings are still a tiny bit too complicated because they are split between two categories. The actual Windows 10 UI settings and the control panel. I hope that they’ll change that because it’s confusing.