Windows.old folder is a leftover folder when you upgrade to a newer version of Windows 11. If there was an existing Windows, it will get moved to a new folder called Windows.old in the root C:/ directory. This article might come in handy when you have recently installed Windows 11 on a partition where there was an existing Windows. This is a good practice value to leave the partition unformatted so you can go back to this folder and see if there is some important file left out
Clean and gain storage space by deleting temporary files on a Windows 11 PC. Temporary files are leftover and useless files but Windows gives you the option to either keep them or delete them.
Sure you can just delete them and save some space on the hard drive. But here is the catch, there is more than one location where temporary files are created and sometimes abandoned for no reason. This guide will cover such temporary file’s location and ways to get rid of them.
RECOMMENDED BY OUR EDITORS
Windows 11 Insider Preview ISO Offline Download
How to Speed up Windows 11 Performance; Guide 101
What Exactly Are Temporary Files?
Here is a quick reference of the temporary file categories Windows 11 lets you manage:
- Delivery Optimization Files — Update cache for peer-to-peer sharing. Safe to remove.
- Downloads — Files in your personal Downloads folder. Review before deleting.
- Windows Update Cleanup — Leftover files from past updates. Safe to remove.
- Windows Upgrade Log Files — Diagnostic logs from upgrades. Safe to remove.
- Windows ESD Installation Files — Staged setup files. Safe after a successful install.
- Temporary Files — General app and system temp data. Safe to remove.
- Temporary Internet Files — Browser caches for faster page loading. Safe to remove.
- Thumbnails — Image and video previews. Windows will recreate them as needed.
- Microsoft Defender Antivirus — Non-critical scan and definition cache. Safe to remove.
- DirectX Shader Cache — Graphics shader data. Games will rebuild this automatically.
A simple list of temporary files in Windows 11 which you can manage.
- Downloads
- Windows Update Cleanup
- Windows Upgrade Log Files
- Windows ESD Installation Files
- Temporary Files
- Temporary Internet Files
- Thumbnails
- Microsoft Defender Antivirus
- Directx Shader cache
- Delivary optimization files
Delete All Temporary Files in Windows 11
A program such as big as the Windows 10 and software’s setup are generally compressed, In order to install them on your computer, you’ll have to go through a process, which we often call setup or installation. In the installation phase, the software package should be extracted. After that, your computer writes files to the disc so you can use the software once it’s installed. The extracted files while the installation will still be there. Some programs clean them automatically while some do not.
1. Clear basic temporary files.
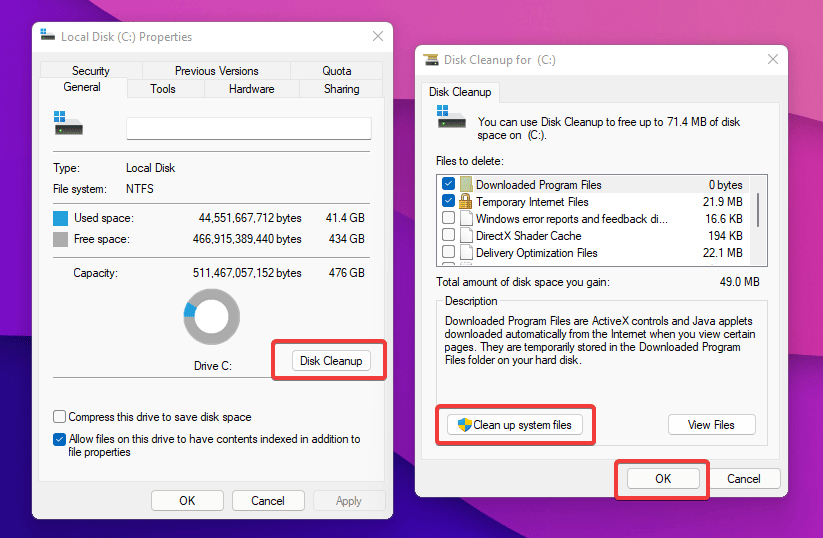
Right click on the Local Disk (C:) and from its properties click the Disk Cleanup button, the tool will scan for temporary files and other non-useful files. In the result box, scroll down and find and tick the Temporary Files now to clean it, click Ok.
You cal also launch the Disk Cleanup utility from the Start Menu > All apps > Windows tools > Disk Cleanup. There is an another way to open the tool. It can also launch by pressing Win + R > Type cleanmgr to launch the same.
There will be many types of junk and temp files, you can tick them all for sure, just you need to know what are you doing. But most of the free space can be achieved by deleting temporary files. Or just tick everything and delete them — that’s what I always do.
2. Clear advanced temporary files.
Follow the above same step but when the result show, click on the “Clean up system files,” this time an advanced result will be shown. You can see below that now temporary files are larger in size, as it includes system level temporary files. You can also clean Windows installation temporary files from here, such as Windows.old folder and other junk files created when Windows Update occurs.
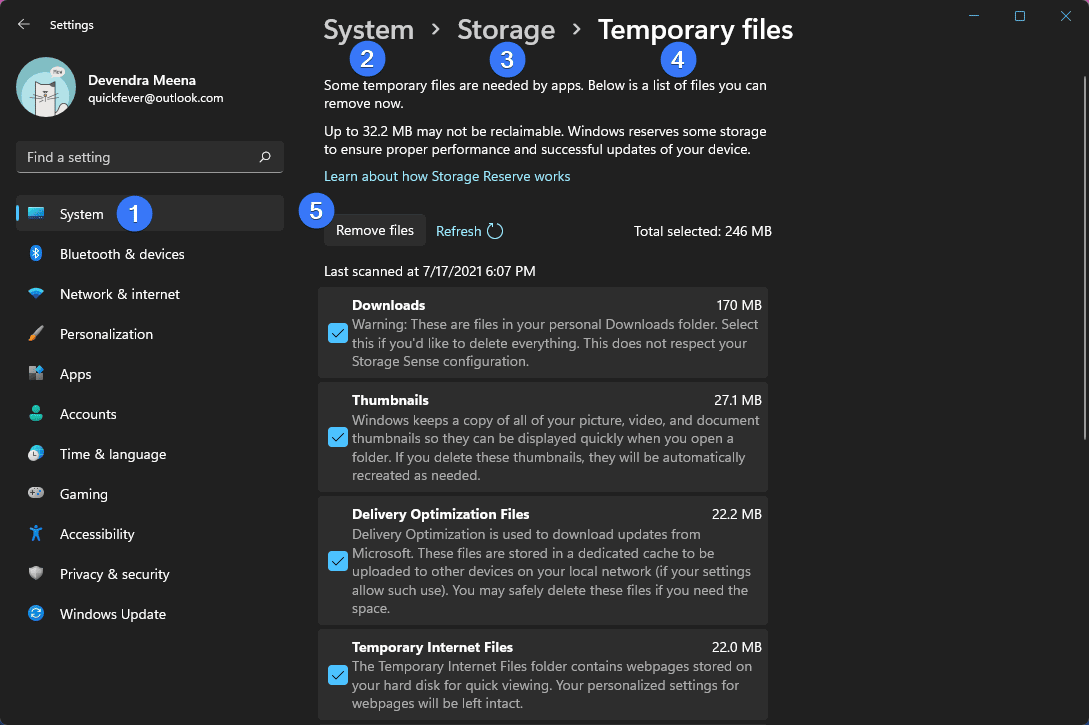
We’ll use new Settings for clearing advanced files temporary files. Open your windows 11 settings by pressing the Windows key + I button. Then navigate to systems, then setting, then storage, then temporary files. Click on everything that you wanna delete? And at last click on remove files to start the process. If you recently updated windows, it might take a while.
3. Deleting the Temporary Folders.
Disk cleanup tool removes the most of the junk and temporary files. But there are more places where are other temporary files are stored. We call them Temp folders. They are actually 2 different folders. How to open them?
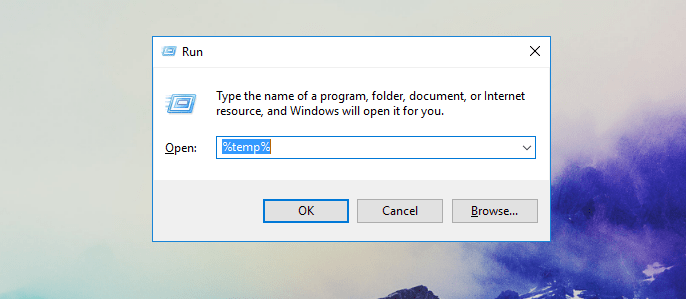
Press Win + R > Type “temp” or “%temp%” one after one. When the Window opens, select all files and delete them.
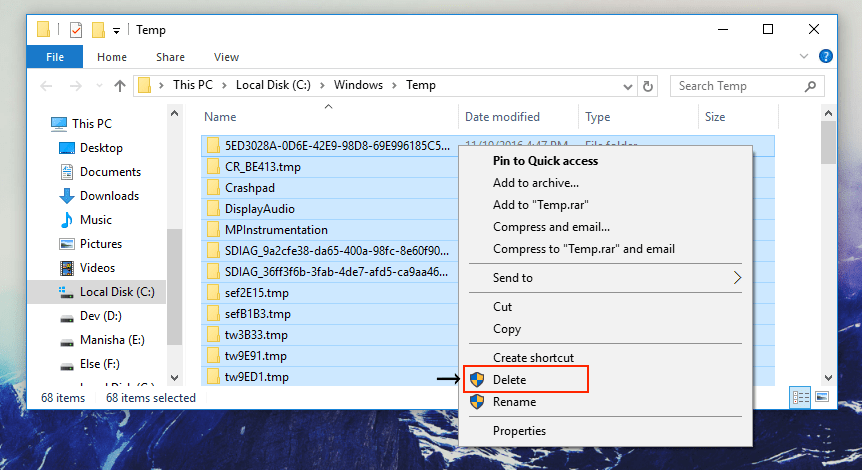
But be extra careful and manually check the temp folders, most of the time they are a totally waste, and you can delete and get rid of them immediately. There are also 3rd party cleanup tools like “Ccleaner, ” but we won’t recommend them, the built-in tool and some knowledge is just enough to remove all the temporary files and folders from your computer.
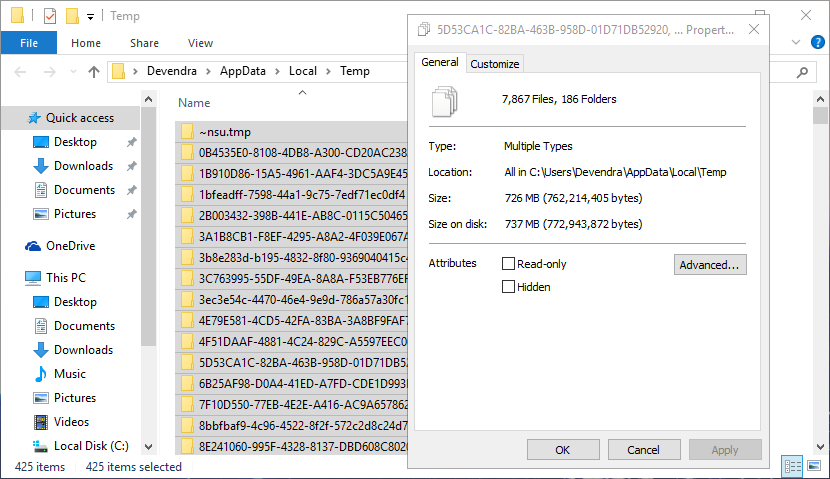
Another location of temp folder can be accessed by typing “%temp%” using the Run dialog. Or manually you can find the folder at this location “C:\Users\YOUR_USERNAME\AppData\Local\Temp” using File Explorer.
Let’s see how much space these files are taking on my computer — around 726MB. And this was after just a couple of days from the last time cleaned this all. So basically you should be cleaning this junk at least once in a month. Or once in every 2 months. How much you care of your computer is up to you.
So now you’ve some more free space, check these Software & Apps list to find something new to install on your computer.
4. Command-Line & Advanced Cleanup
For power users and scripted automation, the Command Prompt and DISM offer deterministic, high-speed cleanup. These methods are irreversible — double-check paths before executing.
Quick Commands
- Delete user temp files:
del /q /f /s %TEMP%\* - Delete system temp files (admin required):
del /q /f /s C:\Windows\Temp\* - Flush DNS cache:
ipconfig /flushdns
DISM Component Store Cleanup
The WinSxS folder holds previous component versions and can grow significantly after updates. Use DISM to reclaim space safely:
- Analyze component store:
Dism.exe /Online /Cleanup-Image /AnalyzeComponentStore - Clean superseded components:
Dism.exe /Online /Cleanup-Image /StartComponentCleanup - Deep cleanup (irreversible — prevents uninstalling older updates):
Dism.exe /Online /Cleanup-Image /StartComponentCleanup /ResetBase
Caution: The /ResetBase switch permanently removes old component versions. After running it, you cannot uninstall updates that were superseded prior to the reset. Only use this on a stable, backed-up system.
5. Automate cleaning temporaty files using storage sense
Open storage sense settings from Windows ➜ System ➜ Storage ➜ Storage Sense.
First tick the cleanup of temp files option, turn on Automatic user content cleanup feature. Next you have to choose on what basis you want to run storage sense. For example, I have opted for every day so it will run every day; cleaning up all my temporary files and folders. You can also opt to automatically clean up your recycle bin and unused files from download folder.
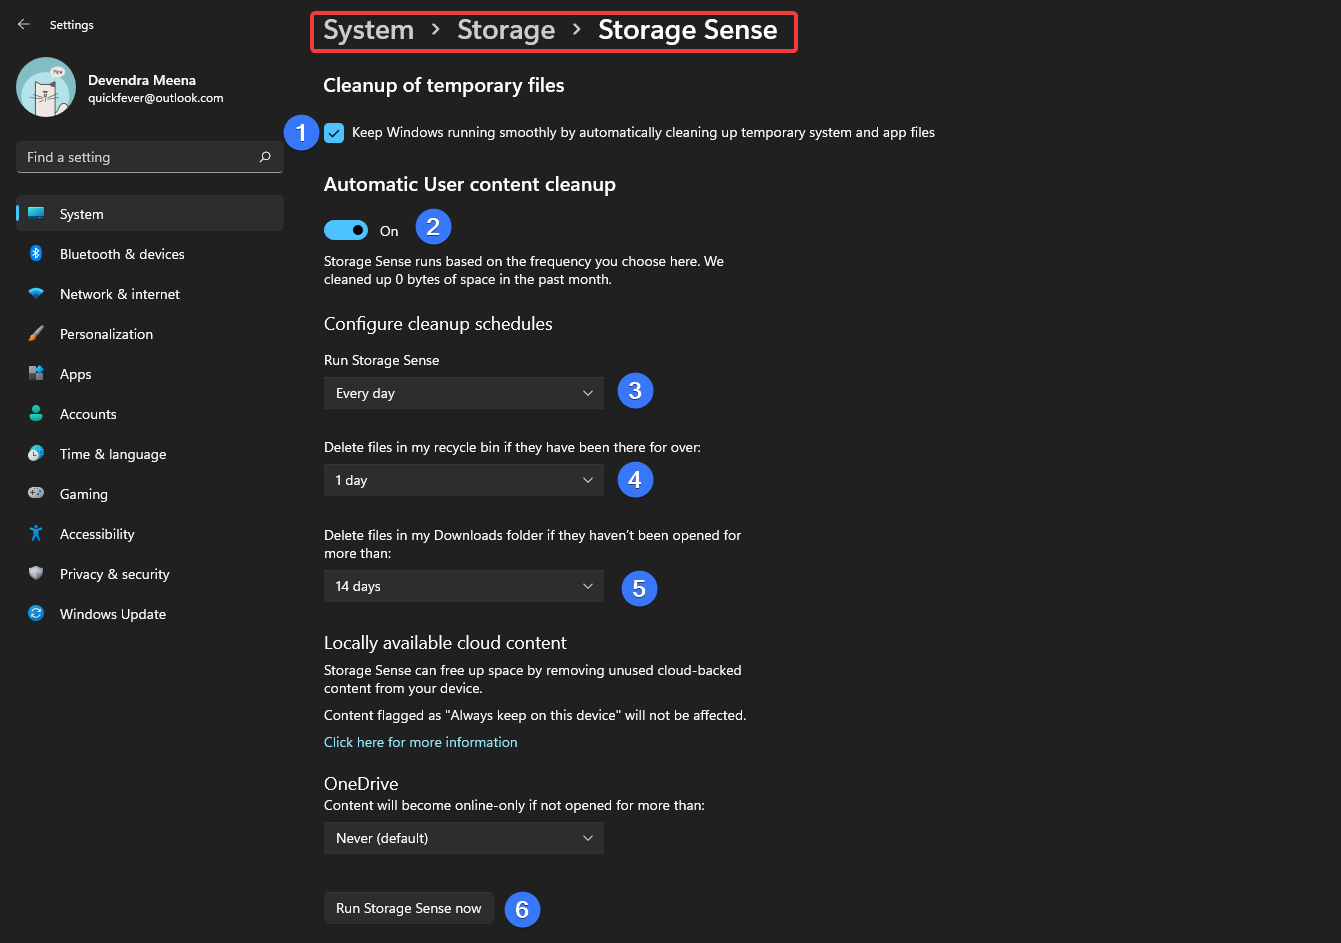
Furthermore, you can schedule some cleanup of your download folder and recycle bin automatically. The button at the bottom of the page will enable you to run Storage sense manually.
Bonus: Keyboard ninja’s out there can use del /q/f/s %TEMP%* command to wipe the temporary folder.
20 Best Software to Install On Windows
Quickfever’s List for Windows: Best Essential Windows Apps
Recommended Cleanup Schedule
Casual users: Enable Storage Sense to run weekly or monthly. Run Settings → Temporary files every 2–3 months.
Power users / developers: Configure Storage Sense to run weekly. Manually clear %temp% weekly and run Disk Cleanup monthly.
Before major updates: Ensure at least 10–15% free disk space. Run Disk Cleanup with “Clean up system files” to remove update leftovers.
Best Practice: Always back up important files before any irreversible system-level cleanup (like removing Windows.old or running DISM /ResetBase). Built-in tools are sufficient — avoid unvetted third-party “optimizer” apps.
Windows 11 creates temporary files constantly — from app caches and update installers to browser data and system logs. Left unchecked, these files can quietly consume gigabytes of storage and slow down your system. The good news: Windows 11 gives you several safe, built-in ways to clean them up — no third-party software required.