The new Windows 11 received good feedback and thousands of users have already upgraded to it. In case your computer is not running as fast as it should, try the following methods to speed up Windows 11 and make it faster and use fewer resources. This dramatically improves the performance of your computer, so you can play heavy games and browse the internet with 56 Google Chrome tabs. This tutorial teaches you about Windows 11 performance tweaks that actually work.
- How to Disable Windows 10 23H2 Built-in Advertising Completely
- Windows 10 Performance Tweaks to Make it Faster
- 10 Alternative PC Operating Systems
- 4 Best Chrome OS Forks for your regular computer
- Install Windows 11 on Legacy BIOS and no TPM 2.0
- Best Windows 11 Apps to Use in 2023
Windows 11 is way better than any of its predecessors. Some people still use Windows 10 for many reasons. One big reason is that they’d have to buy expensive machines just to run Windows 11 on it. While many people do use alternative operating systems, apart from forced ads and pre-defined settings, Windows 11 is the best operating system the world has ever seen.
Windows 11 Performance Tweaks
Follow these top 10 checklists and make sure your computer is running Windows 11 and let’s proceed to make it — faster.
1. Remove Built-in ads (Apps & Games)
How to Disable Windows 10’s Built-in Advertising Completely; this guide fits perfectly with Windows 11.
Microsoft suggests apps and games in the Start menu and sometimes installs them automatically; this is covered under Microsoft’s terms, so there is nothing wrong with it. Since you own the computer, you have a reasonable choice whether or not to let Microsoft decide what to install on it.
When you finish installing Windows, open your Start menu, right-click, and remove all the tiles (games and apps) that you don’t want Microsoft to install.
2. Disable Animations & Visual Effects
There is some setting in Windows 11; tweak them and take advantage by limiting animations and visual effects which directly speeds up system performance. This dramatically increases system performance, although you’ll be missing beautiful animations.
There are some settings in Windows 11. Tweak them and take advantage by limiting animations and visual effects, which can directly speed up system performance. This can dramatically increase system performance, although you’ll be missing beautiful animations.
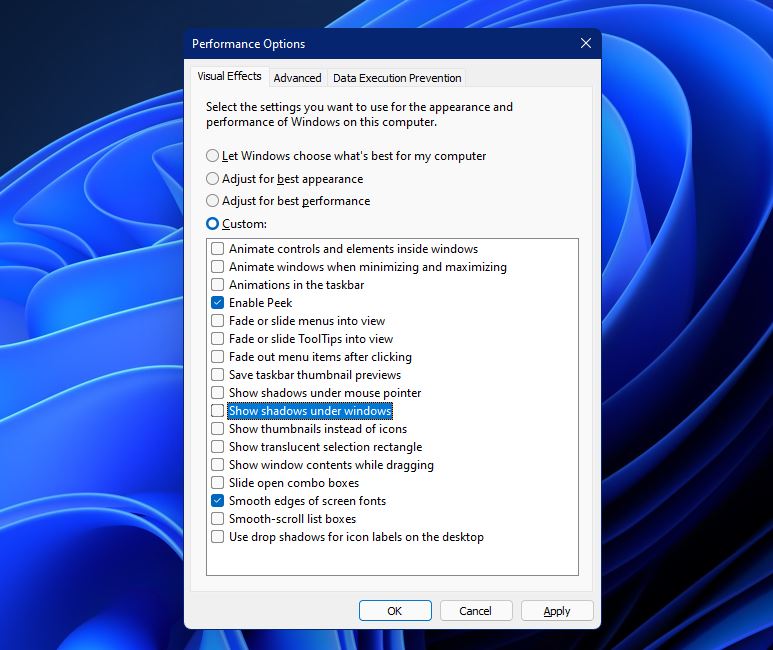
[1] Disable windows animations and visual effects; from Performance Options. Click on the start button and type performance options and select the “Adjust for best performance” option under the very first tab Visual Effects. Another option to open those settings is through the Run box, press the Win + R key, type SystemPropertiesPerformance hit the enter key.
As you can see in the image, I choose to have a few settings turned on. Turning them all off is going to hurt the UI.
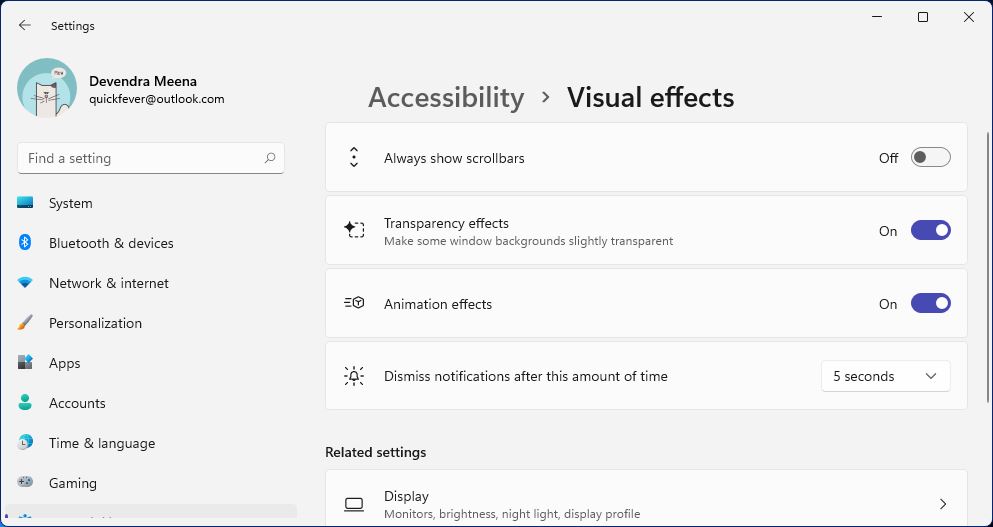
[2] Another way to reduce system-level animation: Head to Settings ➜ Accessibility ➜ Visual Effects ➜ and turning off the following
🚫 Turn off transparency effects in Windows 11
🙅 Automatically hide scrollbar
🙅 Turn off Animation Effect
There is also an option to remove the desktop background, but I don’t recommend blacking out your desktop screen, it won’t look great either.
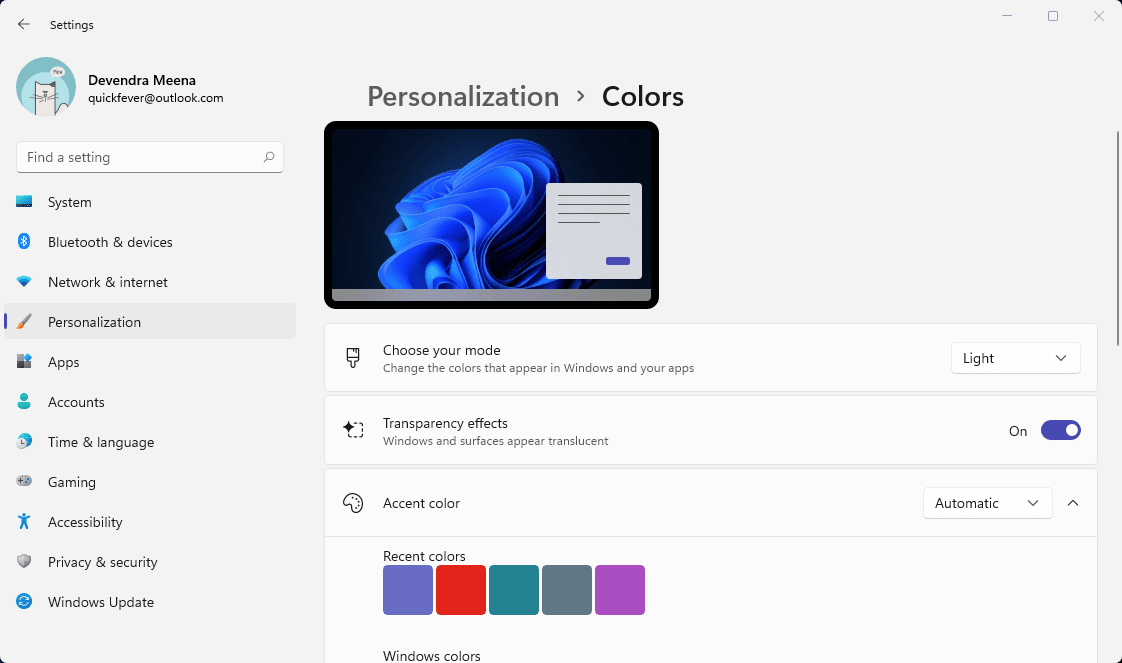
3. Disable Color Settings
Open Settings > Personalization > and disable the transparency effects and optionally custom colors. Use a solid color instead of a transparent accent color. This is very useful to increase performance and speed up your Windows 11. Check the following guide to disable the transparent colors in the taskbar and from the start menu.
Now navigate to Settings > Personalization > Accent color and do the following.
Turn off 🚫 | Show accent color on start and taskbar.
Turn off 🚫 | Show Accent Color on title bars and Windows border.
Change Taskbar Color in Windows 10 This Way – Quickfever
It will not impact much or save a lot of RAM or increase performance. However, disabling search options will make them function smoothly.
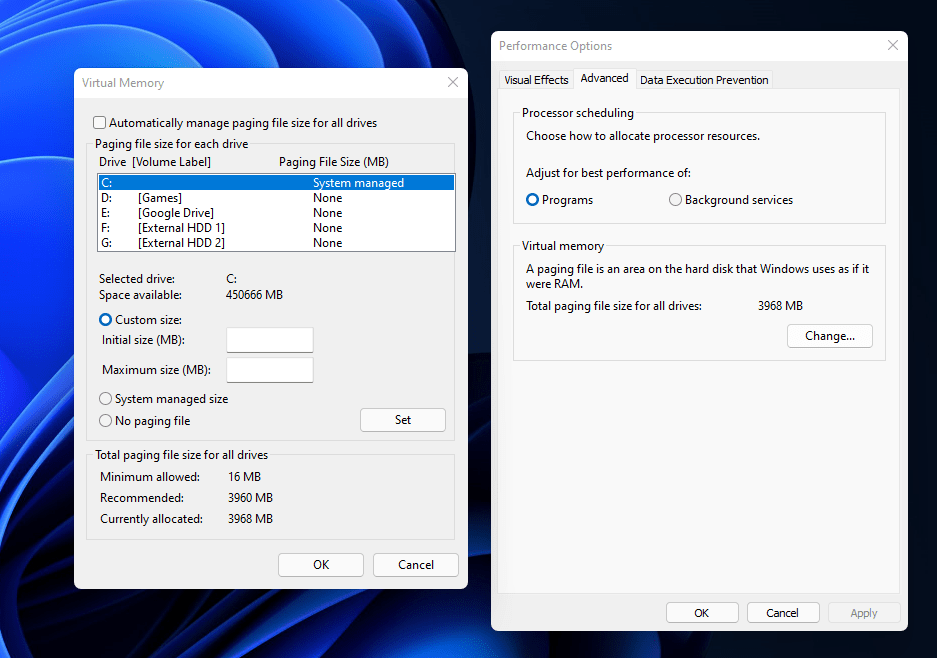
4. Increasing Virtual Memory in Windows 11
In this case, your computer does not have enough RAM to handle Windows 10. Increase the virtual memory to prevent your apps from crashing and the system from lagging or freezing next time. Follow the guide below to adjust or increase virtual memory.
How to Fix and Adjust Virtual Memory to Speed up Windows 10
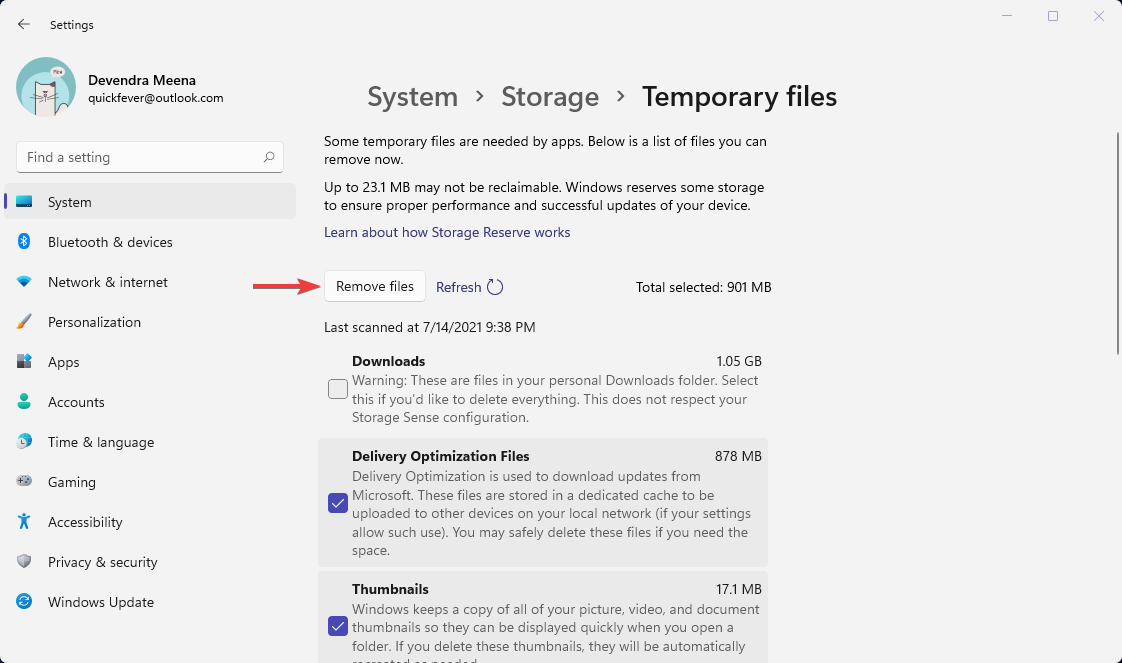
5. Removing Temporary Files through Settings
“It’s very basic. The more garbage on your computer, the slower it will work. Defragmenting should be enough to run your computer as fast as it could be with your hardware specs. But when your computer does a Windows Update, it increases the number of temporary files. This can indirectly affect your computer’s speed, and it is advised that you clear these temporary files once a month or twice a year.”
Navigate to System > Storage > Temporary files, tick ✅ everything that you feel useless, and Remove them by clicking the Remove files button.
Type Windows + R and enter temp and %temp% and delete everything inside these two folders. There are multiple ways to delete temporary files, follow the below-detailed guide. How to Delete Temporary Files in Windows 10 – Quickfever
6. Disable Features
If your concern is RAM usage, you can disable programs and features to save RAM whenever possible. Please note that disabling a program may interrupt other applications or features. We do not recommend disabling all Windows programs and features. Use your common sense and disable programs that you rarely use.
6.1 Windows Update: Well you can disable automatic updates to save both bandwidths and avoid processor stress when apps are being updated, very often. But you should know that you won’t be able to download apps from the Windows store, neither purchase music nor TV shows, you’ll have to re-enable Windows update to make them work.
- How to Completely Disable Automatic Windows & Defender in Windows 11
- How to reinstall windows store and other Built-in Windows Apps
- Windows 10 Store App Stuck and Not Working? Here’s how to Fix
6.2 Cortana: Cortana is no doubt useful, even funny and funnier sometimes, and understands loads of commands and questions. But if you want to get it disabled here’s how.
- How to Disable Cortana in Windows 10 in One-Click – Quickfever
- Top 60 Funny Question and Commands You can Ask Cortana
- Funny Things To Ask Cortana We’ve list of 300+ Commands and Q’s
- 20 Funny Cortana Commands you Won’t believe until you Ask Cortana
6.3 IE11: Internet Explorer shouldn’t be there when an advanced Edge browser is there. IE 11 can be uninstalled using the “add or remove windows features” app.
7. Removing and disabling programs
[1] Uninstalling Programs: You should remove all those installed programs such as rarely used programs.
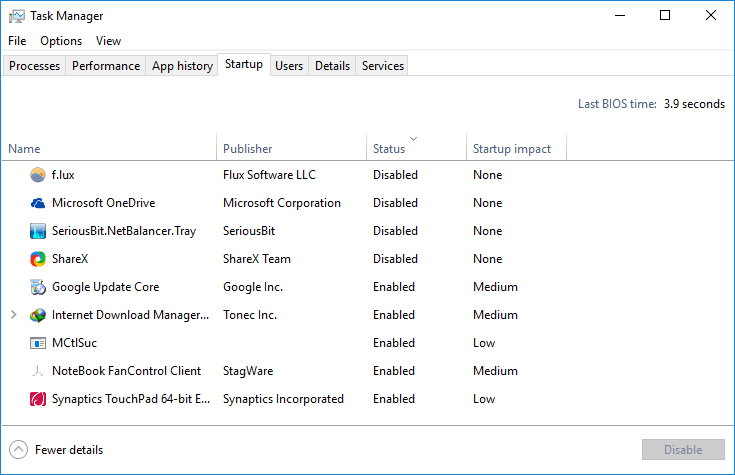
[2] Disabling startup programs: You can save some RAM and CPU stress by disabling programs when Windows starts. To do that, open Task Manager and go to the “startup” tab. See if there are any unwanted programs you can disable. It is not advised to disable driver-related programs, especially those from publishers like Microsoft or Google.
8. Refresh your Computer.
A fresh installation is required when your Windows 10 is completely messed up. Here are a few guides that will help you from downloading a Windows 10 ISO to installing it on your computer.
- Download Windows 10 ISO
- How to Install Windows 11 From USB
- 20 Best Software to Install On Windows 10
- Quickfever’s List for Windows: Best Essential Windows Apps
9. Make Windows 10 boot faster.
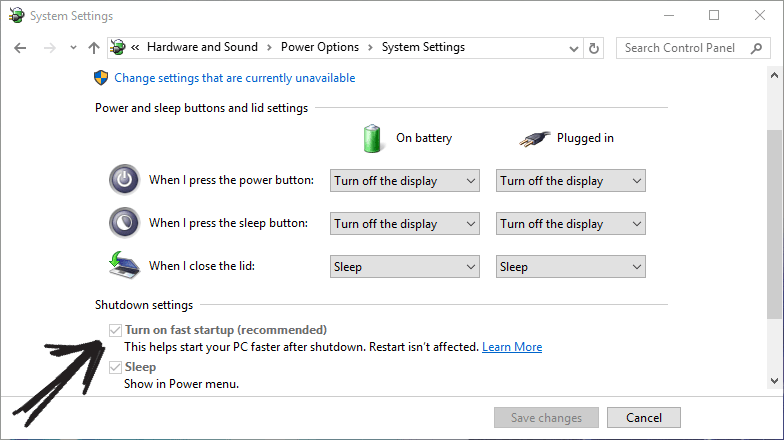
However, if you do all the above steps regularly your Windows 10 will boot as fast as it can, a normal Windows 10 Boot is 30 Seconds. Ensure that the “Fast startup” option is turned on. To check search “Power Options” > what the power buttons do > under shutdown Settings, tick the “Turn on fast startup” option. Also, note that you won’t be able to toggle the fast startup option unless you click on the top button that reads ‘Change settings that are currently unavailable.’
10. Choose accordingly
You don’t have to follow each and every step. You do not need to follow all the steps precisely. Just use common sense, analyze your computer and apply methods according to them in order to make your windows 10 faster.
2 comments
This is just junk!
Almost none of this exists in Windows 11; there is no Performance Options, there is no Visual Effects under Accesibility etc. etc.
This is a guide for Windows 10, white labeled as if it’s for W11 while most of this doesn’t work!
Don’t waste your time on this crap
Windows 10 is no different and the screenshot above are on Windows 11, so how can you say such options doesn’t exist on Windows 11. TIP: Don’t use a de-cluttered Windows 11 ISO you found on the internet.