An external hard drive is a convenient way to back up and store large amounts of data. However, during daily use, unexpected disconnections or file system glitches can cause the MBR (Master Boot Record) or partition table on your external drive to become corrupted. When that happens, Windows may show the disk as unallocated, inaccessible, or RAW. In this guide, you will learn how to fix the MBR on an external hard drive and regain access to your files.
How to Restore permanently deleted files (EaseUS)
The Best Disc Imaging Software for Windows to Clone Hard Drives
Computer won’t boot at all? If it is your computer’s internal boot drive that is failing with errors like “BOOTMGR is missing”, see our dedicated guide: How to Fix Common MBR Issues in Windows 10 and 11.
There are a few clear signs that an external hard drive has a damaged MBR or partition table: Disk Management shows the drive as “Not Initialized” or “Unknown”, File Explorer asks you to format the disk before using it, or CHKDSK reports an error stating that the master file table or boot record is corrupted. You can fix this either directly inside Windows using Command Prompt, or by using a Windows recovery media disk.
How to Create a Windows Recovery Bootable USB Device
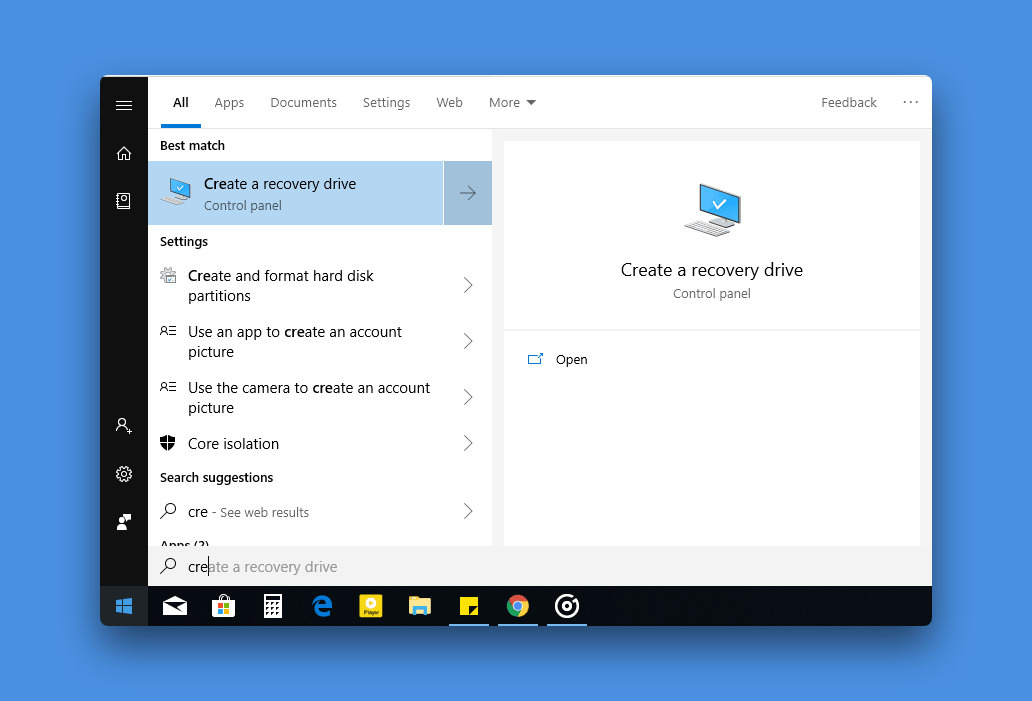
If your computer boots into Windows normally, you can skip to the repair steps below. But if you need an independent recovery environment, Windows includes a built-in tool to create a lightweight recovery drive:
- Click on the Start button and type Create a recovery drive, or press
Windows + R, typerecoverydrive.exe, and press Enter.
- Untick the checkbox that says “Back up system files to the recovery drive” (this speeds up creation significantly and requires less storage space).
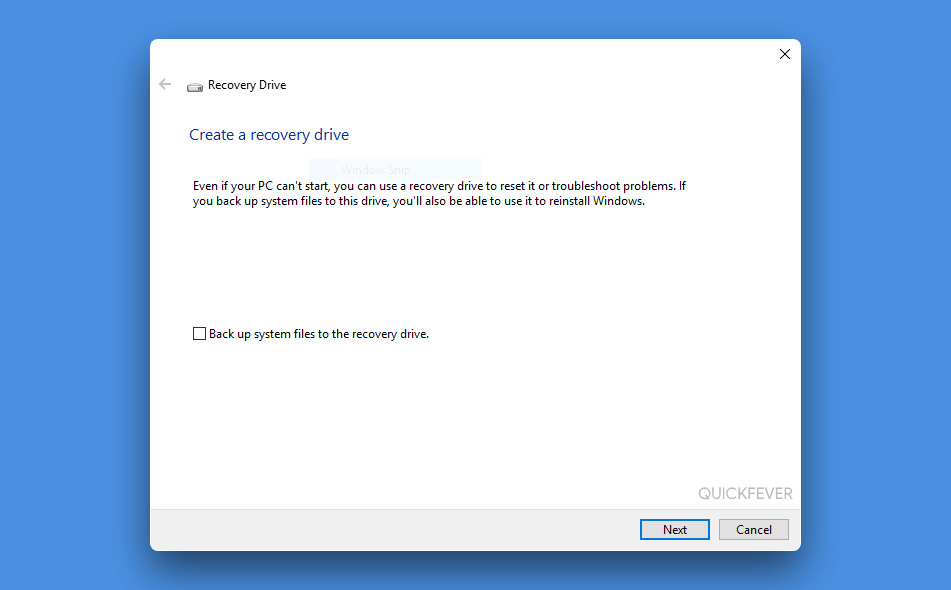
- Connect a spare USB flash drive (at least 1 GB) and click Next to proceed. It will only take a couple of minutes to prepare your recovery USB.
How to Fix an MBR Inaccessible External Hard Drive
Let’s walk through repairing the Master Boot Record and boot sector on your external drive. You have two effective methods depending on whether you run the commands from your working Windows desktop or from Recovery Mode.
Method 1: Repair External Drive MBR Using Bootsect (Fastest)
While the standard bootrec command is designed primarily for the internal boot drive, Microsoft’s official bootsect.exe utility allows you to target specific drive letters and restore their MBR directly.
- Connect your external hard drive via USB.
- Open File Explorer or Disk Management to note your external drive letter (for example, H:).
- Click Start, type cmd, right-click Command Prompt, and select Run as administrator.
- Type the following command (replace
H:with your actual external drive letter) and press Enter:
bootsect /nt60 H: /mbrThis command updates the boot code on volume H: and rewrites the Master Boot Record on the physical disk housing that volume without wiping your files.
Method 2: Repair External Drive Using Recovery Environment
If you prefer using the Windows installation or recovery USB environment:
- Connect both your external hard drive and your recovery USB to the computer.
- Restart the PC and press your boot menu key (F9 on HP, F12 on Dell/Lenovo, ESC, or Del) to boot from the recovery USB.
- Select Repair Your Computer > Troubleshoot > Advanced options > Command Prompt.
- Find your external drive letter by typing
diskpart, thenlist volume, and typingexit. - Switch to your external drive letter by typing
H:(without quotes) and pressing Enter. - Execute the boot repair commands:
bootrec /fixboot
bootrec /fixmbr
Once you see the success message, safely unplug your external drive and reconnect it to verify if the file system is accessible.
Fixing Partition and File System Errors with CHKDSK
If your external hard drive is recognized but you still cannot open folders, or if you receive I/O device errors, run the Windows Check Disk utility to repair bad sectors and reconstruct corrupted file tables.
- Open Command Prompt as Administrator.
- Run the following command (replace
H:with your external drive letter):
chkdsk H: /f /r /x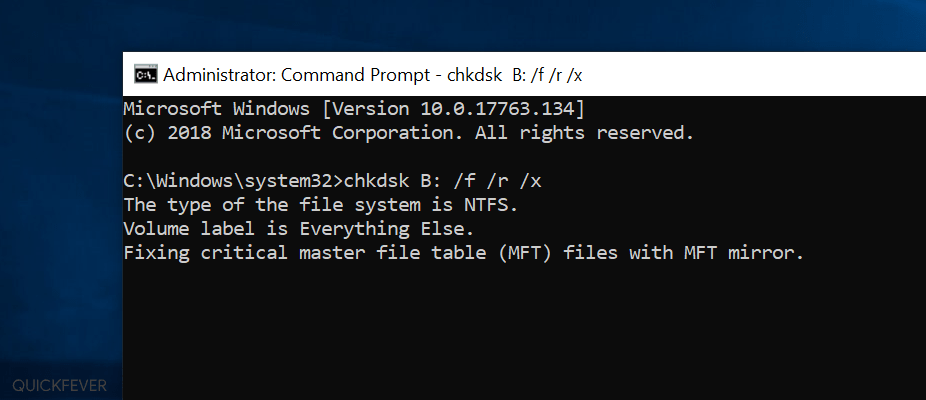
Here is what these parameters do:
/f: Fixes detected errors on the disk./r: Locates bad sectors and recovers readable information./x: Forces the volume to dismount before scanning, ensuring no open handles lock the drive.
Note: If your drive contains several hundred gigabytes or terabytes of files, CHKDSK can take a few hours to thoroughly examine each sector. Let the process finish completely.
Hardware & Connection Troubleshooting Checklist
Before assuming your external drive has experienced permanent hardware failure, verify these common connection pitfalls:
- Try a Direct USB Port: Avoid using unpowered USB hubs or keyboard passthroughs. Plug the external drive directly into the rear USB ports of your motherboard or a high-power USB 3.0 port.
- Test a Different USB Cable: Faulty or bent cables often cause sudden disconnects during write cycles, which is the leading cause of corrupted MBRs.
- Check on Another Computer: Connect the drive to a second PC or laptop to rule out USB controller driver conflicts on your main system.
- Update Disk Drivers: Open Device Manager (
devmgmt.msc), expand Disk drives, right-click your external drive, and select Update driver.
Wrapping It Up
Mechanical external hard drives are sensitive to physical movement and power disruptions while active. Always place your drive on a flat, stable surface, use the “Safely Remove Hardware” tray icon before unplugging, and keep healthy backups. Running bootsect /nt60 H: /mbr followed by chkdsk H: /f /r will resolve the vast majority of MBR and partition table corruption issues.
Warranty & Data Recovery Tip: Major hard drive manufacturers like Seagate and Western Digital offer multi-year warranties. In many cases, Seagate provides Rescue Data Recovery Services included with warranty coverage, or will provide an approval letter allowing you to send the drive to a certified third-party data recovery lab without voiding your replacement warranty.