
This guide is about CubLinux, which was very identical to Chromium OS, and at the same time incredibly lightweight operating system that supports both 32 bit or 64-bit system architecture. The instructions to create persistence USB of other Linux operating system should be similar. Double-check if the Linux distribution you are trying to install supports Live USB persistent or not.
What is a Persistence USB?
A persistence USB stores user data, so when you boot from USB Drive, you can continue from where you left. It is interesting as users have nothing to install on a Hard disk. The second partition in the USB is the EXT4 partition to store user data. All data stays in USB, which turns a portable operating system to another level.
Pros of a Persistence USB
- You don’t have to install anything on a hard disk.
- All changes and installed Apps stay on USB Drive.
- Carry as many as USB thumb drives.
- No Hard Drive? It still works.
Downloads
- A Linux ISO, Ubuntu, Ubuntu-based Distros, Linux Distro
- Rufus and RMPrepUSB (Method 1)
- Unetbootin (Method 2)
Make a Live Persistence USB for Linux (UEFI)
We have divided this guide into two sections, in first, here is how to make a bootable Live USB with an ext4 partition. And the second section is about botting the bootable USB with your computer.
1. Create Bootable USB
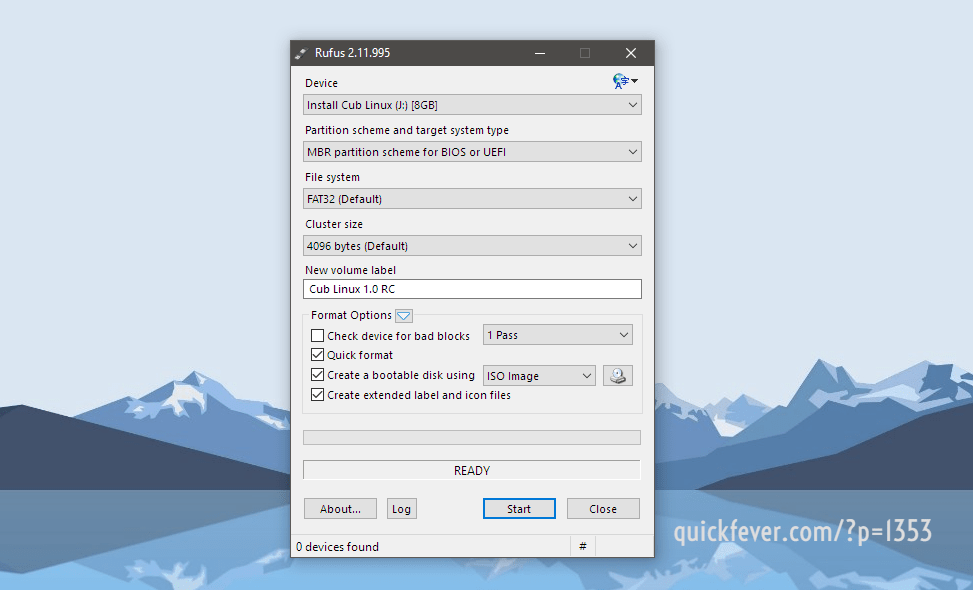
Get Linus ISO and make a bootable USB using the RUFUS tool.
2. EXT4 Partition
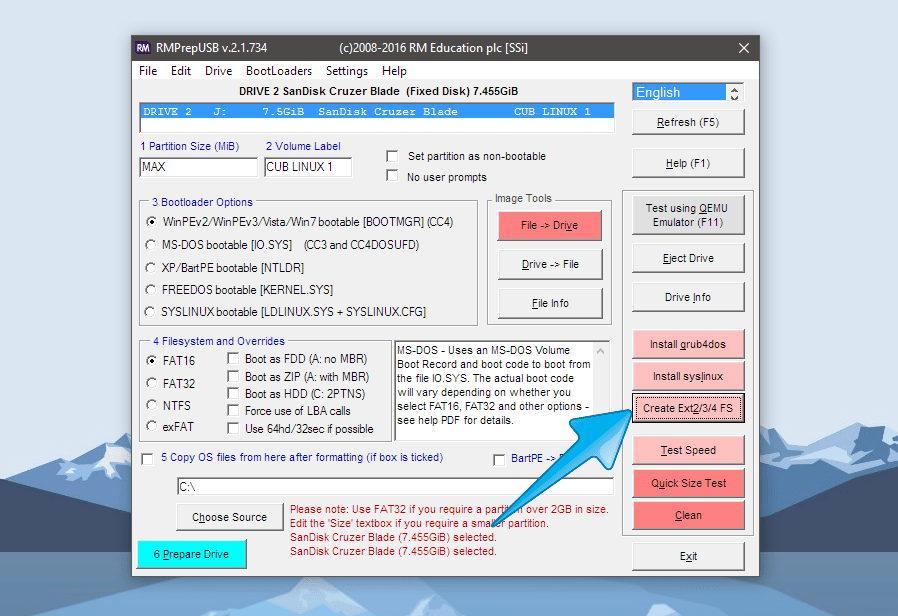
Open RmPrepUSB and click on Create Ext2/3/4. Remember: You’ll be prompted for label name and volume name keep it casper-rw and in Size put “4096” and click ok. It takes a few minutes and after it will prompt again to create a partition for the created casper-rw file, Allow that as well.
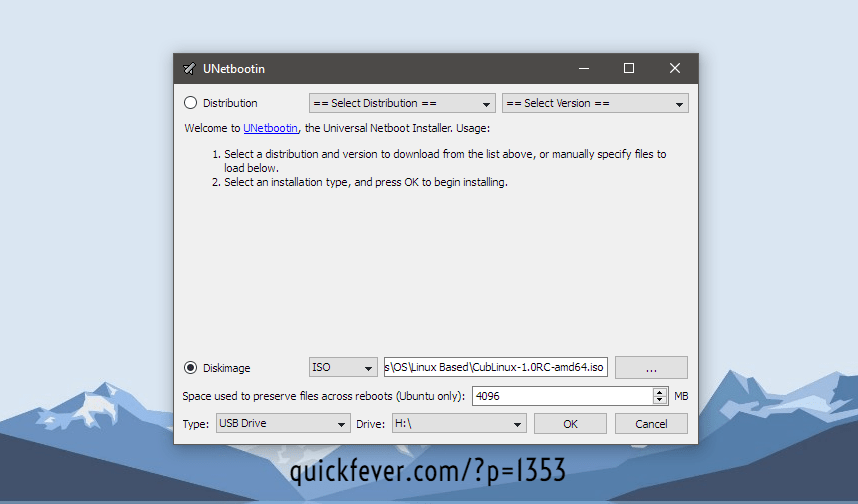
TIP: You can also use UNetboootin to make bootable USB and create a persistence file at once. You need to tick on Diskimage and choose the ISO file and in the preserved field, enter 4096 to make persistence of 4GB.
3. Modify GRUB entry
Now you need to modify the grub.cfg file in order to use persistence in UEFI computers. Access to the USB Drive/boot/grub/grub.cfg and open it with Notepad or Notepad++. Add this line (specific for Cublinux). It will look like this after adding the code.

Open the grub.cfg file with NotePad++, and add the below code. Or you can get this grub It is a zip you just have to extract and replace in the directory. // Please comment if confusion.
“This code is needed to be added == (Skip this if you already have the grub file and replaced).
menuentry "Cub Linux persistent" {

set gfxpayload=keep

linux /casper/vmlinuz.efi persistent boot=casper quiet splash --

initrd /casper/initrd.gz

}
„
We actually added a new menu named ‘CubLinux persistence‘ and added the word persistence just before the boot=… line.
4. Boot.
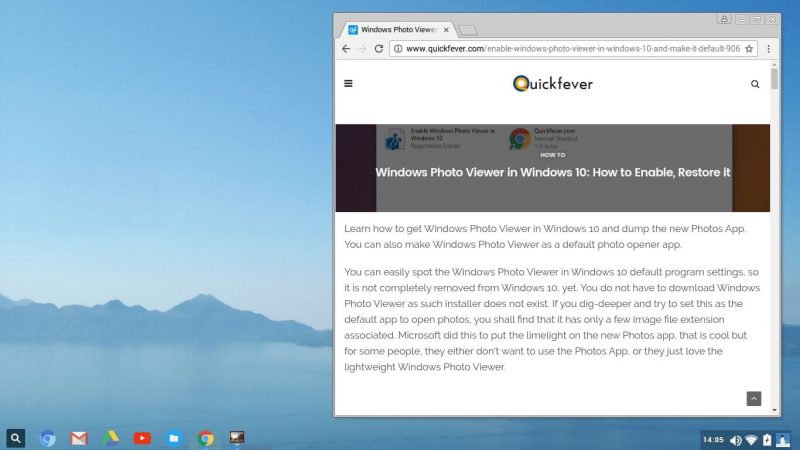
Restart your computer and choose boot device options (it might vary for different computers) and choose the USB you had plugged into your computer. In some cases, you may have to enable USB booting from BIOS settings. Once you figure this out. You will see a new menu saying “Cub Linux persistence” choose this menu using keyboard arrow keys and press enter key. After a few seconds, you’ll be logged into CubLinux, and the very first step you can do is connect to Wi-Fi and Sign-in with your Google account.
As Cublinux is based on Fedora, you can also install .deb files. In reality, you can do more things than a real Chromebook. Despite the fact that Chromebooks are getting android support. But for that, we already have some Android emulators for windows and full Android operating systems for computers as well.
Ending Words
CubLinux is a perfect lightweight operating system with an exact interface like the Chrome OS. Expect it can run on almost any computer, unlike the official Chrome OS that requires a real Chromebook. However, there is some unofficial Chromium OS provider like CloudReady, but their OS is like 5 GB when extracted to make Bootable USB and are no way a fast OS for old computers.


7 comments
…and by the way, a live distro does not use the normal GRUB.
Also, I have a pc with 12 GB of RAM, yet Netbootin does not allow me to go over 9999 MB.
By using RUFUS then RMPrepUSB, there is no room for the ext4 partition. In what order do we need to do things?
I used 32 bit version and the latest Rufus tool. However, there was no grub.cfg file. Can you clear this ?
The 32-bit Cub may have different mechanism. Check inside the “Boot” folder what do you find?, if possible make a zip file and paste the share link here. I’ll look into it.
I followed the instructions and tried both methods. But there is no grub.cfg file in the directory. Even if I download yours and paste there, when I boot up the Cublinux there is no option named “Cub Linux Persistence”. Only normal boot is available.
Did I do something wrong or there has been any kind of update since this article?
Hello, I wrote this article using an 64-bit version of cub Linux, I need to know whether you are using the 32-bit version. Or did you used the latest Rufus tool to create installation media?