
BlissOS is one of the Android OS available for computers, currently offers Android 11 in a stable branch and a few other betas builds go all the way up to Android 12. Here you will learn how to dual boot BlissOS with Windows 11 or even Windows 10. Also we help you with the links to download the operating system.
⭐Have issues booting BlissOS, try the alternative Phoenix OS and it’s dual boot guide.
Download Bliss OS 15 [Android 12]
You need these two things to get started.
1. Head over to download the latest alpha version of bliss OS 15 based on Android 12. And if you prefer stable (Android 9) download that from here.
2. The file you just downloaded should be in .ISO format. Now we need two more things, a USB drive and a tool to create a bootable USB, we recommend Rufus.
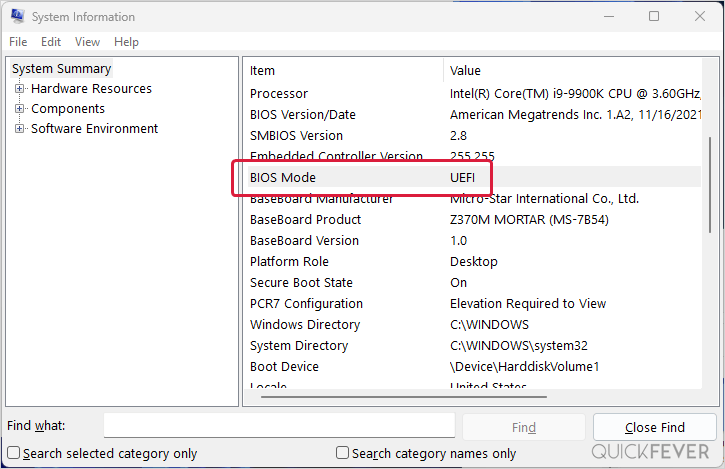
Important: You need to figure out your BIOS mode. If you have a recent computer it will surely have UEFI support and if it’s very old go with the Legacy build of bliss OS. To check that search system information on your computer and look for BIOS mode
Create a Bootable USB of BlissOS
- Open the Rufus on your Windows computer.
- Click on the Browse button and select BlissOS image.
- Click on the Start button, a USB 3.0 takes less than a minute to complete.
- Ths USB drive is now ready to boot BlissOS on your computer.
How to dual boot BlissOS with Windows
Once you have Bootable USB ready, plug it in and boot your computer. The process is different from the motherboard to motherboard. This process includes:
If you need a more descriptive method with steps and images, here you go.
1. Get your Bootable BlissOS USB drive and plug it into a system where you want to dual boot it.
2. Press F9 to access the boot menu when your PC starts.
The boot menu can be accessed using one of the following buttons (F9, DEL, ESC, F12, F2) also boot preference can be altered from BIOS settings.
3. Following the guide requires opting for the Install BlissOS option. But you’re free to test the operating system without having to install it to see how it’ll work. That is also a good method to see which things are working I.e. Bluetooth, wifi and which aren’t.
Install BlissOS on UEFI (dual boot)
EFI is intended for new computers that support UEFI.
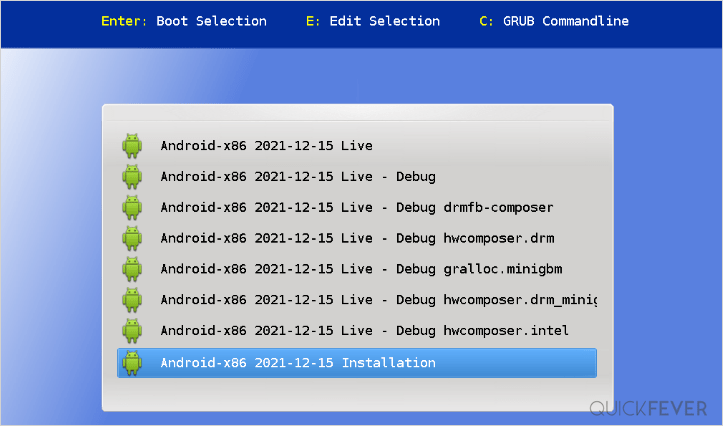
Boot from the USB and select “Android-x86 …Installation“: If you can’t able to get to this screen, Enable USB boot in BIOS and set the preferred boot device to a USB drive.
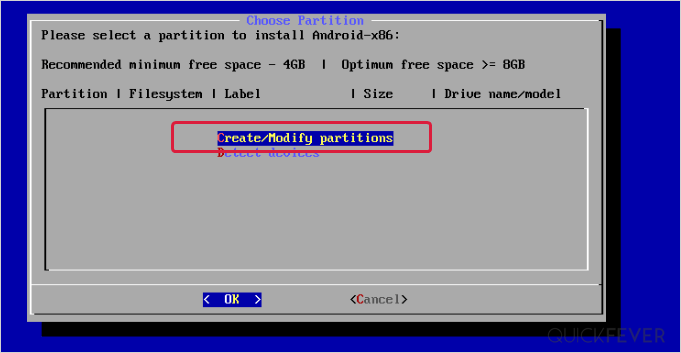
Installer loads and will ask you to select a partition. If a dual boot is your goal, simply select the NTFS drive where Windows is currently installed. As a result, the installer creates an image on the Windows partition.
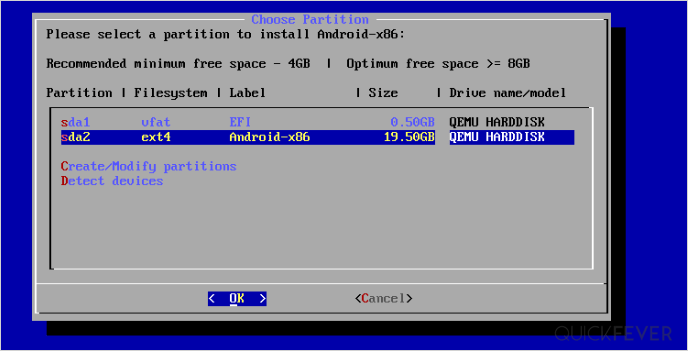
After that select the partition where your Windows is currently installed.
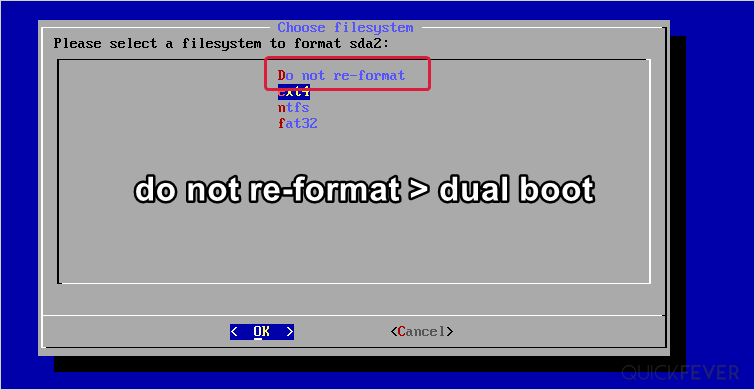
Next, you’ll be asked to select a filesystem, since we don’t want Windows to get removed, choose “Do not re-format” this leaves the Windows 11 or Windows 10 intact.
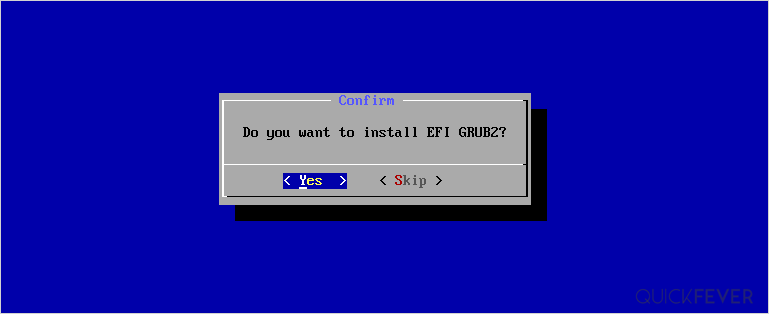
The next screen asks whether you want to install the Grub bootloader. Select Yes and click Ok. This is type is very crucial because a bootloader have all the information of the installed operating system. If you skip this option you will end up having only blissOS and a clean install of Windows 11 will be required in case you want that then.
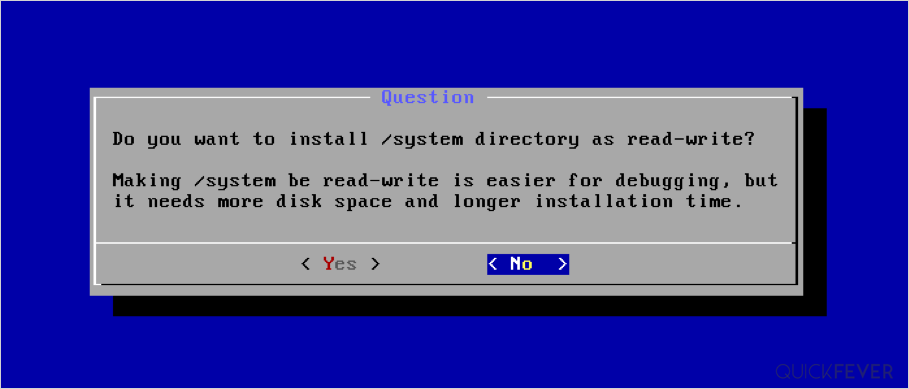
An additional prompt asks for Read-only permission, if you want root permission select, Yes, but we’ll go with No.
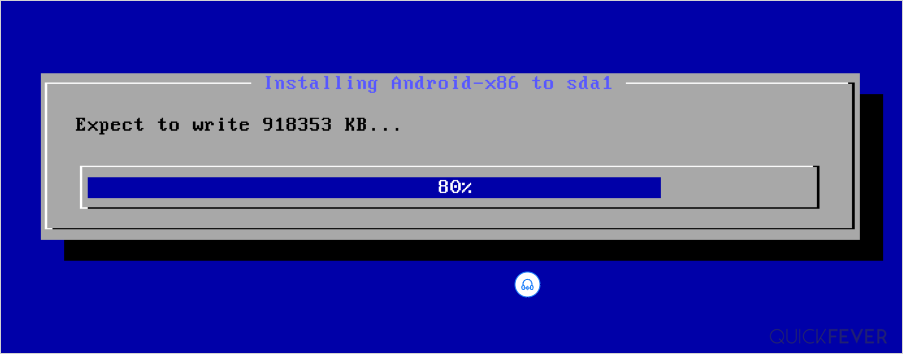
The installer now begins to copy the image to the disk. Depending on the type of Hard Disk it can take somewhere from a minute to 10 minutes.
Hindi next tab you can specify how much space you want to to give for the data image a good range is between 8 to 32 GB for most users.
Install BlissOS on Legacy
Legacy hardware are all the old computers who does not support UEFI interface. A good thumb rule is, if your computer can’t install Windows 11 or Windows 10 then you need legacy version of the operating system. However some motherbaords support both Legacy and UEFI interface.
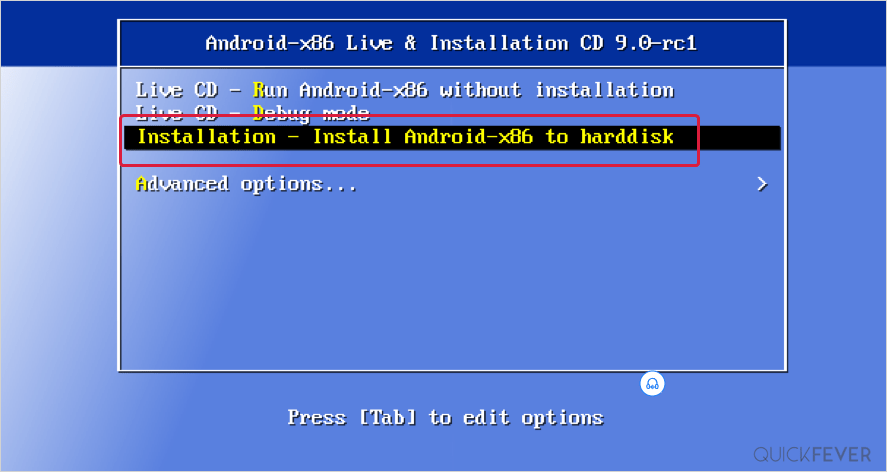
Boot from the USB and select “Installation – Install Android-x86 to harddisk”: If you can’t able to get to this screen, Enable USB boot in BIOS and set the preferred boot device to a USB drive.
Installer loads and will ask you to select a partition. If a dual boot is your goal, simply select the NTFS drive where Windows is currently installed. As a result, the installer creates an image on the Windows partition.
After that select the partition where your Windows is currently installed.
Next, you’ll be asked to select a filesystem, since we don’t want Windows to get removed, choose “Do not re-format” this leaves the Windows 11 or Windows 10 intact.
The next screen asks whether you want to install the Grub bootloader. Select Yes and click Ok. This is type is very crucial because a bootloader have all the information of the installed operating system. If you skip this option you will end up having only blissOS and a clean install of Windows 11 will be required in case you want that then.
An additional prompt asks for Read-only permission, if you want root permission select, Yes, but we’ll go with No.
The installer now begins to copy the image to the disk. Depending on the type of Hard Disk it can take somewhere from a minute to 10 minutes.
Hindi next tab you can specify how much space you want to to give for the data image a good range is between 8 to 32 GB for most users.