Google Docs is an amazing online office suite that offers every tool to take care of all your office needs. It is free and available on any platform as it is a web-based app. It makes collaboration incredibly easy. You can easily track changes others have made. The apps are powerful and easily accessible from any portable device and desktops as well. The app’s interface is neat, polished, and feels complete.
Since nothing is saved on your device, everything is saved on the cloud enabling you to access it from anywhere using any device. You are provided with 15 GB of space to save all your files to the cloud. If you need more, you can always upgrade to a paid subscription. You have many great options like voice-to-text, exporting to many formats, etc.
Google Slides is the Google’s version of PowerPoint. While not as feature rich, it is easy to use. Using Slides, you can make some really good looking, effective presentations easily. You can access these from just about anywhere in the World as long as you are connected to the Internet.
One thing that I recently had to do was insert a PDF file into Slides, and there was no really straightforward way of doing so. However, there’s a workaround which I’m going to share today in this post. So in case you also want to do something similar, read on for the steps to do so.
Since there is no direct way to insert PDFs to Slides directly within the Google Docs, here’s a workable workaround.
Insert a PDF into Google Slides
First, let me give you an idea of what exactly are we going to do here. We need the PDF you want to insert available publicly on the internet. This is essential, use any service you like, be it Google Drive, OneDrive, or any other online service for that matter as long as it serves the purpose. Next, we’ll use this link and embed it into an image we’ll use as a cover. Now when a user clicks on the image, it’ll redirect the user to the PDF file. I know this isn’t the most sophisticated solution, but this is the only one at the time of writing.
Now that you have the basic idea, let’s get started.
How to upload a PDF document to Google Slides
- First, upload the PDF file to an online service. I’ll use Google Drive here as an example.
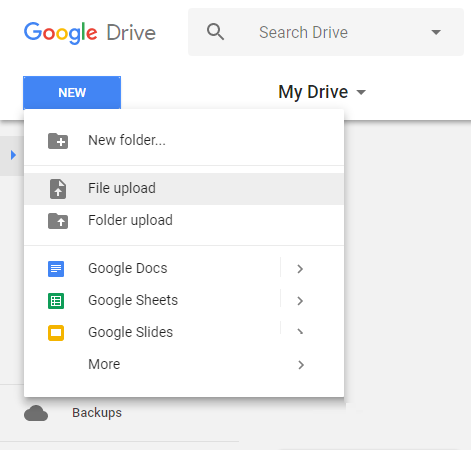
- To do so, just click on New button on the Drive homepage and click on File upload option.
- Now just select the file and it’ll upload.
- What we want to do is, make it publicly available. Just Right-click on the uploaded file and choose Share.
- (optional) In the pop-up, click on Advanced button.
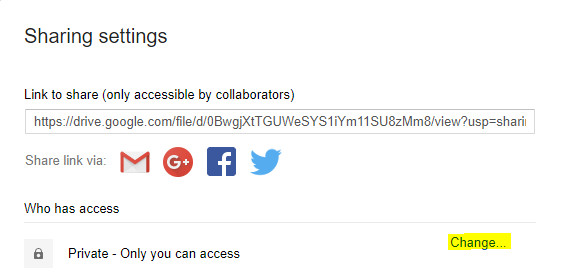
- (optional) Now in the new pop-up, click on change.
- (optional) Now, select any one of the two public options.
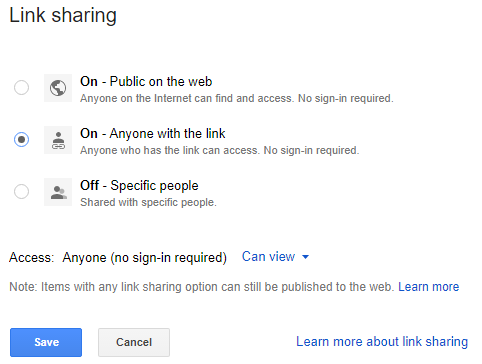
- (optional) Next, just click on Save button and in the previous pop-up, hit Done.
- Right-click on the file and choose to Get shareable link get a shareable link, copy it.

Now you have your PDF ready. - Next, choose a cover image for this PDF. Cover image in the sense that it essentially will embed the link for that PDF file. When clicked on the image, the user will be redirected to the PDF file. The image can be any you want.
- Just open the Slide and hit Insert.
- Now, click on Image.
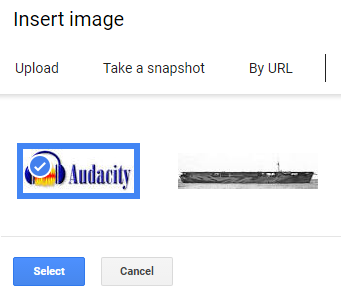
- Now, select that image and click on Select.
- When uploaded, place the image as you want. Best will be to place it all over the slide if you want to make it look like a cover page.
- When done placing the image, click on it to select it.
- Next, click on Insert and select Link. This is where you’ll put that previously copied link.
- This embeds the link on your image.
- Now you are basically done. As long as the PDF file is publicly available via that link, the user(s) will be redirected to the PDF file when the image is clicked upon.
This is one way of linking your PDF file in your Google Slide presentation. This essentially links the image file to your PDF file which is publicly available.
Convert PDF file to Image and insert
If your PDF file is short enough, you can go with this alternate way of doing this as well. In this, we are going to convert the PDF into a set of images. Then, we are going to insert these images into the Slide(s). To do so, follow the steps below.
- Firstly, open the PDF file.
- You can do this whether opening it on your PC and saving the pages or select parts and saving it as screenshots.
- You can also take screenshots in your Chrome browser with the help of this extension- FireShot. This lets you capture all the pages you want to save.
- You can also use online conversion services like pdf2jpg, PDF to Image, or Online Converter.
- I personally liked the Online Converter. It gives you options such as quality presets, image size, color options, DPI setting, and enhancement. To use it, just click on upload and select your file. You can even directly choose your file from Google Drive and One Drive.
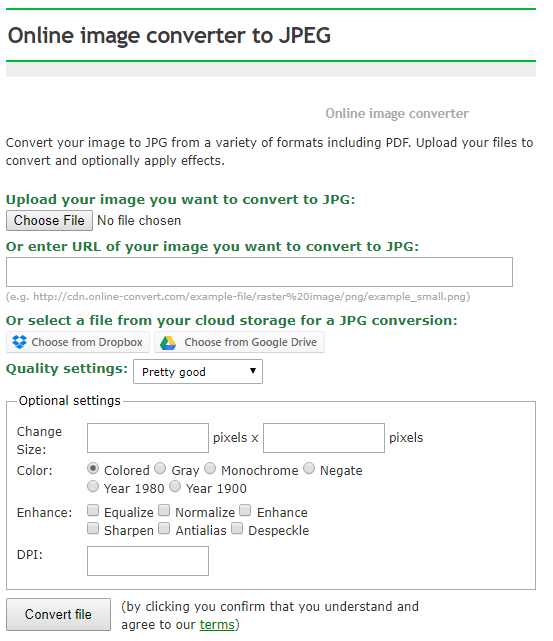
- Now, select the most suitable settings from the Optional Settings section.
- Click on Convert File and your file will be uploaded, and converted.
- Now you can download the images in a zip file.
- You just have to insert these images into you Slides as we did above for the Cover image.
I personally used Online Converter like Canva as it can process long PDFs with ease and provides many options to have control on the output file(s). You can go with this option if the PDF is not too long as this options looks good and doesn’t take you out from the slideshow. You can insert PDF to PowerPoint so that you’ll not miss important details like documents or graphs of your presentation.
No doubt these are not the most user-friendly solutions but are only available. Still, gets the job done if you absolutely need to insert a PDF file into a Slide. However, if the PDF is opened, it’ll send you out of the slideshow using the first method.
Have any confusion or a tip, shoot them up in the comments section below!