If you installed ChromeOS Flex on your laptop or desktop to test it out, you might have quickly hit its limitations: no Google Play Store, no Android app support, and restricted compatibility with specialized desktop software. But when you decide to switch back to Windows, you encounter a frustrating roadblock: Google provides no “uninstall” button for ChromeOS Flex.
Because ChromeOS Flex takes over your entire drive and creates a complex 12-partition Linux layout, you cannot simply remove it from inside system settings. To uninstall ChromeOS Flex completely, you must perform a clean installation of another operating system—such as Windows 11, Windows 10, or Linux—and completely wipe those partitions.
In this guide, you will learn how to completely delete ChromeOS Flex and reinstall Windows 11 or 10. Best of all, if ChromeOS Flex is your only working computer, we’ll show you a clever built-in workaround to create a bootable Windows installer USB directly inside ChromeOS Flex without needing a second PC or Rufus.
⚡ Quick Summary: What You Need
- A USB flash drive with at least 8 GB to 16 GB of storage (all data on this drive will be erased).
- An official Windows 11 ISO or Windows 10 ISO downloaded from Microsoft.
- The free Chromebook Recovery Utility extension from the Chrome Web Store.
- Backup Reminder: Reinstalling Windows will format your internal drive. Back up any personal files from your ChromeOS Flex Downloads folder to Google Drive or an external drive before proceeding.
Phase 1: Create a Bootable Windows USB Directly on ChromeOS Flex
Popular USB burning utilities like Rufus, Ventoy, and the Microsoft Media Creation Tool do not run natively on ChromeOS. Fortunately, you can trick Google’s official recovery extension into flashing a Windows installation image by using a simple file extension rename.
Step 1: Install the Chromebook Recovery Utility
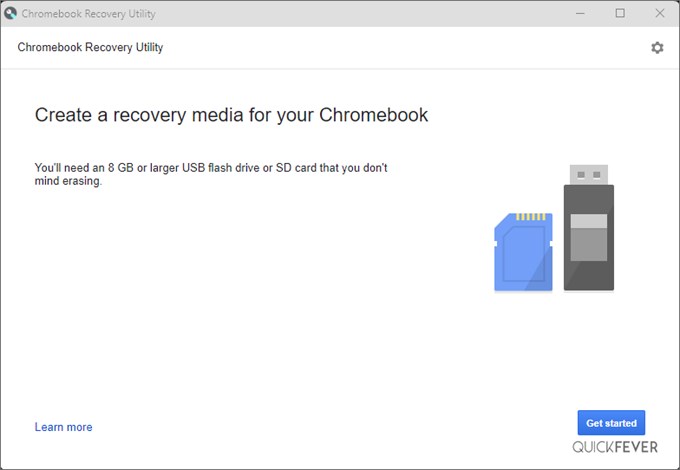
Open the Chrome browser on your ChromeOS Flex system and install the official Chromebook Recovery Utility extension from the Chrome Web Store.
Step 2: Download Windows ISO & Rename from .ISO to .BIN
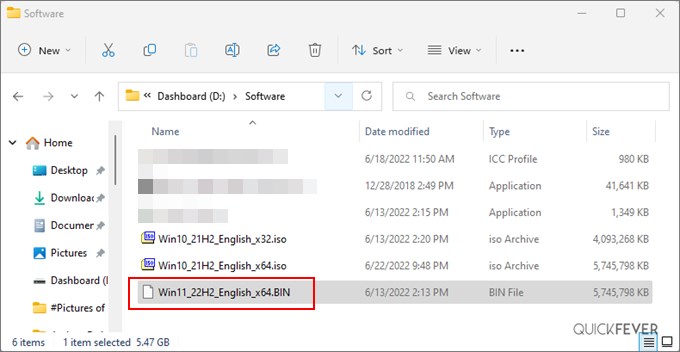
Download the official 64-bit Windows 11 or Windows 10 ISO file directly from Microsoft. Once the download finishes, open the ChromeOS Files app:
- Locate your downloaded Windows ISO file in the Downloads folder.
- Right-click the file and select Rename (or press
Ctrl + Enter). - Change the file extension from
.isoto.bin(for example, changeWin11_English_x64.isotoWin11_English_x64.bin).
Why this works: The Chromebook Recovery Utility is hardcoded to recognize raw .bin recovery images. By changing the extension, the tool accepts the Windows disk image and writes it directly to your USB drive block-by-block.
Step 3: Select “Use Local Image” in Recovery Utility
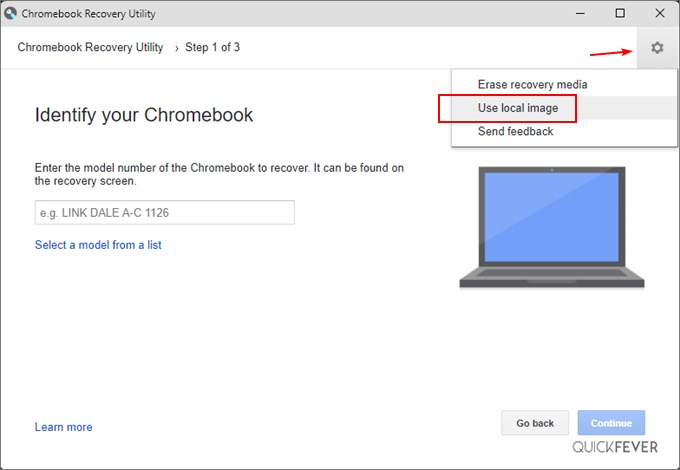
Launch the Chromebook Recovery Utility from your Chrome extension toolbar (the puzzle icon). Instead of clicking the blue “Get started” button, click the Gear icon (Settings) located in the top-right corner of the window and select Use local image.
Step 4: Choose the Renamed .BIN File
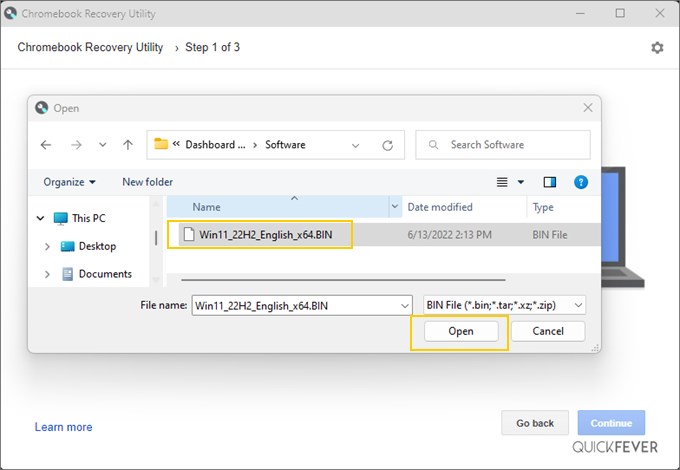
Browse to your Downloads folder, select the renamed Windows .bin file, and click Open.
Step 5: Select Your USB Drive and Flash
Plug your USB flash drive into your computer. In the dropdown menu, select your USB drive model. Double-check that you selected the correct drive, then click Continue and select Create now.
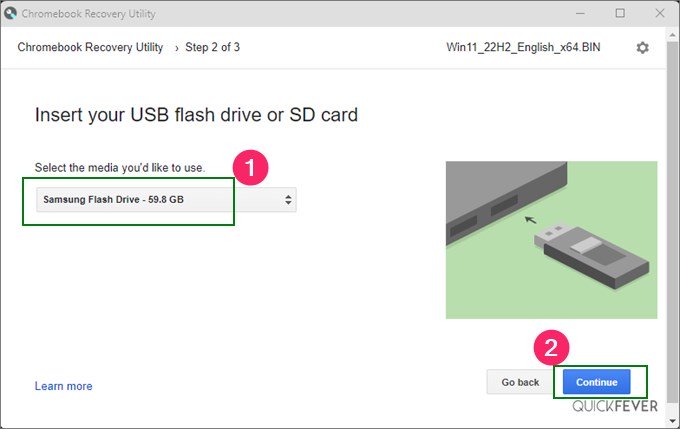
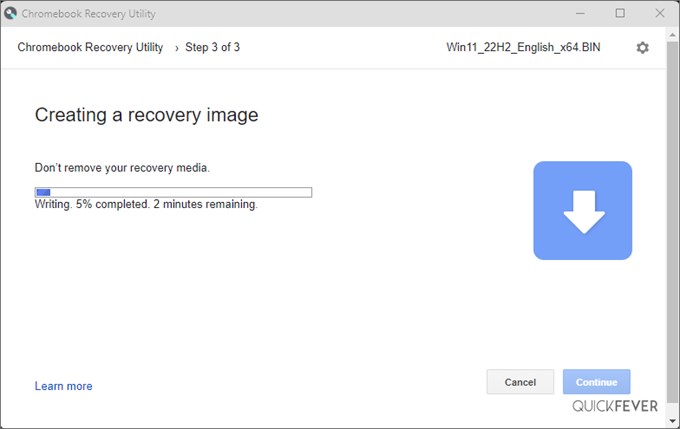
The utility will write the image and verify the files. This process typically takes between 5 to 10 minutes depending on your USB drive’s write speed.
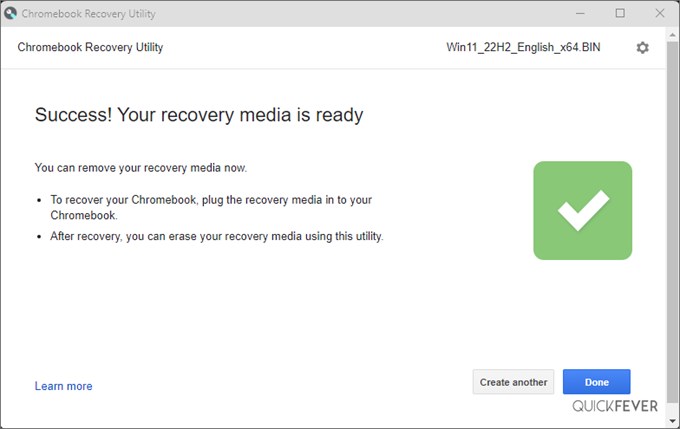
When you see the green checkmark stating “Success! Your recovery media is ready,” click Done. Your bootable Windows installer USB is ready!
Phase 2: Boot Your Computer from the USB Drive
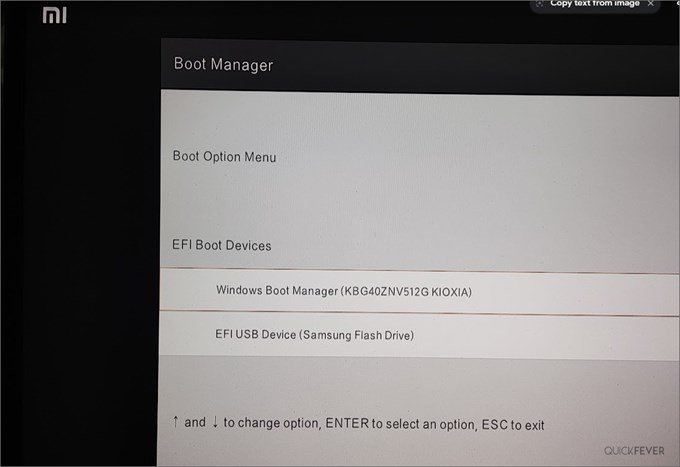
Now shut down your ChromeOS Flex computer completely. Leave the bootable USB plugged in, turn on the computer, and immediately begin repeatedly tapping your computer’s Boot Menu Key:
| Computer Brand | Boot Menu Key | BIOS / UEFI Setup Key |
|---|---|---|
| HP | F9 or Esc | F10 |
| Dell | F12 | F2 |
| Lenovo | F12 or Fn + F12 (or Novo button) | F1 or F2 |
| Asus | F8 or Esc | F2 or Del |
| Acer | F12 | F2 or Del |
| MSI | F11 | Del |
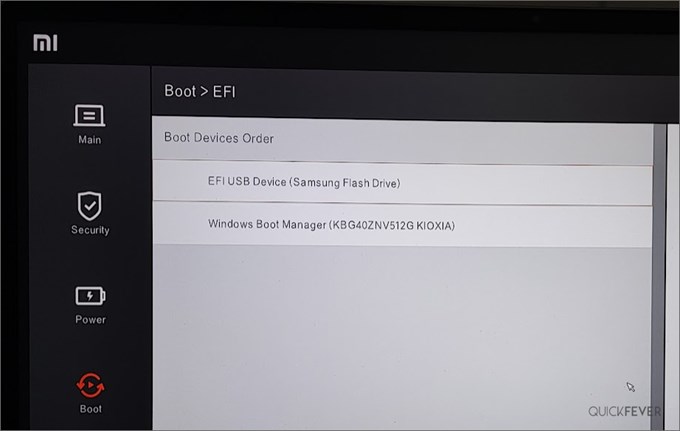
From the Boot Menu, select your USB flash drive (often labeled with your USB brand or UEFI: USB Drive) and press Enter.
Phase 3: Wiping ChromeOS Flex Partitions (The Crucial Step!)
This is where most users get stuck. When you boot the Windows installer and reach the screen titled “Where do you want to install Windows?”, you will see up to 12 different partitions labeled Drive 0 Partition 1 through Drive 0 Partition 12. If you try to click Next or format a partition, Windows will display an error saying it cannot be installed on this drive.
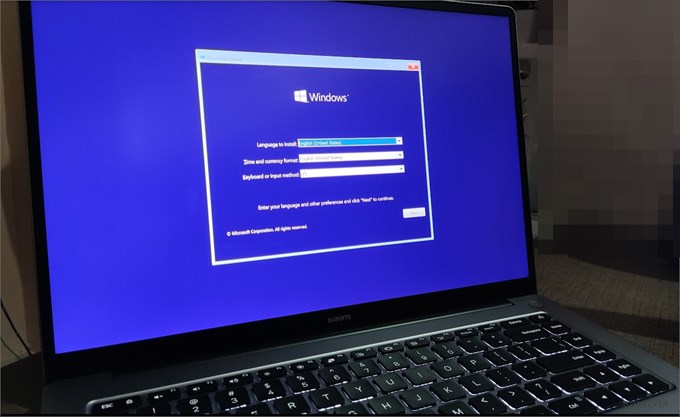
To wipe ChromeOS Flex completely, use one of the two methods below:
Method A: Delete All Partitions via Windows Setup GUI (Easiest)
- Select Drive 0 Partition 1 and click the Delete button at the bottom.
- Repeat this step for every single partition on Drive 0 (Partition 2, Partition 3, etc.).
- Once all partitions are deleted, the entire drive will merge into a single line labeled: Drive 0 Unallocated Space.
- Select Drive 0 Unallocated Space and click Next. Windows will automatically partition and format the drive cleanly.
Method B: Wipe the Disk with Diskpart (If You Encounter Partition Errors)
If the Windows installer refuses to delete partitions or throws a GPT error, use the built-in diskpart utility to perform a clean wipe:
- On the Windows Setup screen, press Shift + F10 (or Shift + Fn + F10 on some laptops) to open the Command Prompt.
- Type the following commands one by one, pressing
Enterafter each:
diskpart
list disk
select disk 0
clean
convert gpt
exit
exit
Note: Double-check the disk number using list disk. Make sure disk 0 matches your internal SSD/HDD size and not your USB flash drive!
After closing the Command Prompt, click the Refresh button on the Windows setup screen. Your drive will now appear as Drive 0 Unallocated Space. Select it, click Next, and let Windows complete its installation. ChromeOS Flex is now 100% removed!
Alternative OS Options: What If Windows 11 Is Too Heavy?
If you initially installed ChromeOS Flex because your laptop was older or struggled with Windows, reinstalling standard Windows 11 might slow your device down again. If your hardware lacks TPM 2.0 or has less than 8 GB of RAM, consider these lightweight alternatives from our PC operating systems directory:
- FydeOS: If you liked the speed of ChromeOS but desperately missed Android apps and the Google Play Store, FydeOS is a ChromiumOS-based alternative that supports Android apps and Linux containers out of the box.
- Linux Mint or Zorin OS Lite: Ultra-fast, lightweight Linux operating systems that look and feel just like Windows, with built-in app stores, LibreOffice, and full browser support.
- Windows 11 Without TPM / System Requirements: If you really want Windows 11 on unsupported hardware, follow our bypass guide to install Windows 11 smoothly without hardware restrictions.
Frequently Asked Questions (FAQ)
Q1. How do I format and restore my USB drive after using Chromebook Recovery Utility?
Answer: The Chromebook Recovery Utility splits USB drives into multiple partitions that Windows File Explorer cannot format directly. To restore your USB to full capacity in Windows, open Disk Management, right-click and delete all volumes on the USB drive, and create a New Simple Volume. Alternatively, launch Rufus or the Chromebook Recovery Utility and click Gear icon > Erase recovery media.
Q2. Why didn’t ChromeOS Flex support Google Play Store or Android apps?
Answer: ChromeOS Flex is built by Google specifically for enterprise and educational fleets on non-Chromebook hardware. Because certifying Android hardware abstraction layers across thousands of PC chipsets is extremely complex, Google deliberately excluded Android app runtime and the Play Store from Flex. Only official Chromebooks and forks like FydeOS include Android app support.
Q3. Can I dual-boot ChromeOS Flex alongside Windows 11?
Answer: No. Official ChromeOS Flex does not support dual-booting. The installer automatically reformats the entire internal drive. If you want to use ChromeOS without modifying your Windows installation, you can run ChromeOS Flex directly in “Live Mode” from a USB flash drive without installing it, or install a dual-boot compatible fork like Brunch or FydeOS.
Q4. “ChromeOS Flex” still appears in my BIOS boot menu after installing Windows. How do I remove it?
Answer: This is a harmless orphaned UEFI NVRAM entry. In Windows, you can remove it by opening Command Prompt as Administrator and running: bcdedit /enum firmware to find the ChromeOS entry’s identifier, followed by bcdedit /delete {identifier}. Alternatively, use free GUI tools like EasyUEFI to delete stale bootloader entries.