


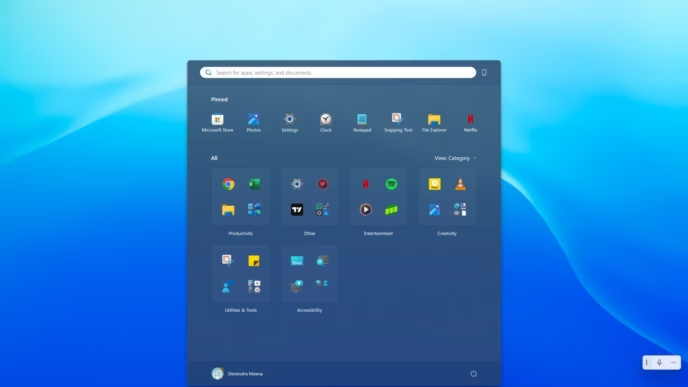
Bliss OS is an open-source Android operating system designed to run on standard x86 computers, laptops, and tablets. Unlike mobile-only operating systems, Bliss OS provides a desktop-friendly experience with an optional taskbar, multi-window support to run apps side by side, and integrated keyboard and mouse navigation.
Whether you want to play Android games, run mobile utility apps, or revive an older laptop, Bliss OS bridges the gap between phone software and PC hardware. If you are comparing Android distributions for your machine, you can also check our roundup of the best Android OS for PC.

People who care less about heavily modified Android skins and want an uncluttered system should give this a spin. Below, you will find download sources and a step-by-step walkthrough to dual boot Bliss OS alongside Windows 11 or Windows 10.
Download Bliss OS for PC
Bliss OS releases are split across multiple Android versions depending on your hardware generation. You can download ISO disk images directly from the official project repositories:
| Version | Android Base | Download Source |
|---|---|---|
| Bliss OS 16 | Android 13 (Tiramisu) | SourceForge (GApps & FOSS) |
| Bliss OS 15 | Android 12 (Snow Cone) | SourceForge Archive |
| Bliss OS 14 | Android 11 (Red Velvet Cake) | SourceForge Archive |
| Official Portal | Documentation & Source | blissos.org / docs.blissos.org |
Which build should you choose?
- GApps Variant: Includes Google Play Services and the Play Store pre-installed, recommended for most daily users.
- FOSS Variant: Completely open source without proprietary Google binaries, featuring Aurora Store and microG.
- Surface Builds: Built with specialized Linux-Surface kernel patches for touchscreens, cameras, and battery meters on Microsoft Surface devices.
Check Your BIOS Mode: UEFI vs Legacy
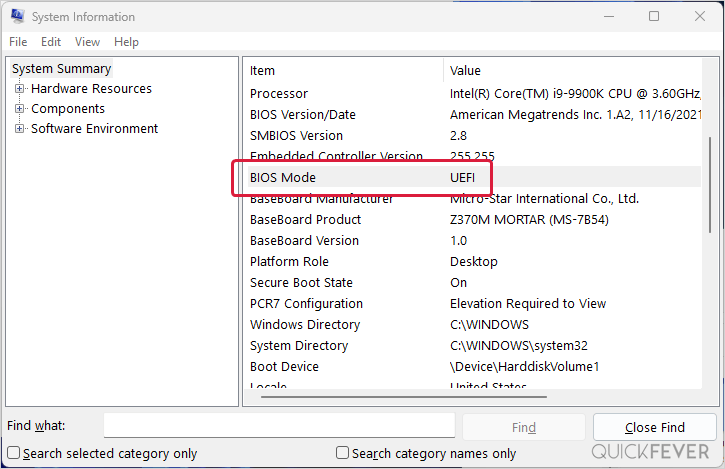
Before creating installation media, verify whether your computer runs in UEFI or Legacy BIOS mode. Modern PCs manufactured in the last decade boot using UEFI by default, while older systems rely on Legacy MBR.
To check on Windows, press Win + R, type msinfo32, and press Enter. Look for the BIOS Mode line in the System Summary window:
Required BIOS adjustments before booting:
- Disable Secure Boot: Because Bliss OS uses unsigned kernels and custom GRUB modules, Secure Boot will prevent it from loading. Enter your BIOS setup and turn Secure Boot off.
- Set SATA Controller to AHCI: Ensure storage access is set to AHCI rather than Intel RST or RAID mode.
Create a Bootable USB with Rufus
You can quickly make a bootable USB using a fast flash drive with at least 8 GB capacity:
- Download and open Rufus on your Windows PC.
- Insert your USB drive and select it under the Device dropdown.
- Click Select and pick your downloaded Bliss OS ISO file.
- Set Partition scheme to GPT for UEFI systems (or MBR for older Legacy BIOS machines).
- Click Start. If prompted, select ISO mode (recommended) and confirm to begin writing the image.
How to Dual Boot Bliss OS with Windows
Plug your bootable USB into your target computer and restart. Press your motherboard boot menu key (commonly F9, F12, Del, or Esc) immediately as the computer powers on.
Depending on your firmware, you will see either the UEFI bootloader or the Legacy splash screen:
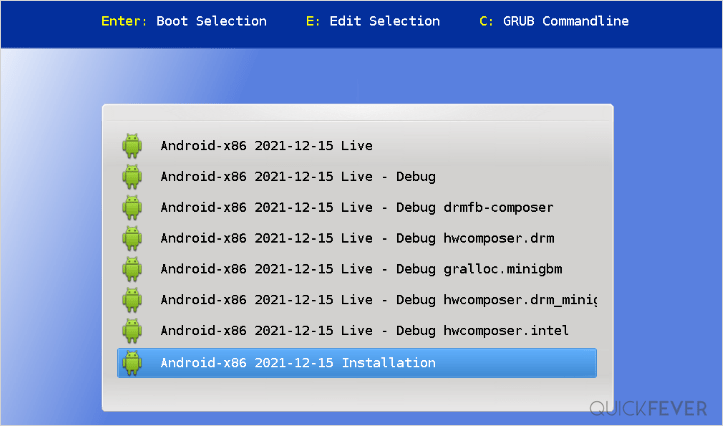
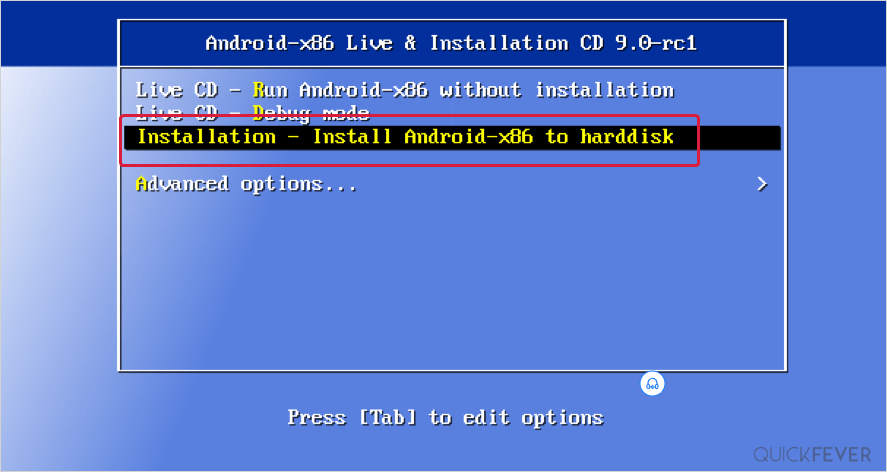
Testing first: You can choose the live mode option to test hardware recognition (Wi-Fi, Bluetooth, touch input, and sound) before writing anything to disk. When you are ready to install, follow these steps:
- Start Installer: Select Installation – Install Android-x86 to harddisk from the boot menu.
- Select Target Partition: Pick the disk drive or partition where you wish to place Bliss OS. If you are sharing a drive with Windows, select your NTFS partition. The installer will create a container image directly on the drive without disturbing Windows files.
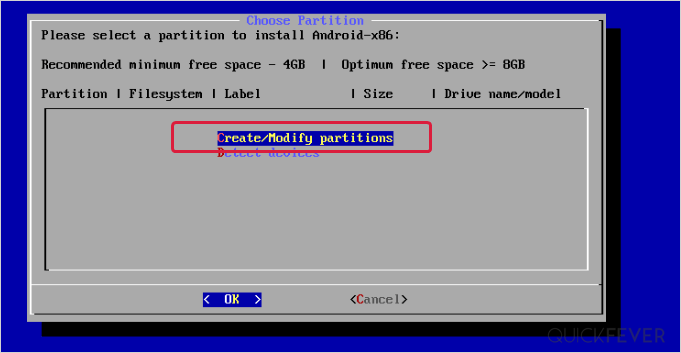
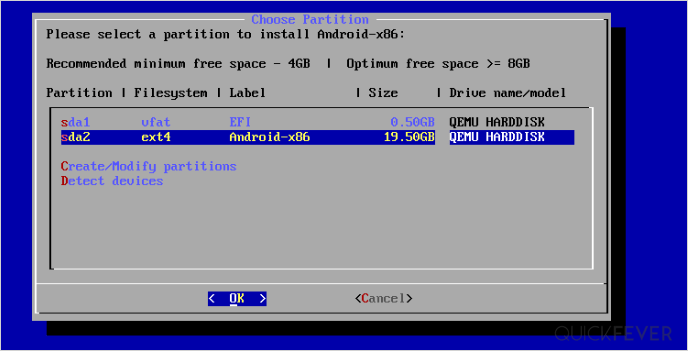
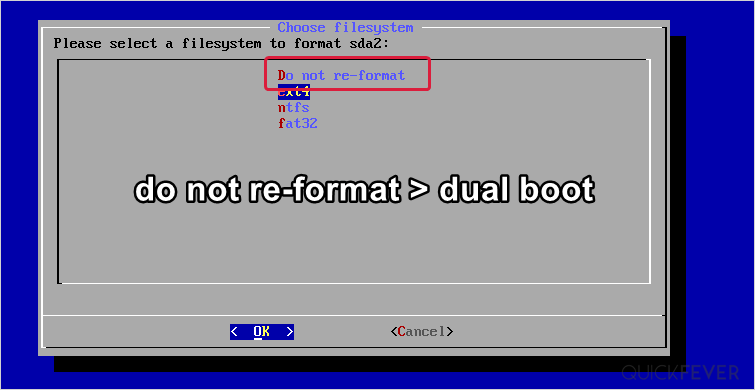
- Do Not Format the Drive: When asked to format, select Do not re-format. Formatting will erase your drive and delete Windows, so keep the current filesystem intact.
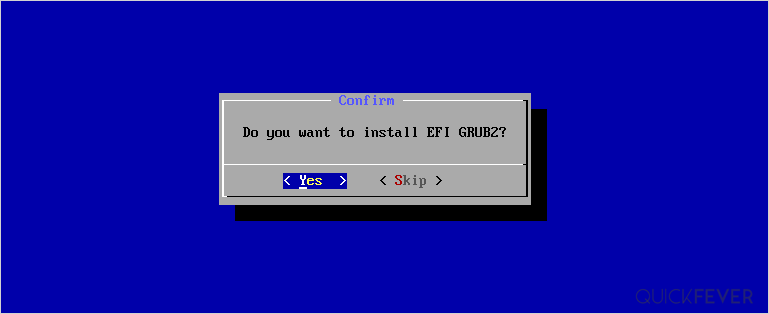
- Install GRUB Bootloader: Select Yes when prompted to install the GRUB bootloader. GRUB detects your existing Windows installation and builds a startup menu that lets you pick between Bliss OS and Windows each time your PC powers on. Skipping this step may leave you needing a clean install of Windows to repair your boot records.
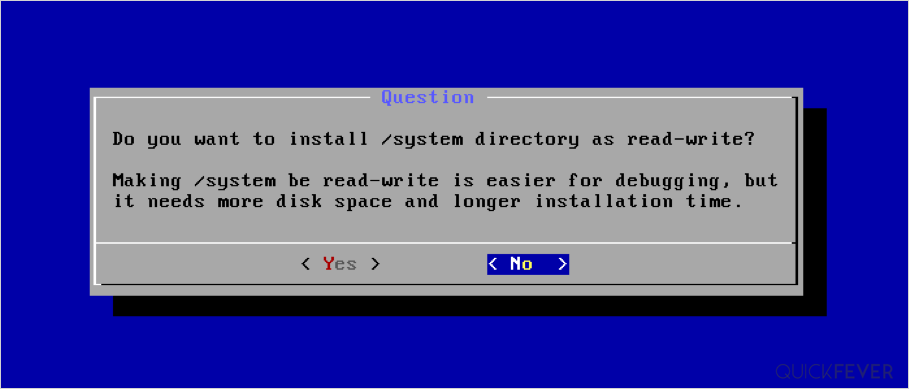
- System Directory Permissions: The installer asks if you want to install
/systemwith read-write permissions. If you plan to customize root files or test custom modules, select Yes; otherwise, select No for added stability.
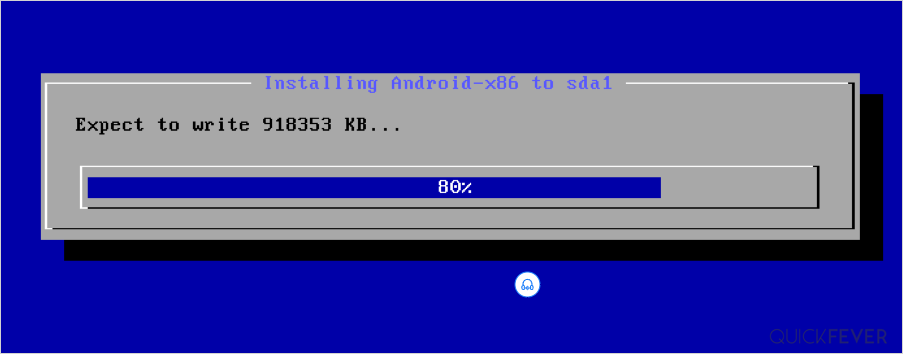
- Wait for File Copy: The installer unpacks system components to your drive. On an SSD, this process finishes in under two minutes.
- Allocate Data Storage: In the next step, specify how much storage space to dedicate to Android user data (
data.img). A good allocation is between 16 GB and 32 GB for downloading apps and caching media smoothly. - Finish and Reboot: Remove your USB flash drive and reboot your machine. Your PC will present the GRUB boot menu displaying entries for Bliss OS and Windows.
Troubleshooting Common Issues
If you encounter difficulties during or after setup, check these quick fixes:
- Black Screen on First Boot: Some discrete graphics cards (such as NVIDIA GeForce chips) struggle with generic Android display drivers. Try booting using Vulkan Mode or nomodeset from the GRUB boot options.
- Wi-Fi or Bluetooth Not Recognized: Certain Broadcom and Realtek wireless chips lack Linux kernel modules in older builds. If wireless connectivity fails, test Bliss OS 16 or try a USB Wi-Fi dongle.
- Alternative Android Options: If your laptop hardware does not play nicely with Bliss OS, consider FydeOS for native Android app integration on Chromium OS, or run Android inside virtual machine software without modifying hard drive partitions.


Tried it, I found it buggy as the desktop mode duplicated the taskbar, had to change mode. Very few games would work on it. Though it was a bit pointless really. Used the android 9 variant.
Easy methods to declare permissions for Android M units.